Securing a Google account is paramount for users looking to fully exploit Google’s vast array of tools and services, as it provides streamlined access to a cohesive suite of functionalities, ensuring efficient management across various platforms.
Leverage the Google Cloud Platform to access state-of-the-art cloud computing solutions, offering a secure and scalable environment for your projects. Dive into Google Search Console to analyze and enhance your website’s visibility, while Google Analytics provides rich insights into user interactions and traffic patterns, empowering you to optimise your online presence for maximum engagement and conversion. Harness the power of Google Ads to craft targeted advertising campaigns, driving traffic and bolstering sales.
Setting up a server via Google Cloud Console becomes a breeze with Alma Linux as your operating system. This open-source enterprise-level OS ensures stability and reliability, drawing from the strengths of its RHEL lineage.
Pair it with CyberPanel, an intuitive server management panel built on OpenLiteSpeed, for a user-friendly experience without sacrificing performance. Enjoy features such as one-click SSL, auto-backups and an in-built firewall, all contributing to a robust and secure server environment.
Together, these tools and resources culminate in a Google account being an indispensable asset for users striving for digital excellence, providing an all-encompassing solution for efficient management and optimization of your online endeavors.
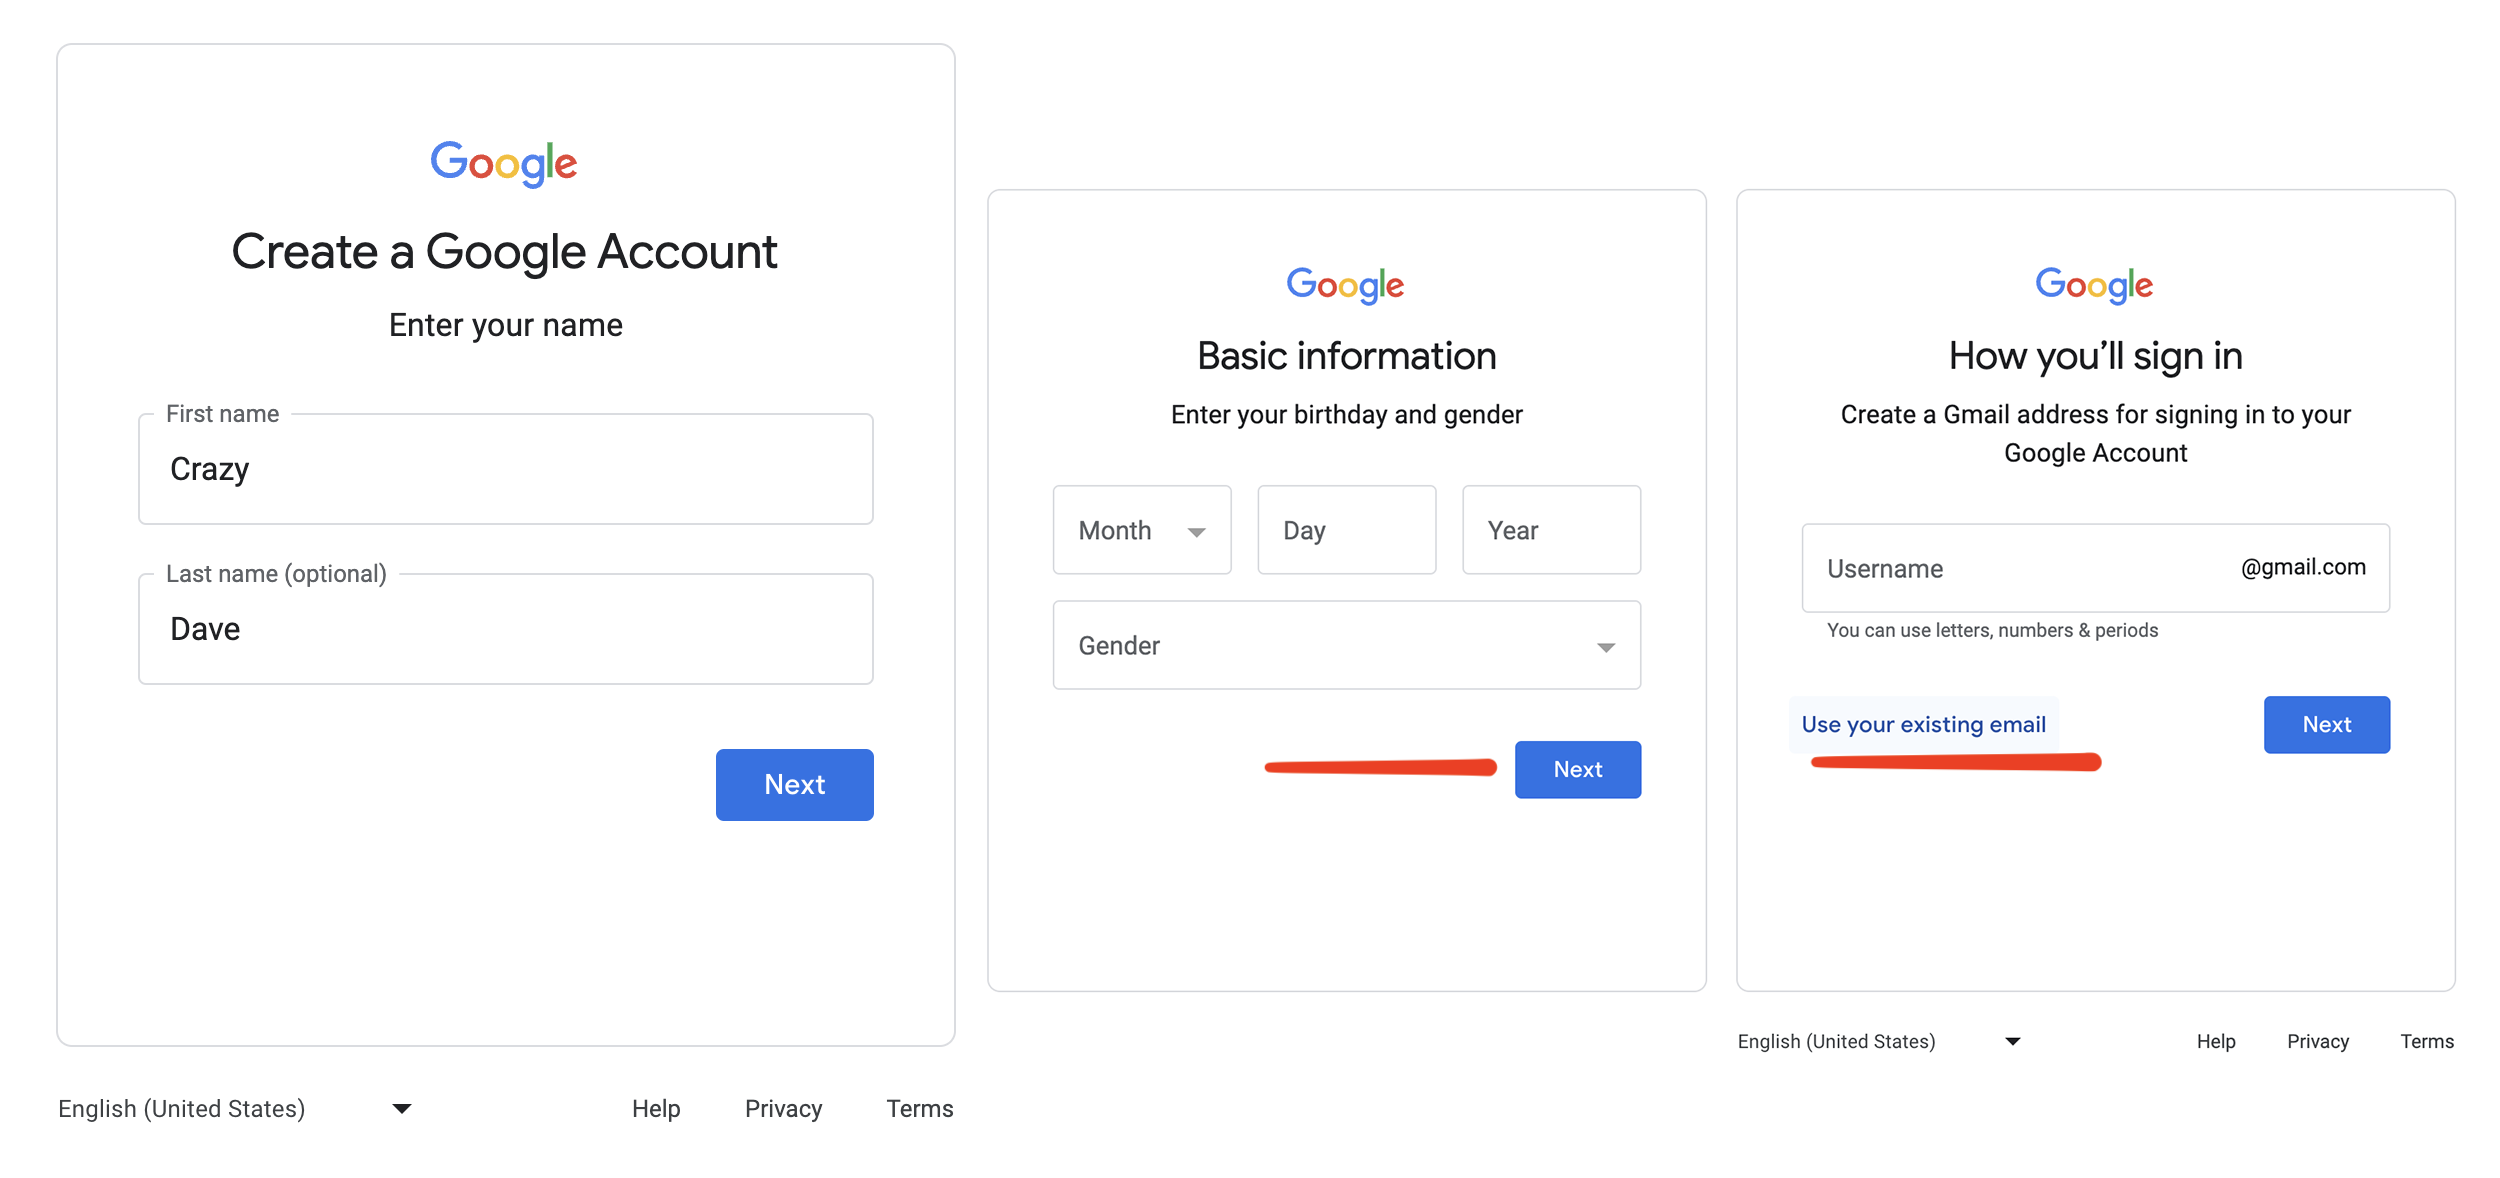
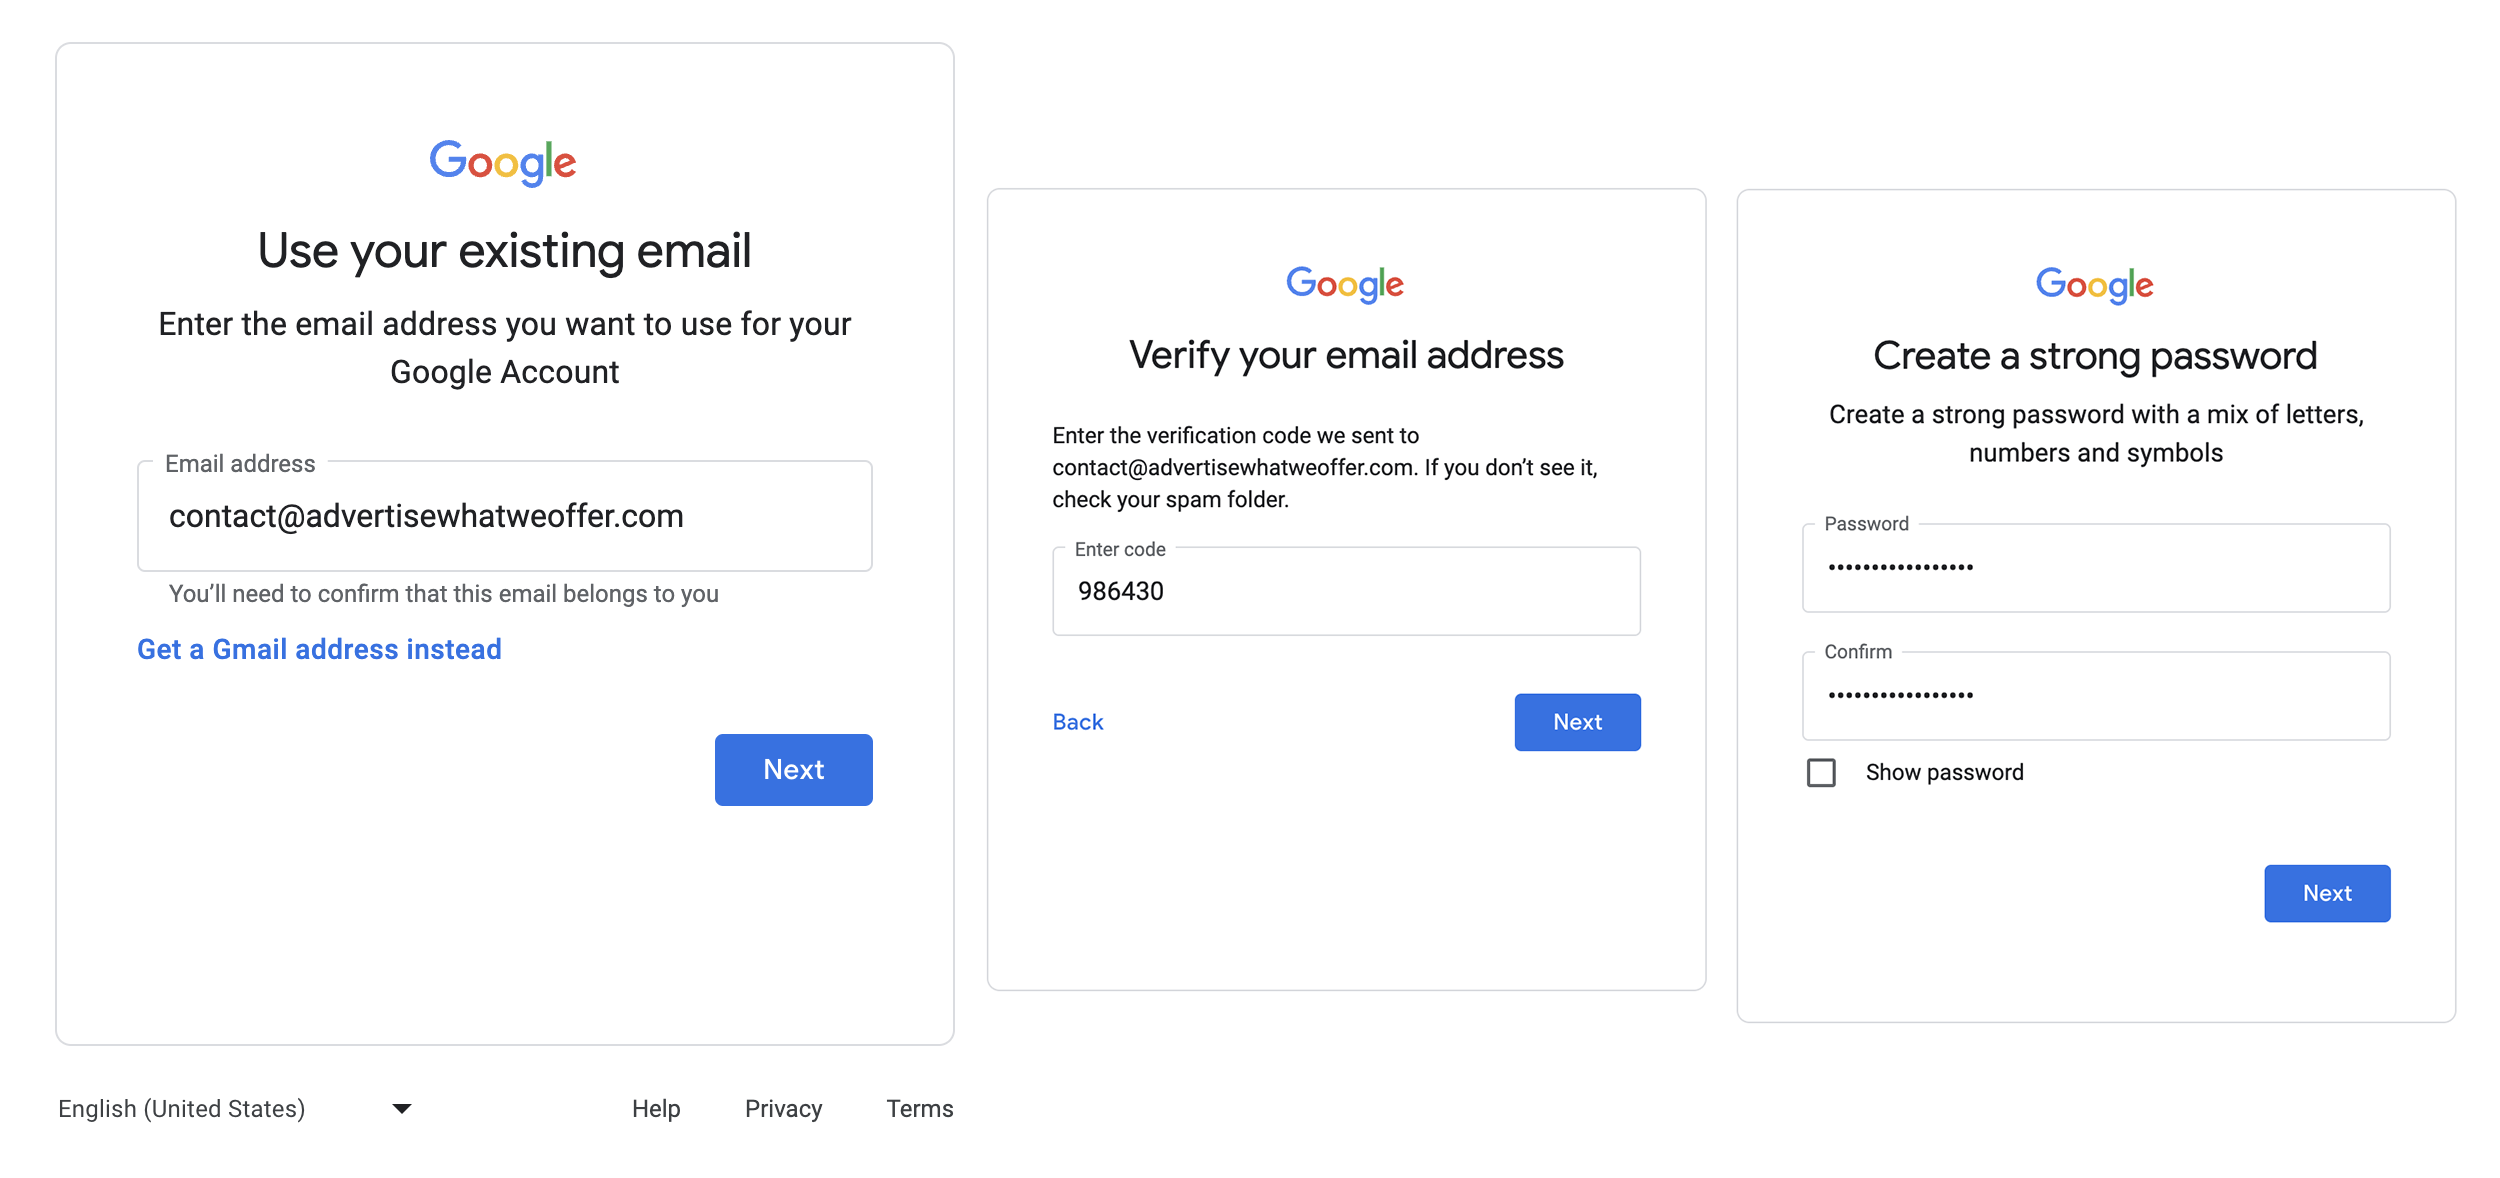
- If you already have a Google Account that you want to use go ahead and skip this step. It is imperative to get a Google Account in order to manage all your related services. Before proceeding make sure the Email Routing is working properly. You'll also need a phone number to confirm your account with Google. Pass all the Google Setup prompts and finish creating your account.
- Connect to your Google Account.
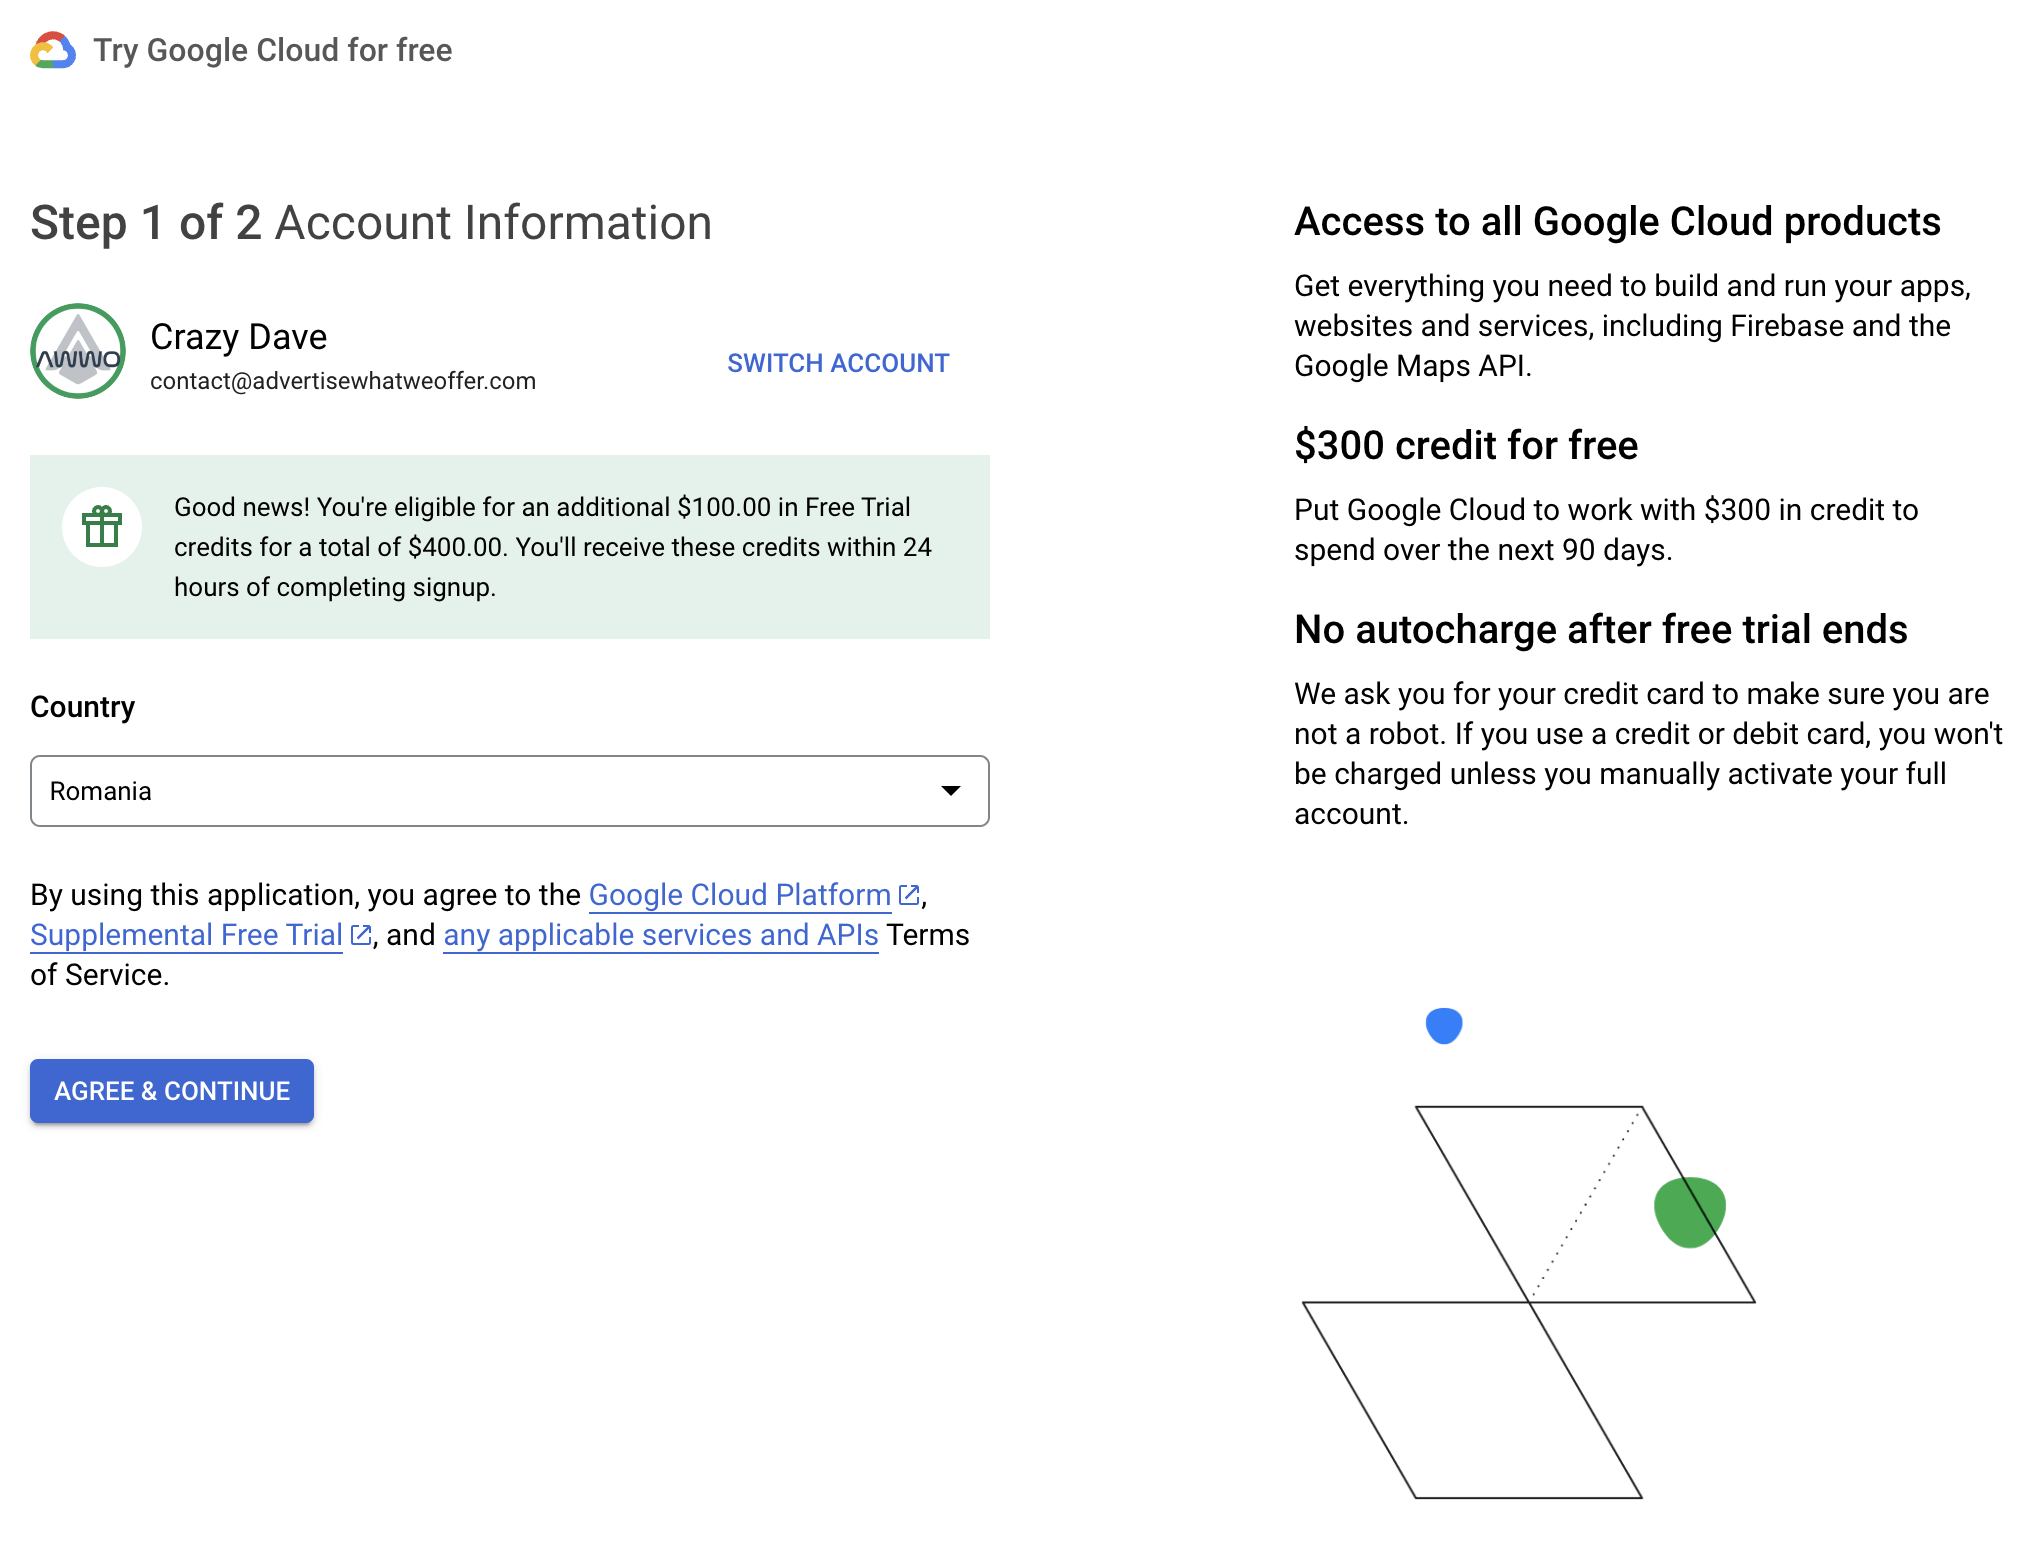
- Once connected, visit the Google Cloud page. If this is your first rodeo with Google Cloud, you'll be awarded with a 300$ budget to spend in 90 days, which is more than enough to get you business straight. In some cases Google might add another 100$ to your budget, totalling 400$. Proceed by clicking the Get started for free button.

- Confirm country of residence.
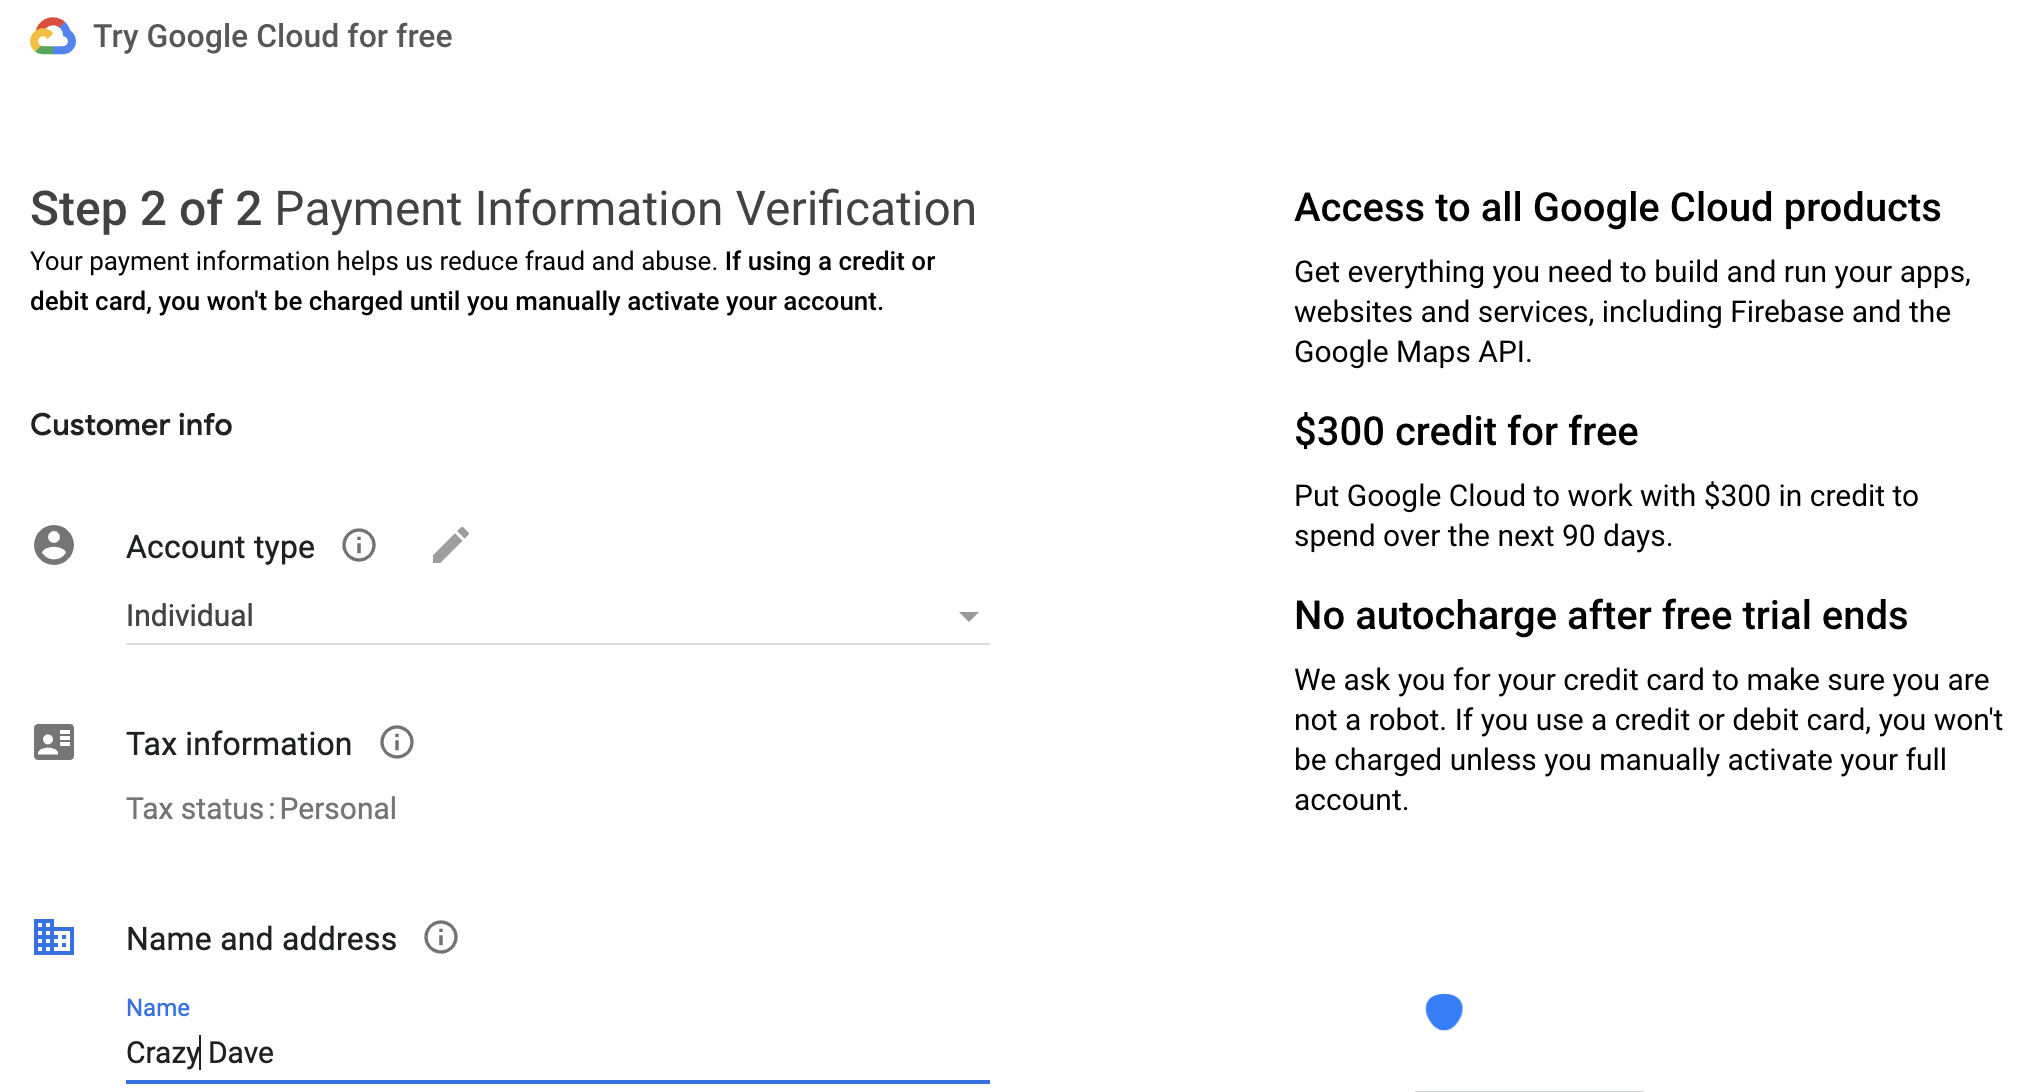
- Choose Account type and fill all the required fields. Finish by clicking the START FREE button.
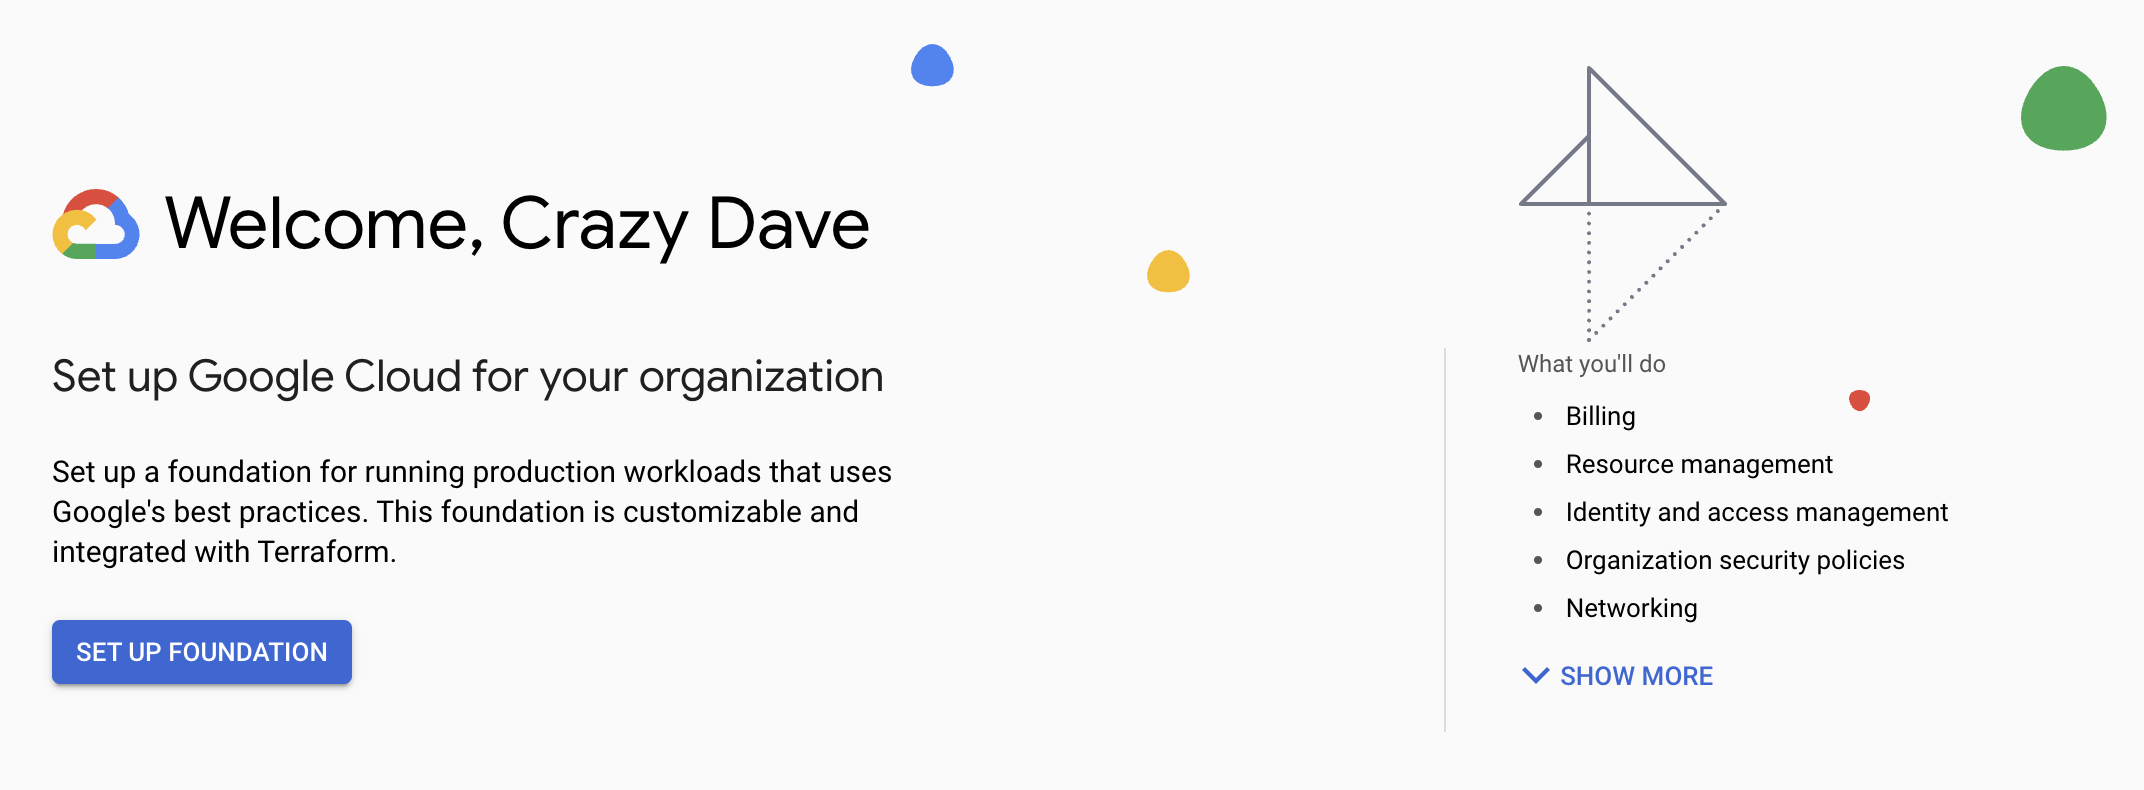
- A successful Google Cloud account setup will be prompted with the following screen.
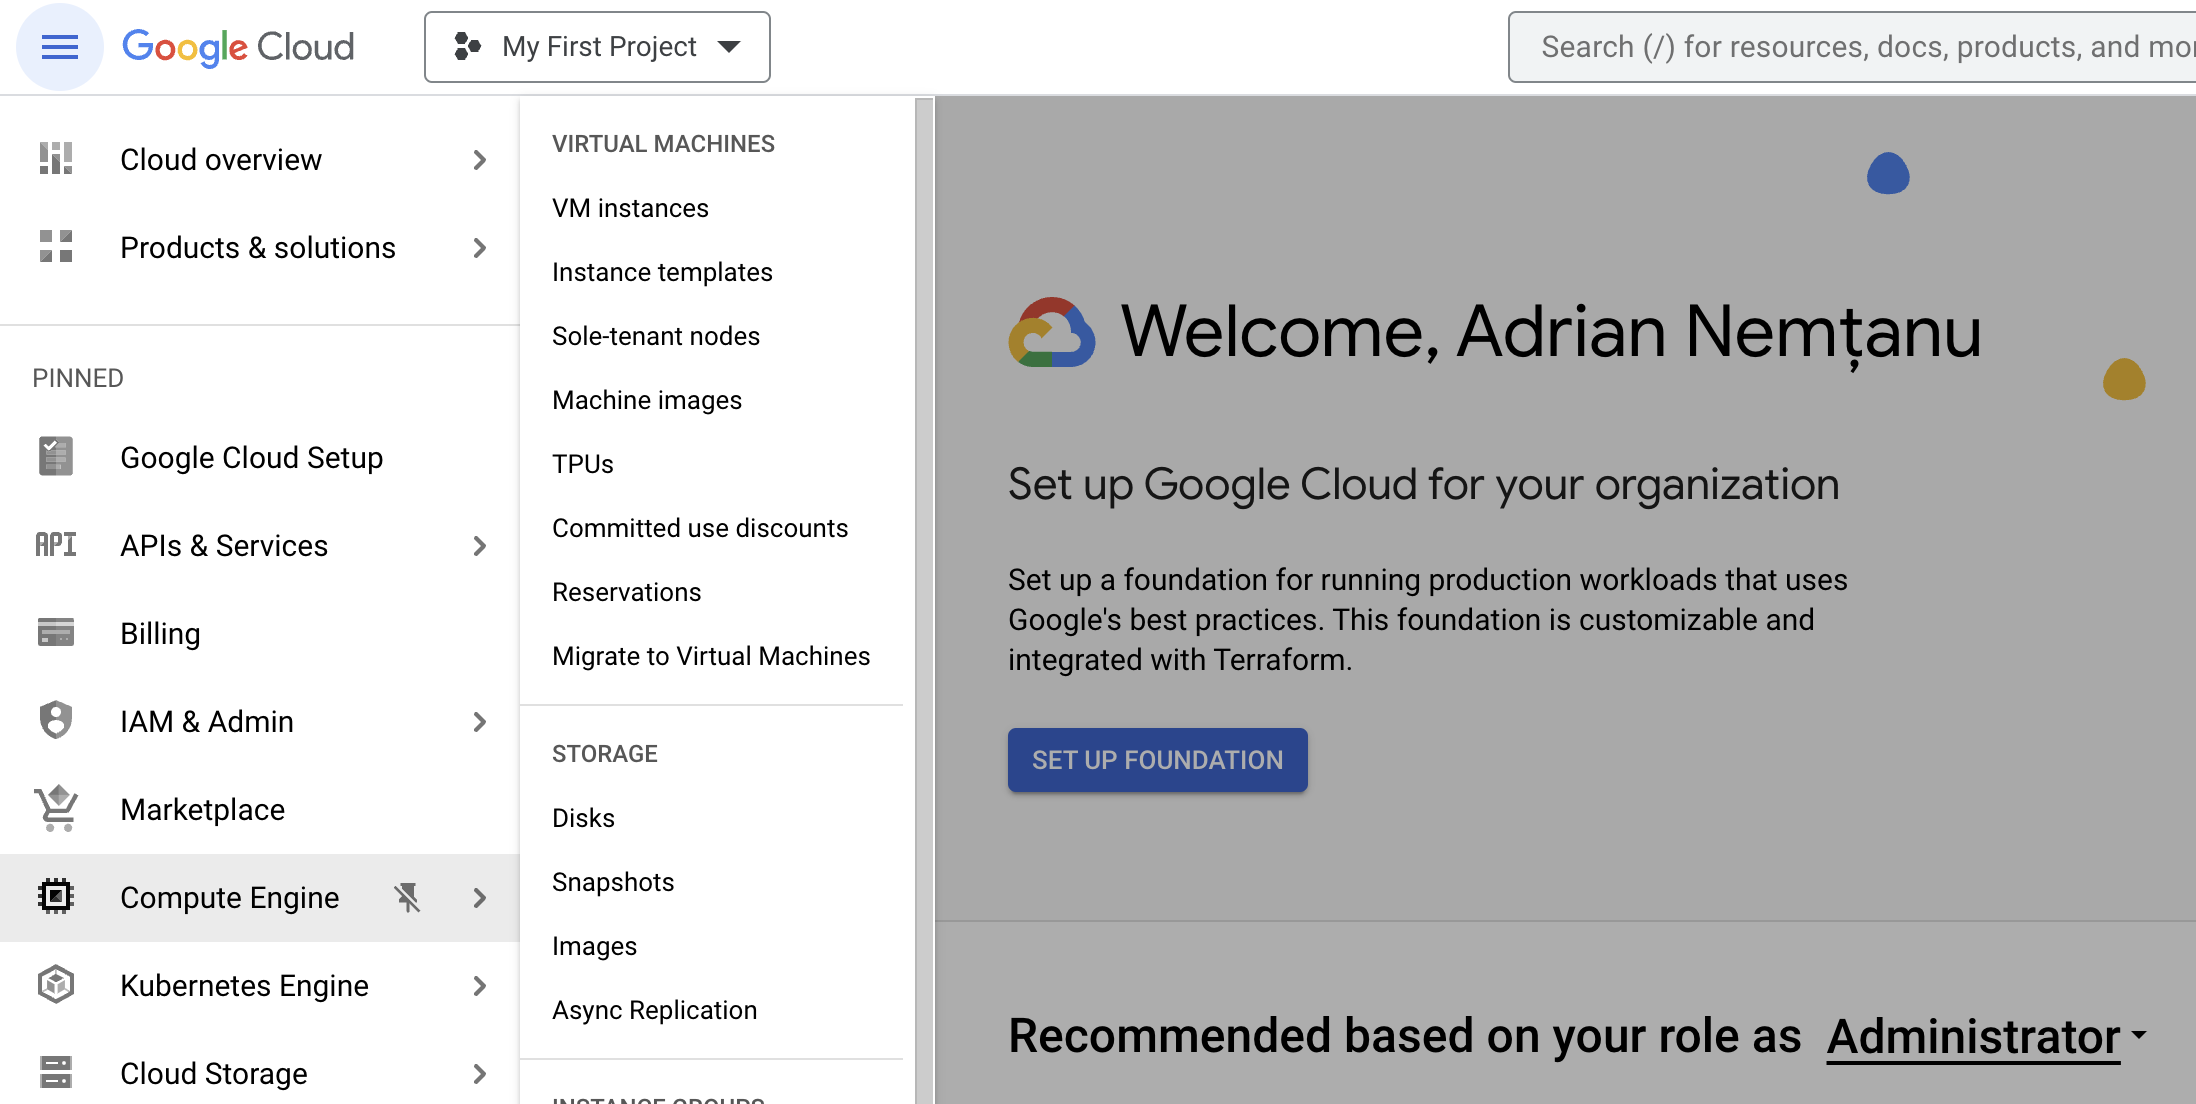
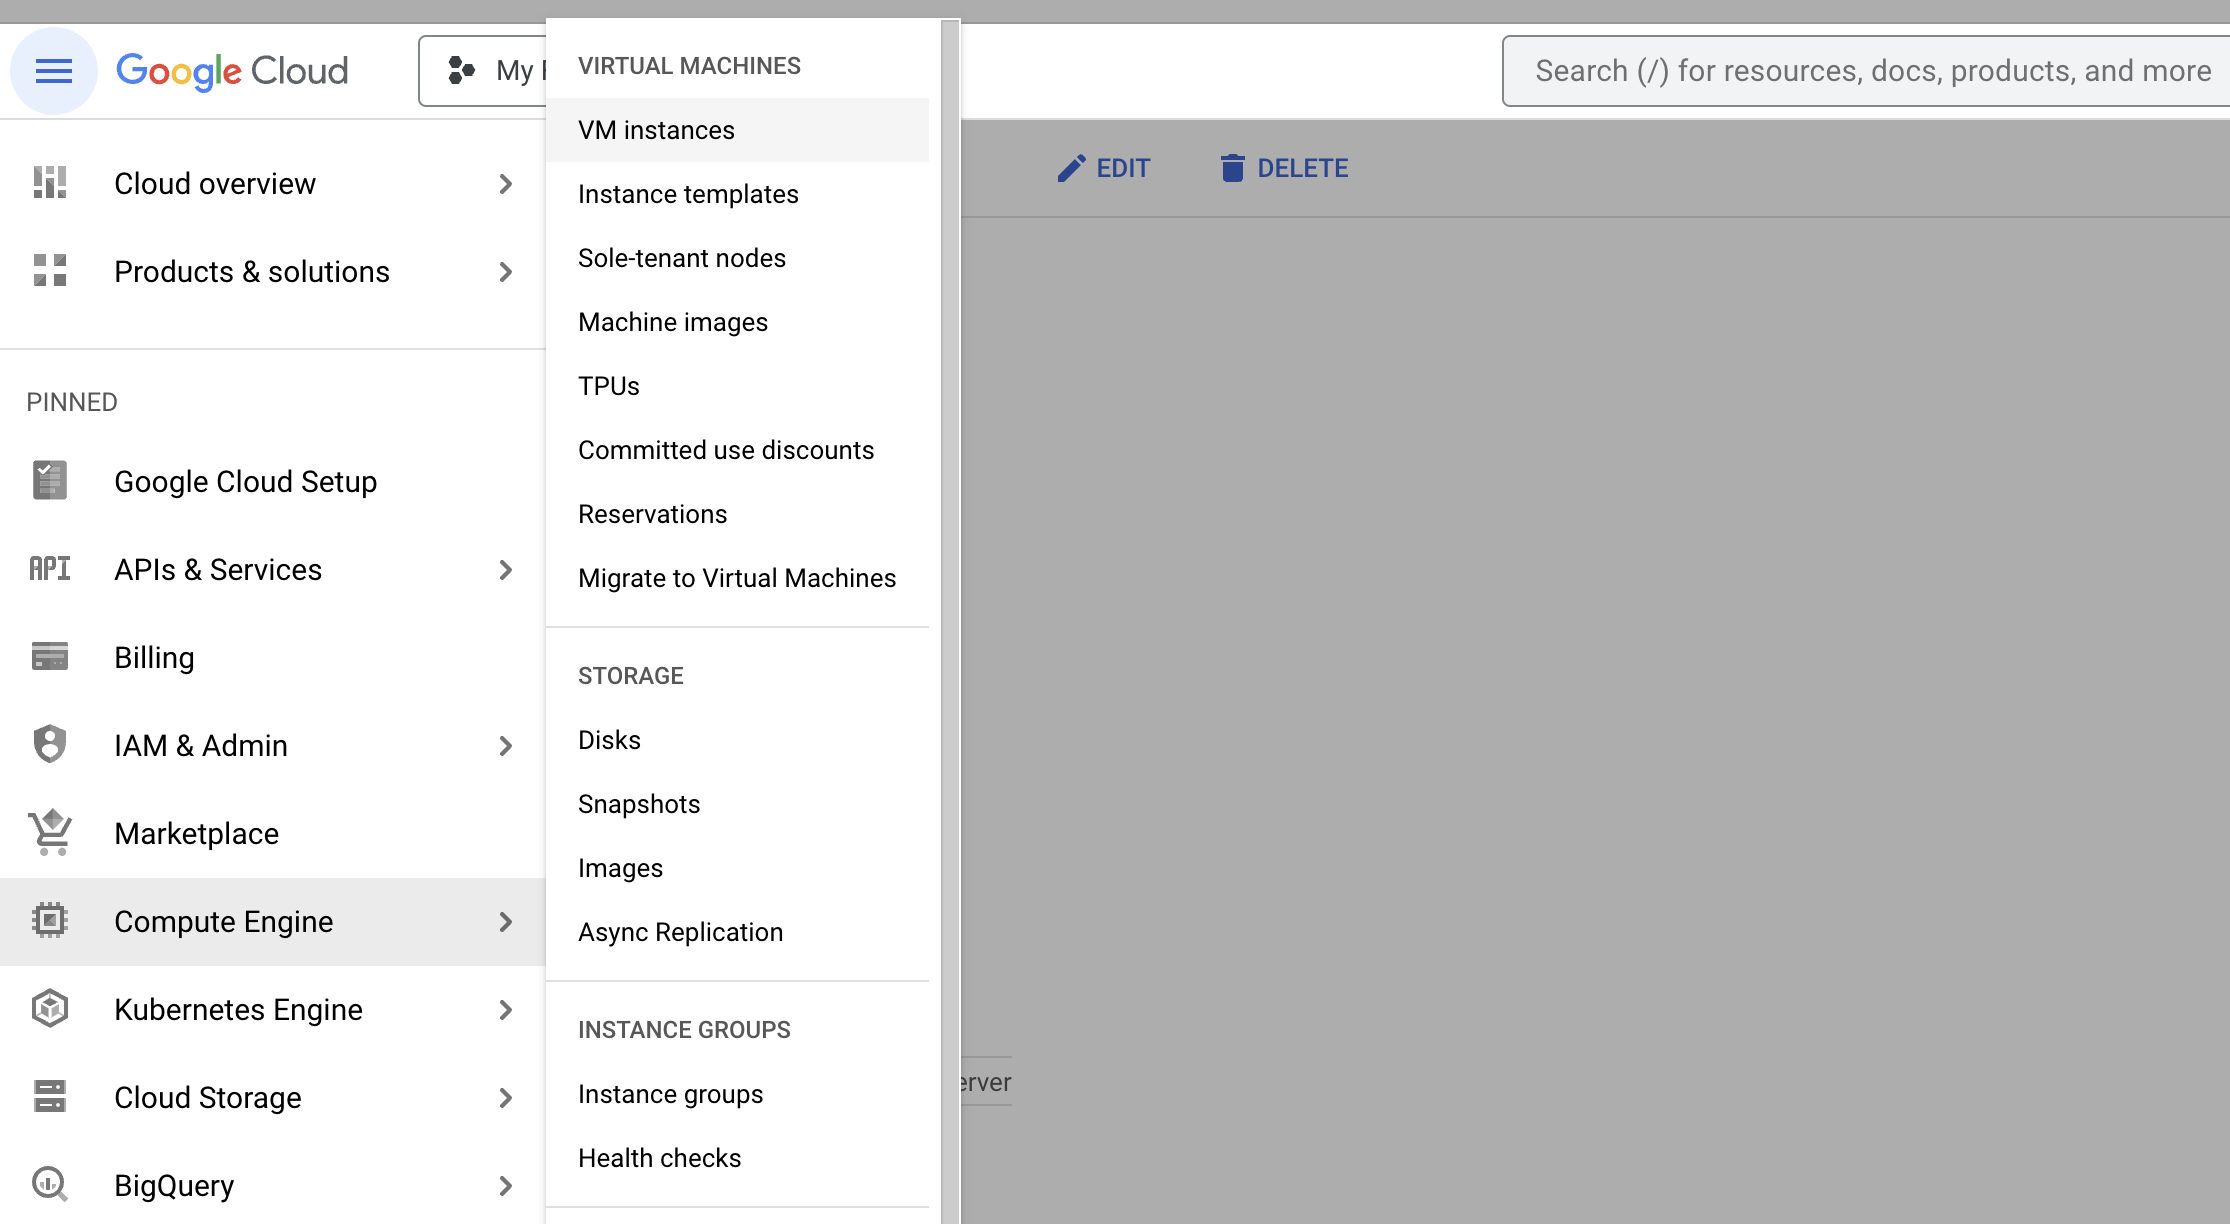
- Using the burger menu located at the top left side of the page, navigate to Compute Engine.
- Activate the Compute Engine API by clicking the Enable button.
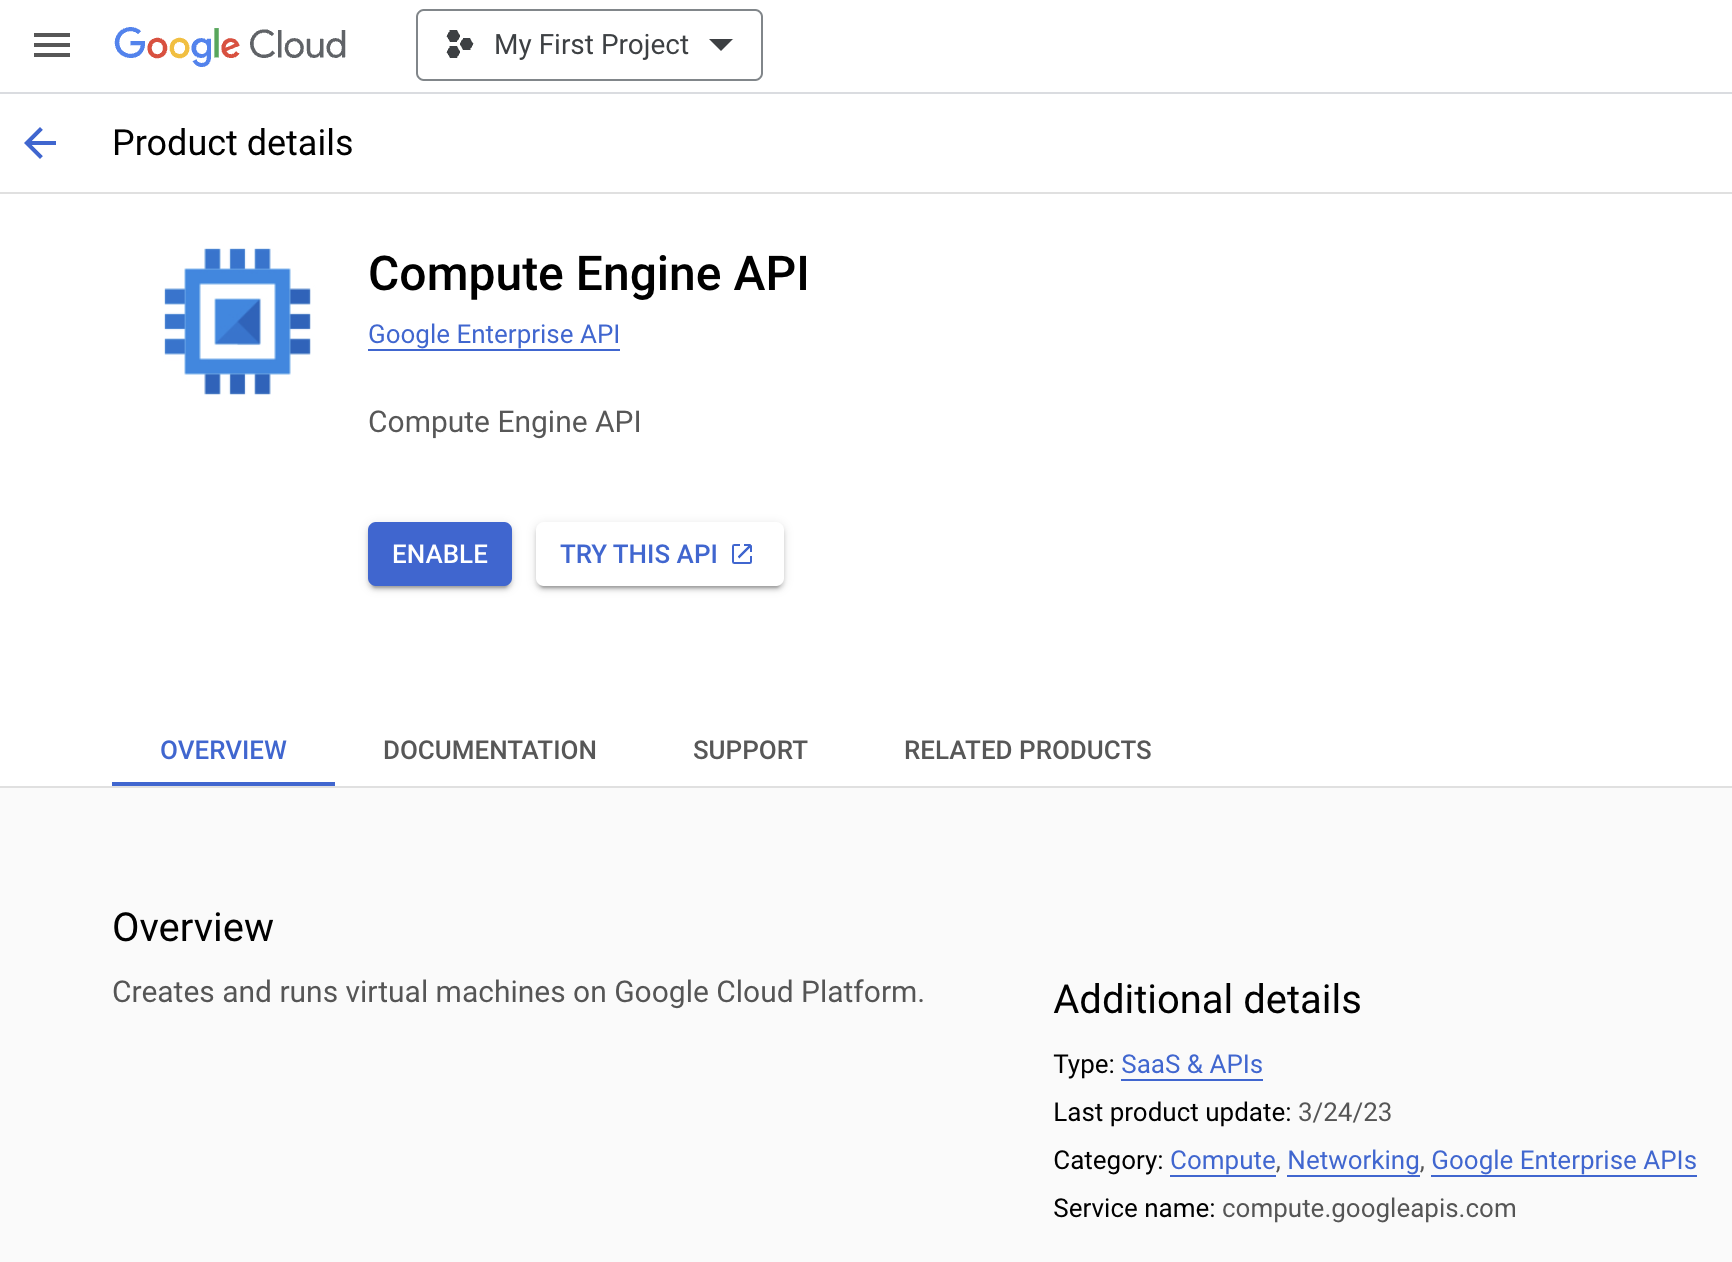
- Once the service is successfully activated you will be prompted with the following screen.

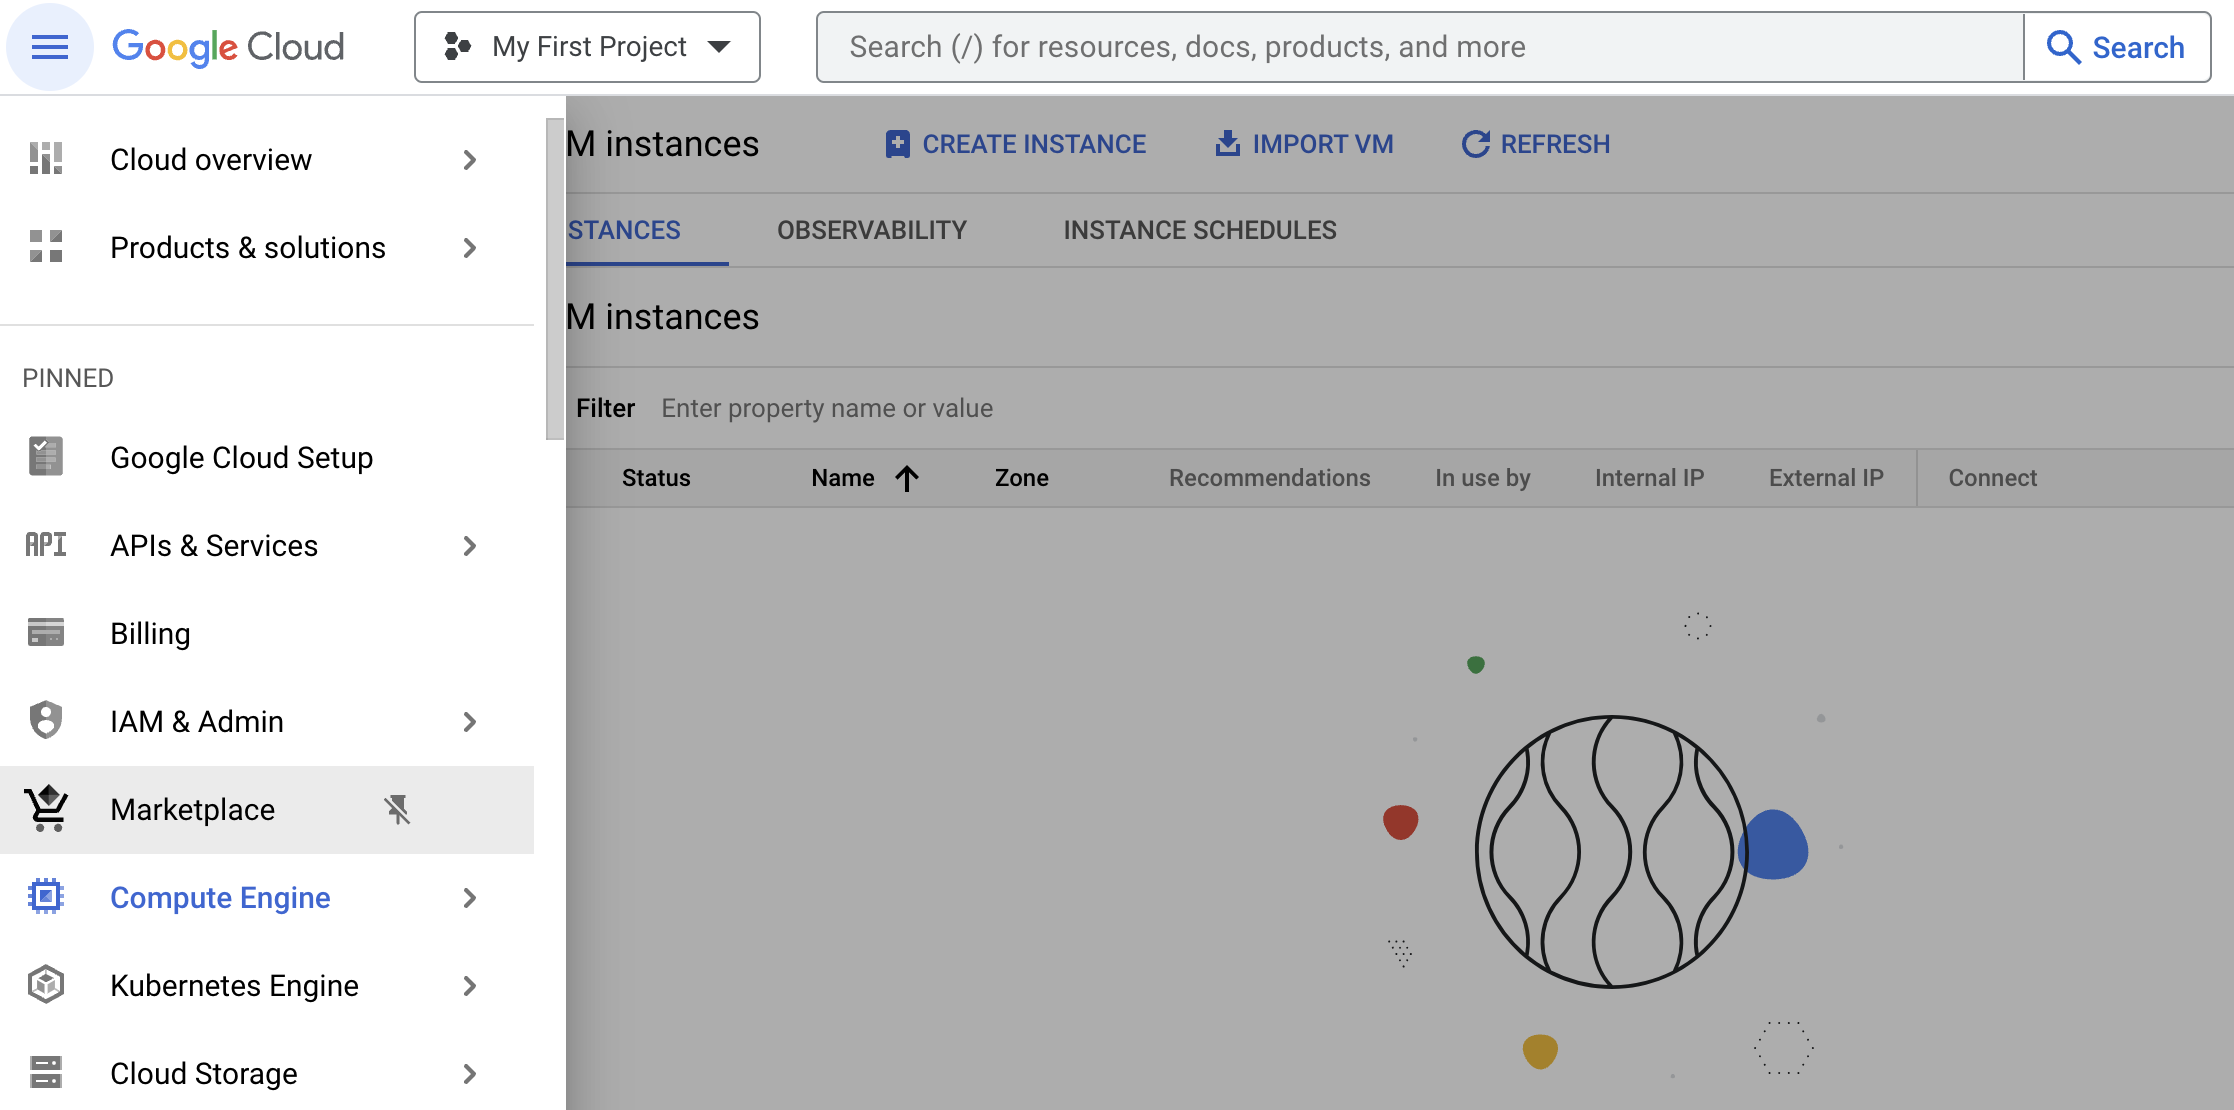
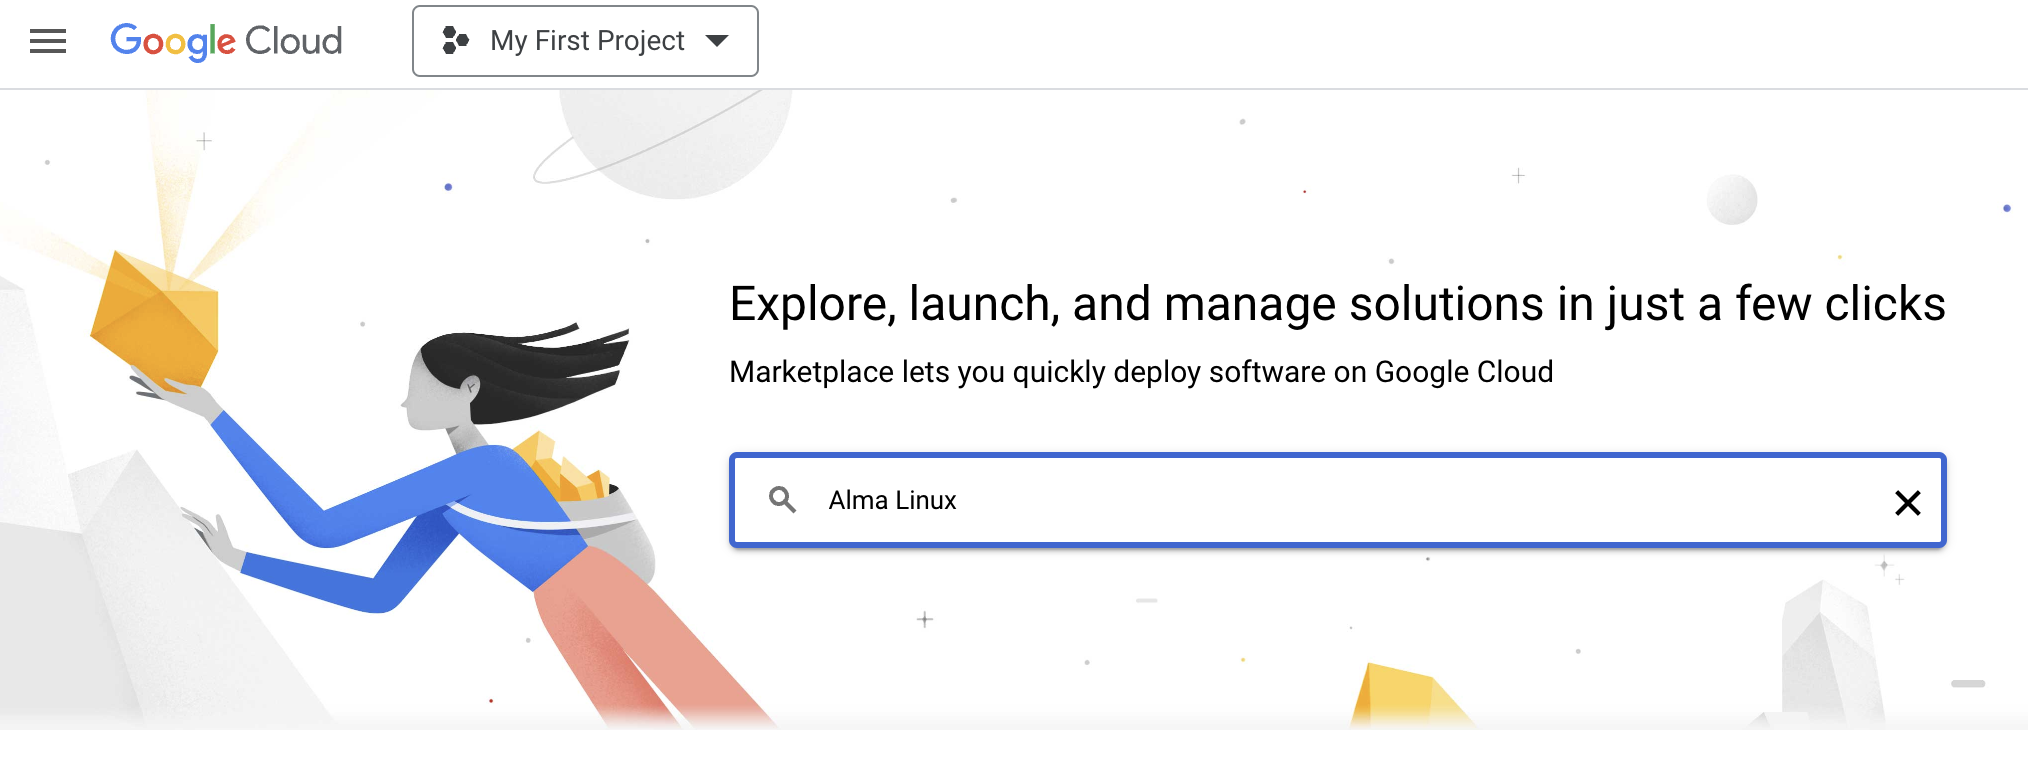
- Head back to the burger menu and navigate to Marketplace.
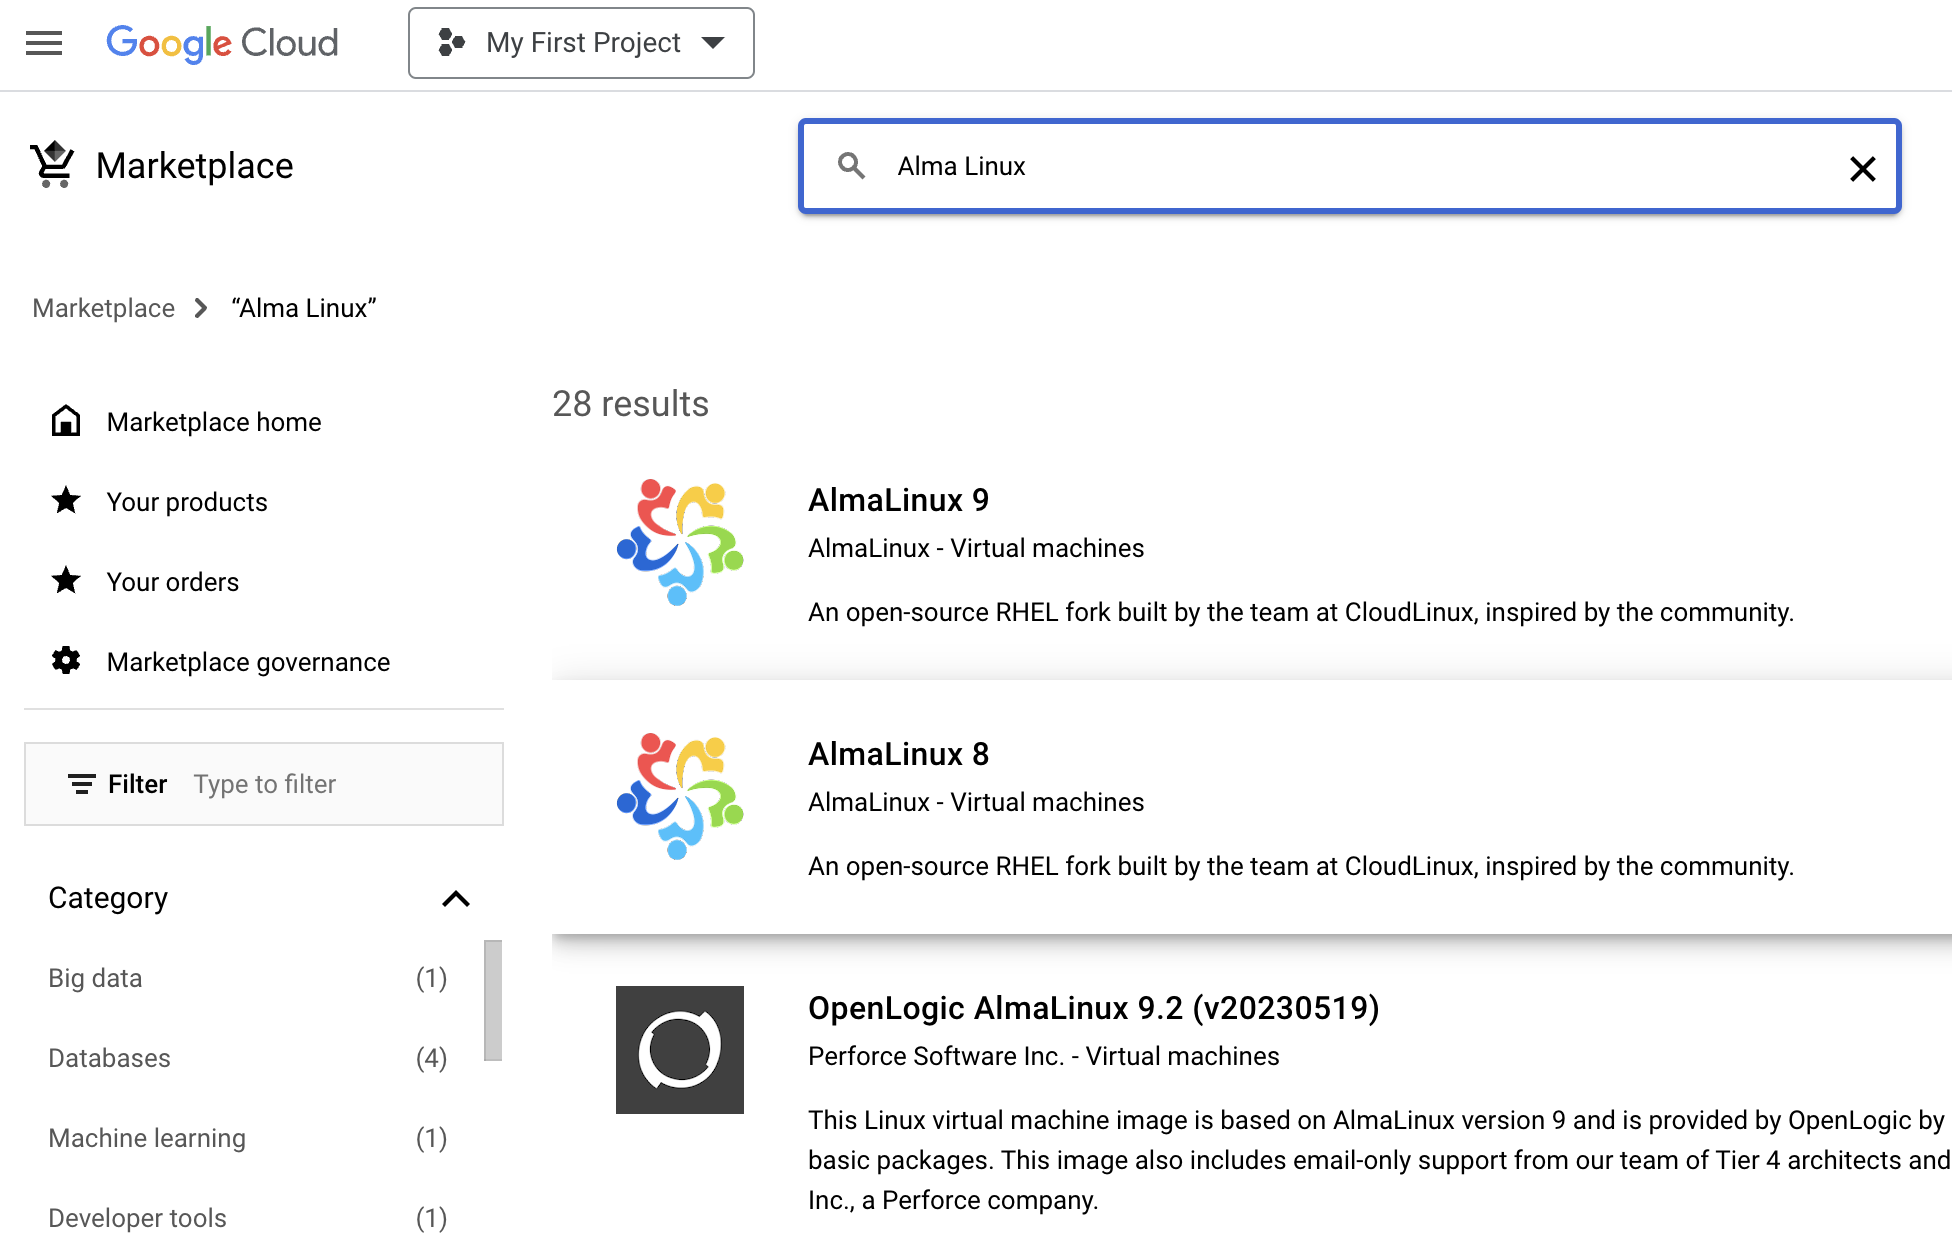
- Type Alma Linux inside the search box and hit the Enter button on your keyboard.
- Choose Alma Linux 8 from the search results list.
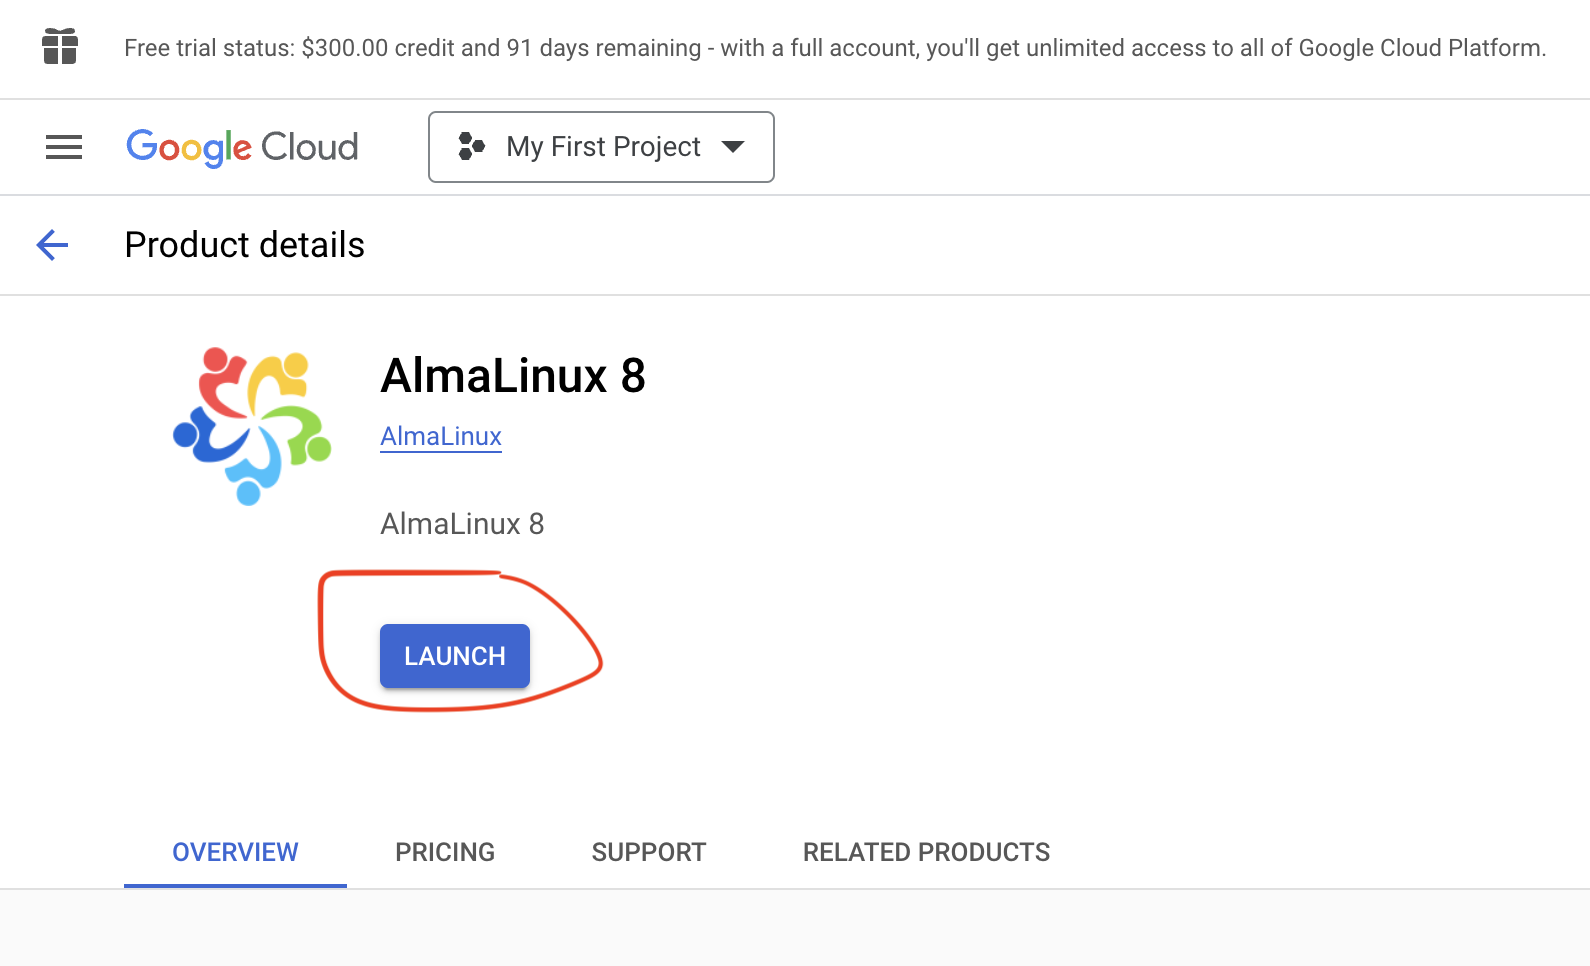
- The system will take you to the Launch page for Alma Linux 8. In case you lost track of things, click here. Once the page is loaded click the Launch button.
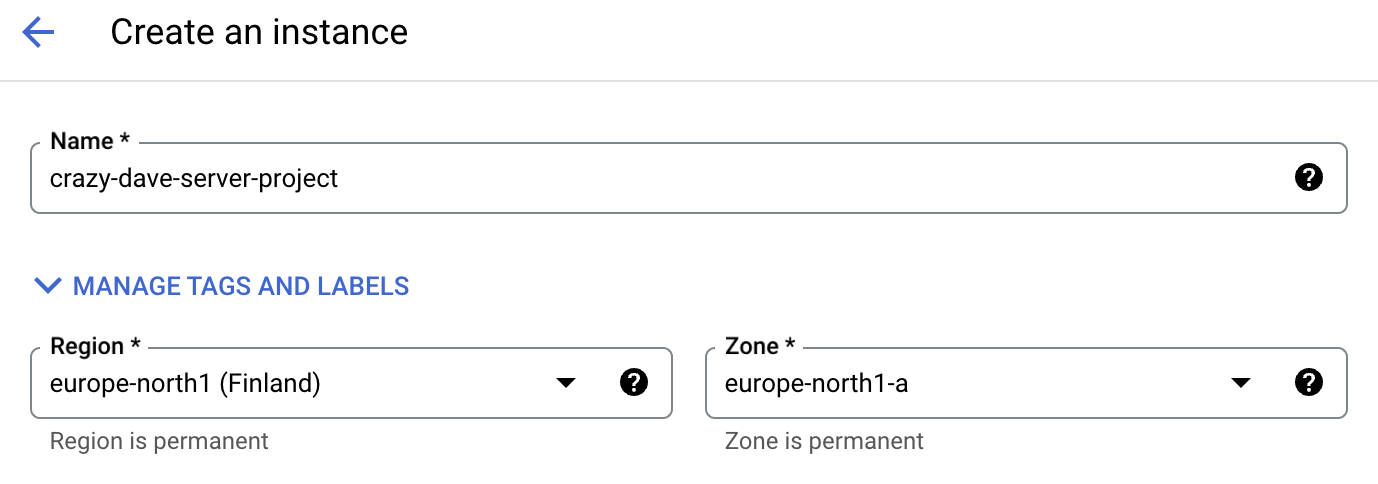
- Now you will be able to configure your server details. Set a Name for your instance and use the hyphen symbol instead of empty spaces. Choose a Region for your server. If you're a business in Europe according to the EU law, you are required to store data inside EU Region. Pricing will vary depending on selected region.
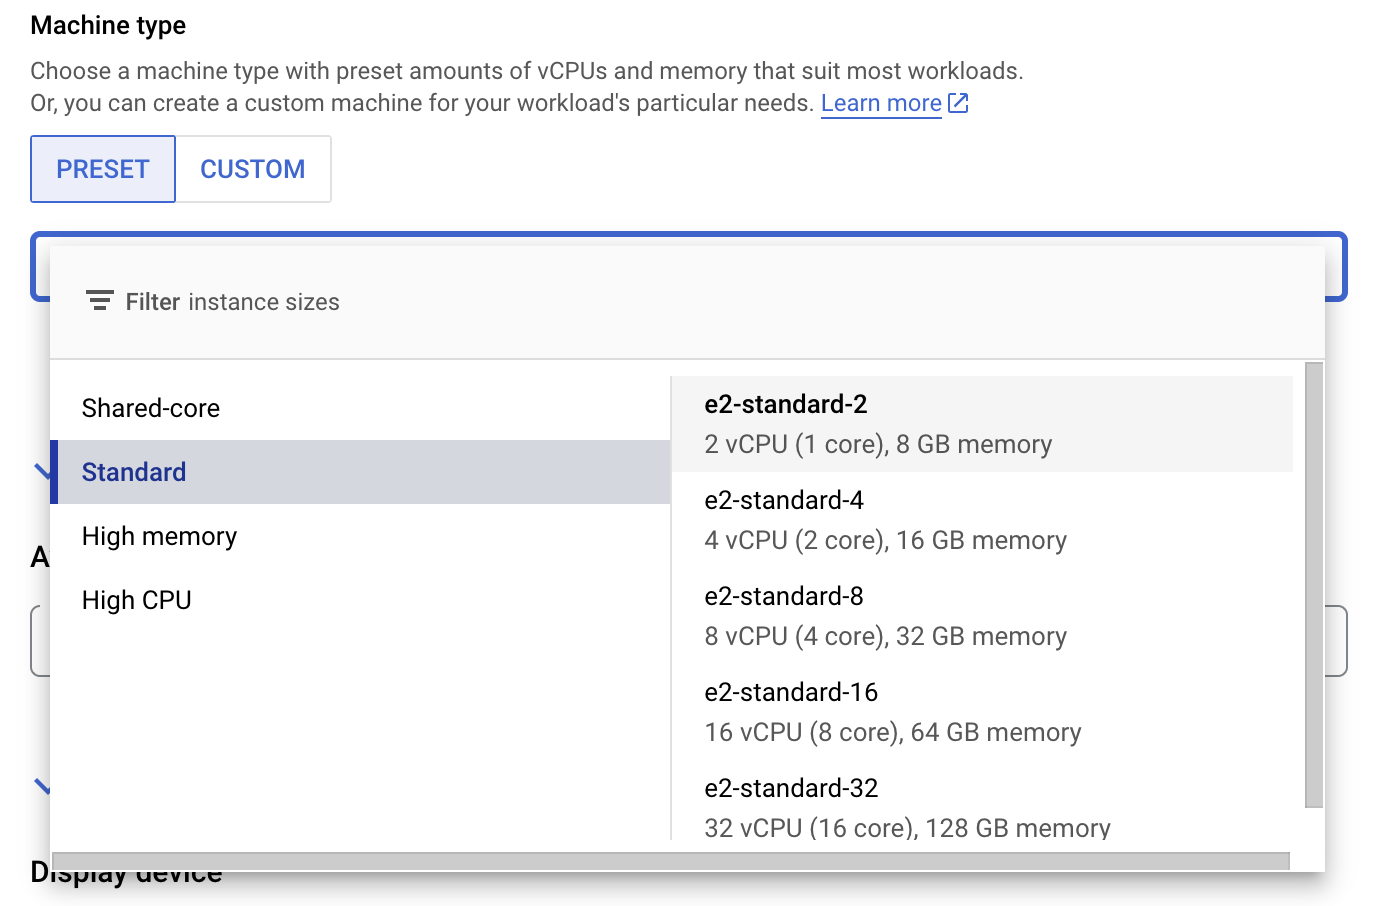
- Proceed with the Machine type setup.
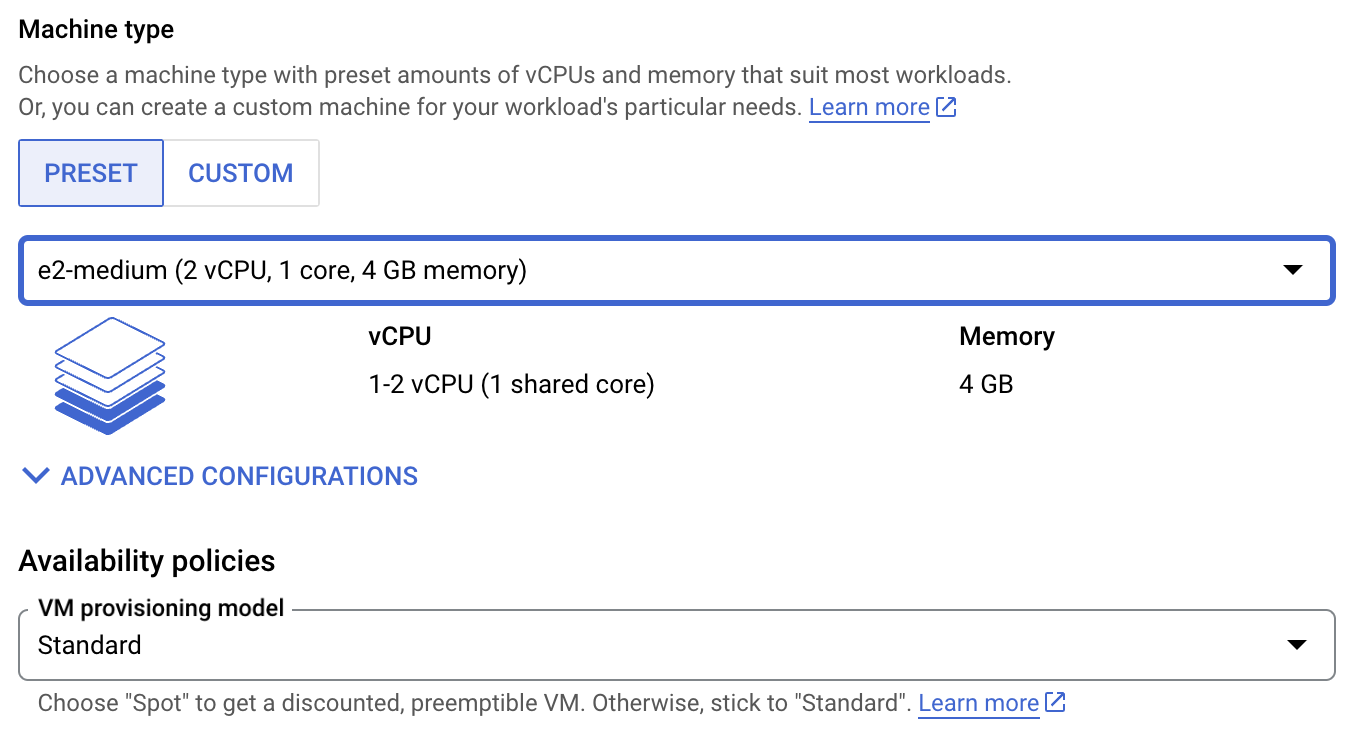
- We recommend switching to a machine with a dedicated core for better performance. In this case we went with the e2-standard-2 version.
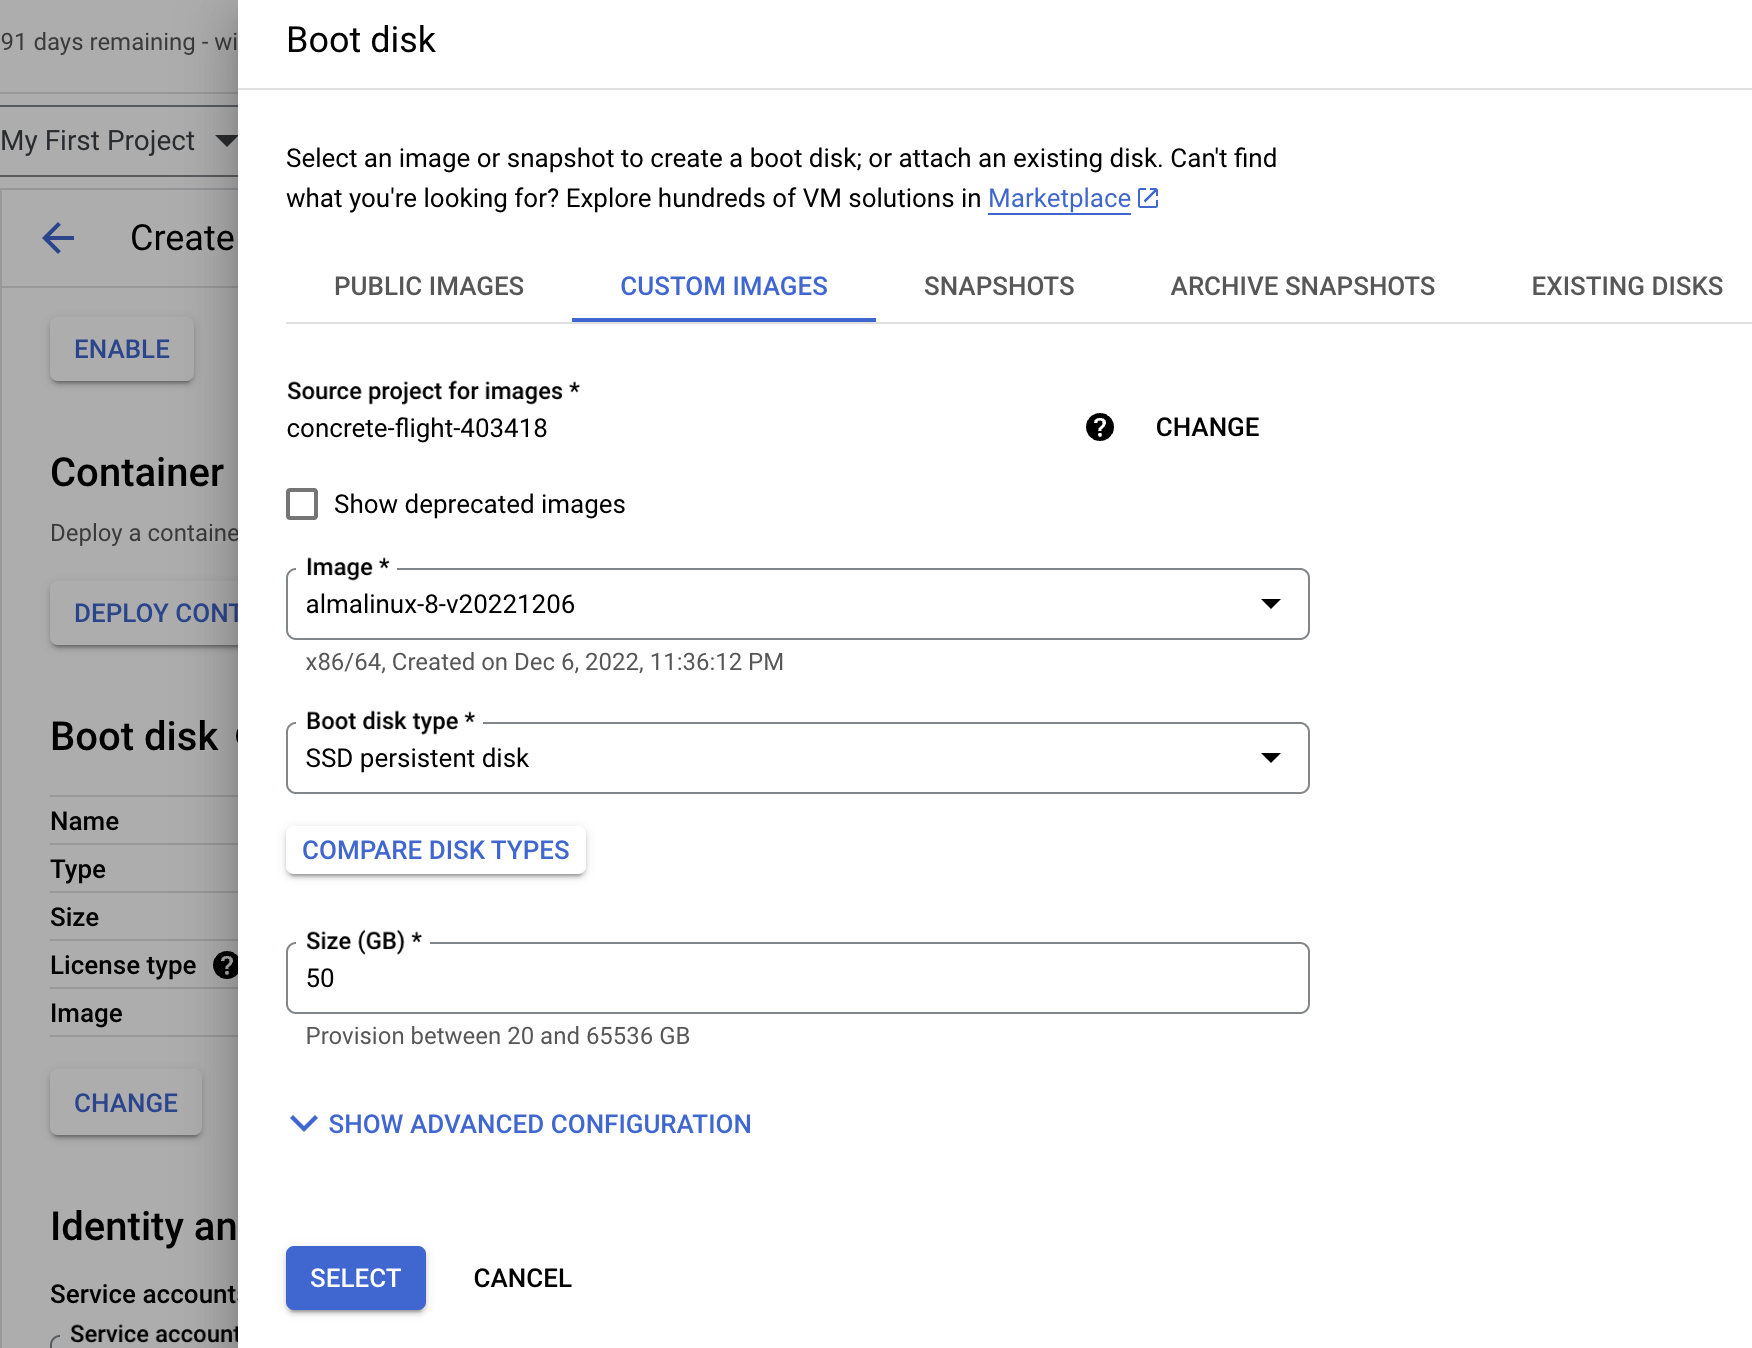
- Scroll down to the Container section and click the Change button.

- In this section change the Boot disk type to SSD persistent disk and increase the Size from 20 to 50, then hit the SELECT button.
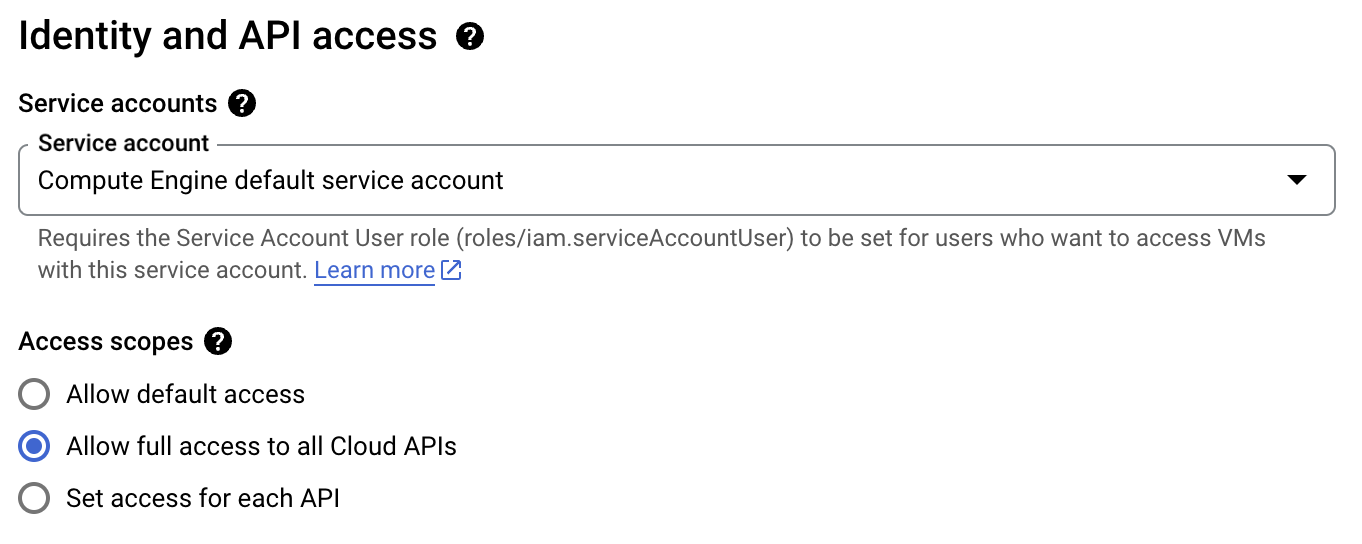
- Inside the Identity and API access section, change the Access scopes to Allow full access to all Cloud APIs
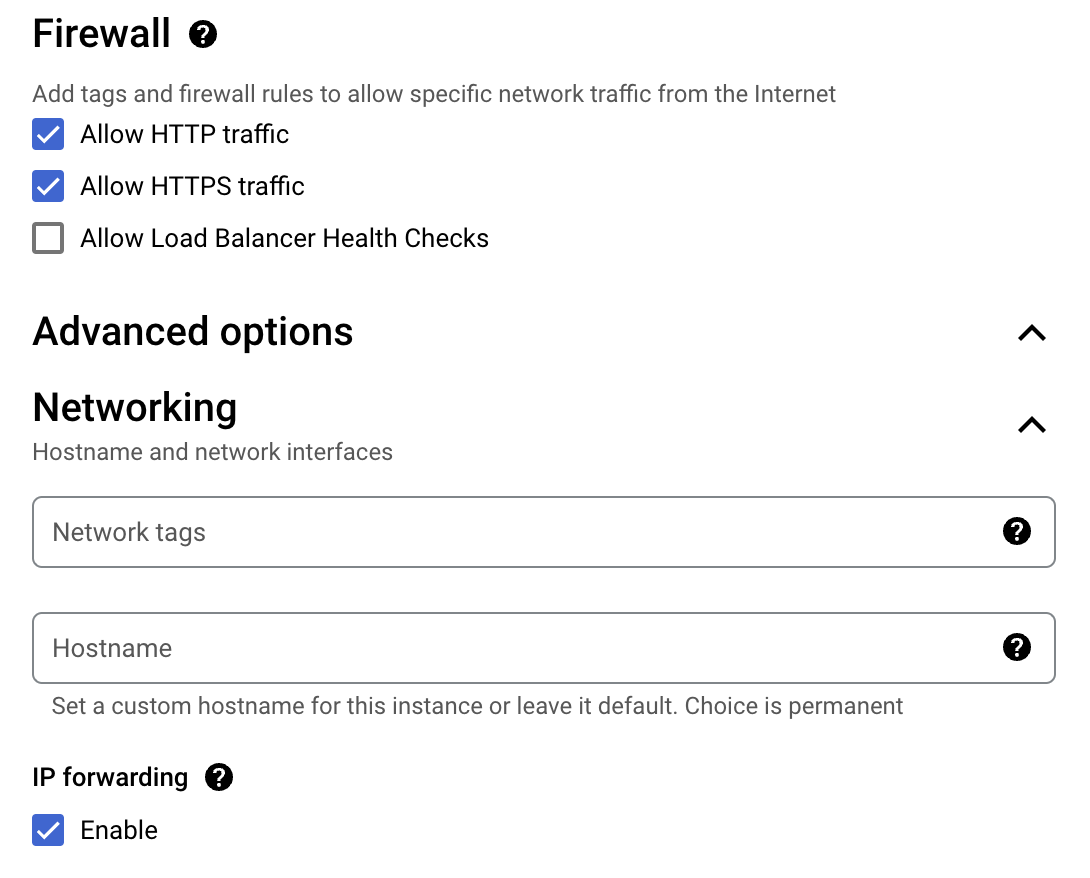
- Inside the Firewall section activate the Allow HTTP traffic and Allow HTTPS traffic boxes. Under Advanced Options, Networking enable IP forwarding.
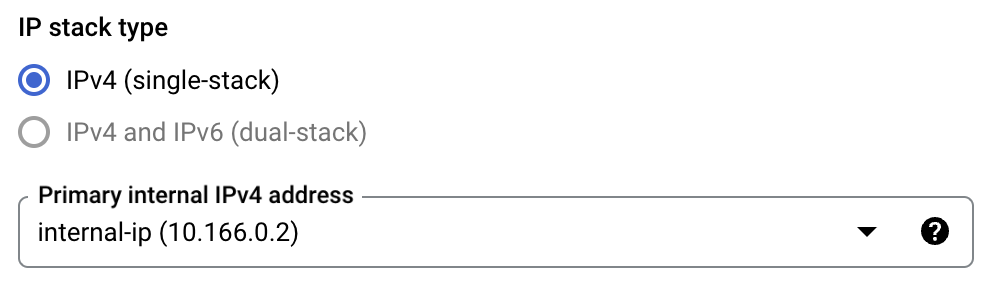
- Inside the Network interfaces section click the right arrow to view more options. Head over to Primary internal IPv4 address and click one RESERVE STATIC INSTERNAL IPV4 ADDRESS. Set a Name for your IP (internal-ip), then click the RESERVE button.

- Make sure the generated static IP is selected.
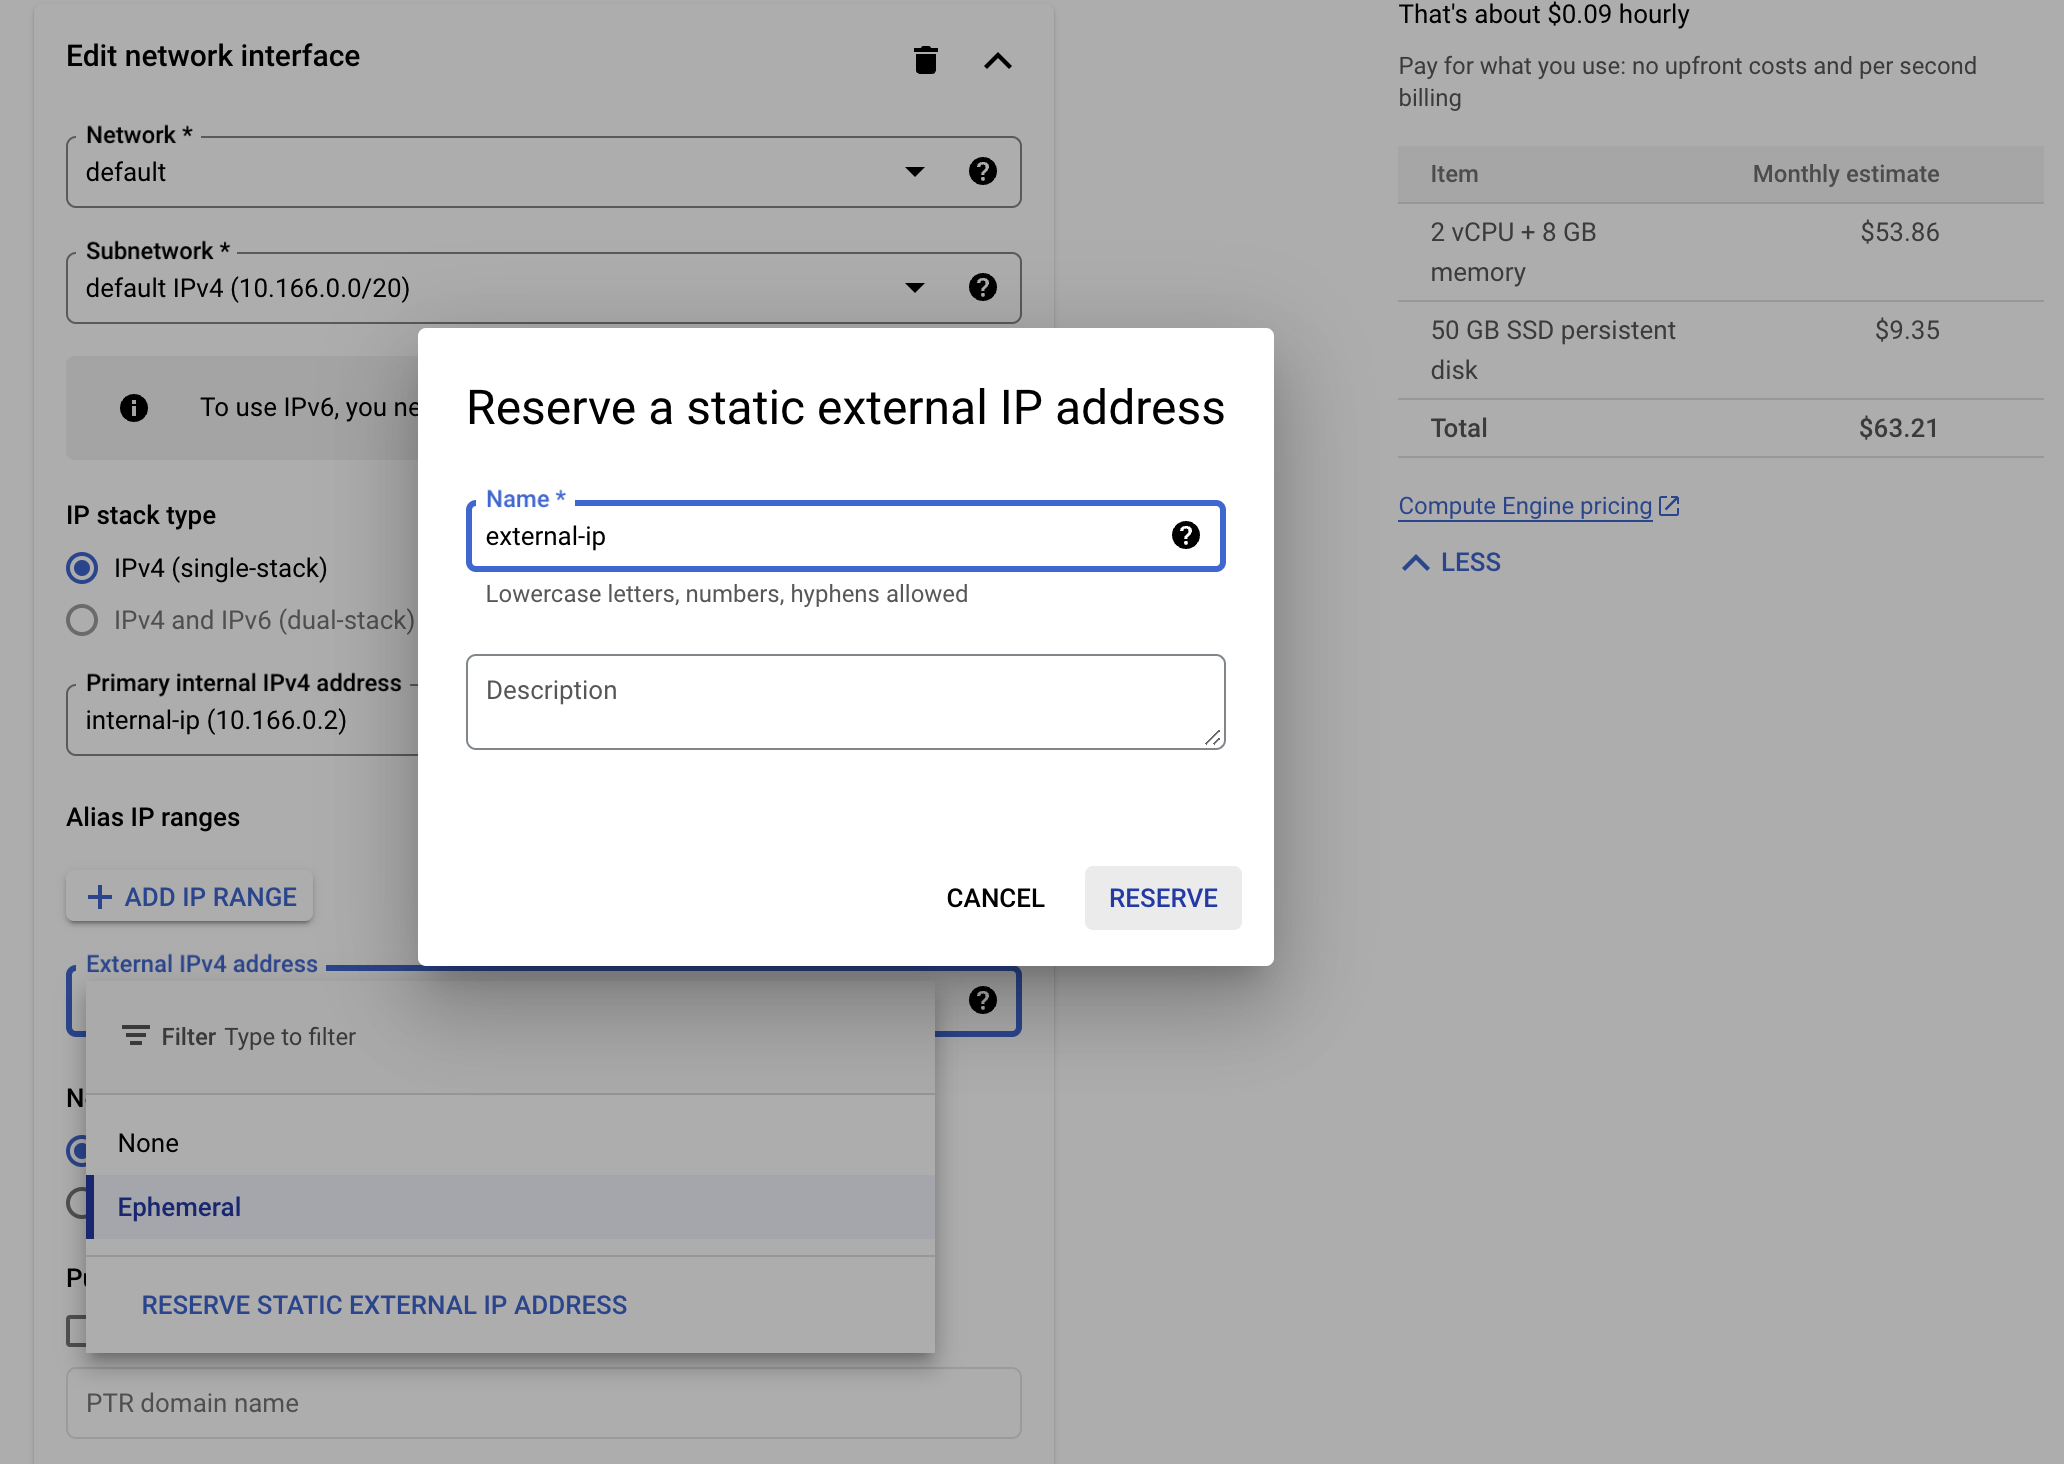
- Now you need to do the same thing to the External IPv4 address. In order for your domain to point to this server you need a public IP address. Set a Name (external-ip) for your public IP address, then click the RESERVE button.
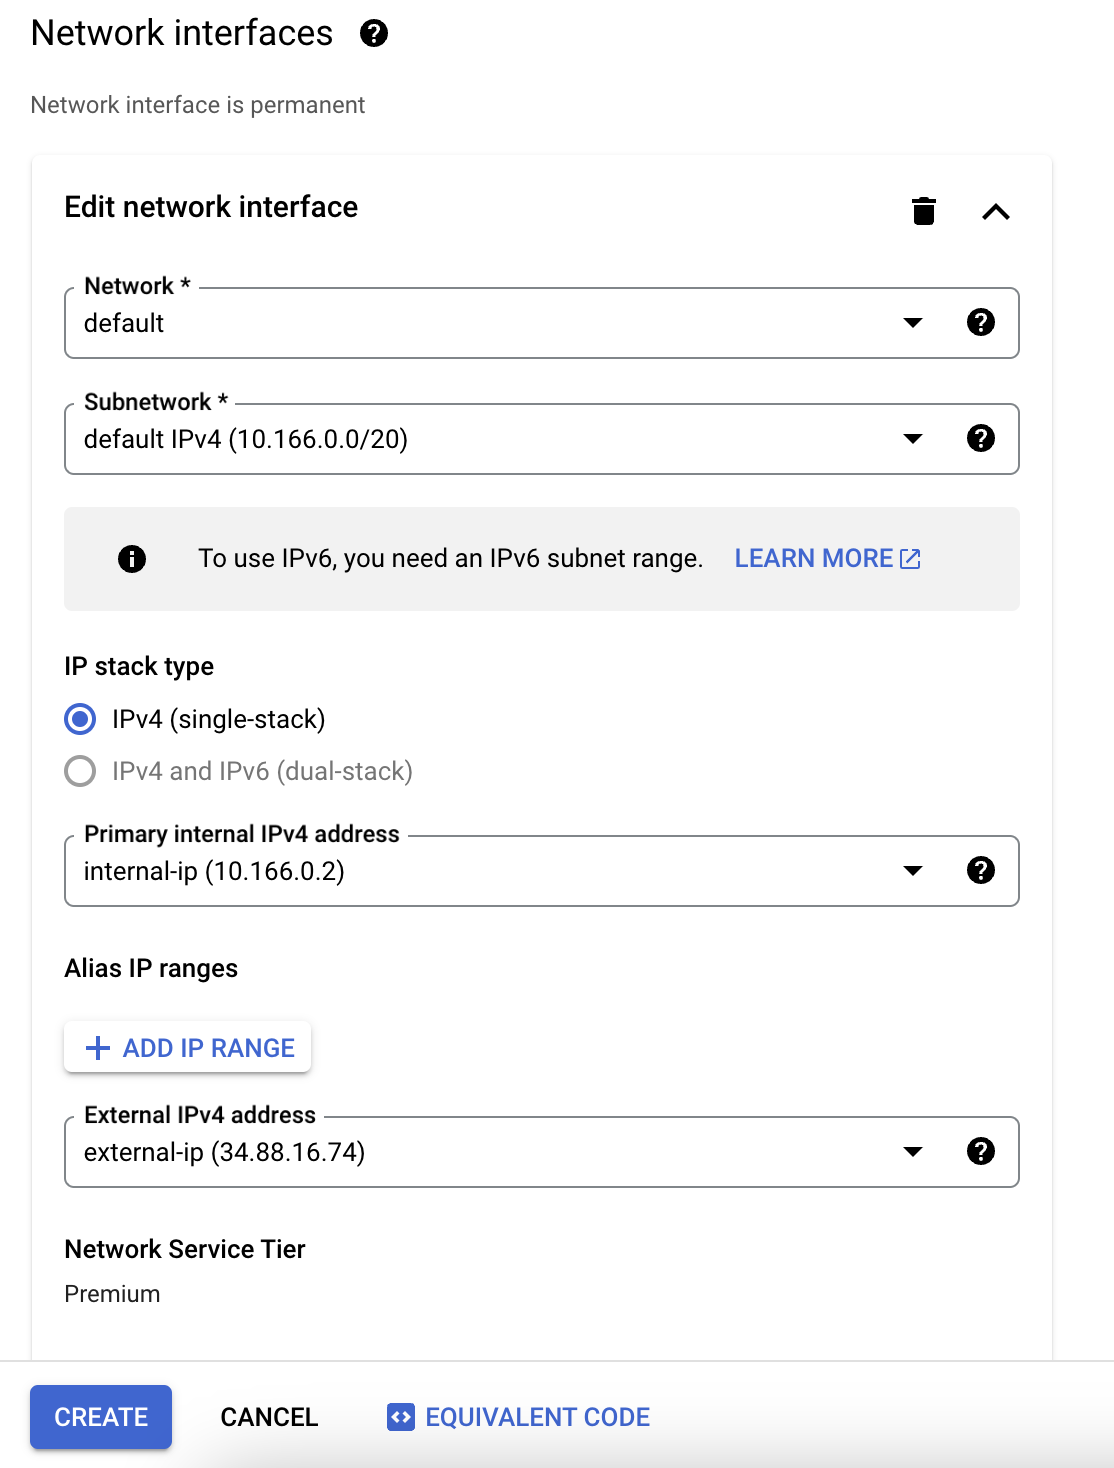
- This is a very important step because you'll have to start from the beginning if you made any critical mistakes. Visually confirm everything by going over all the above steps. Hit the Create button located at the bottom of the page to initiate the server configuration.
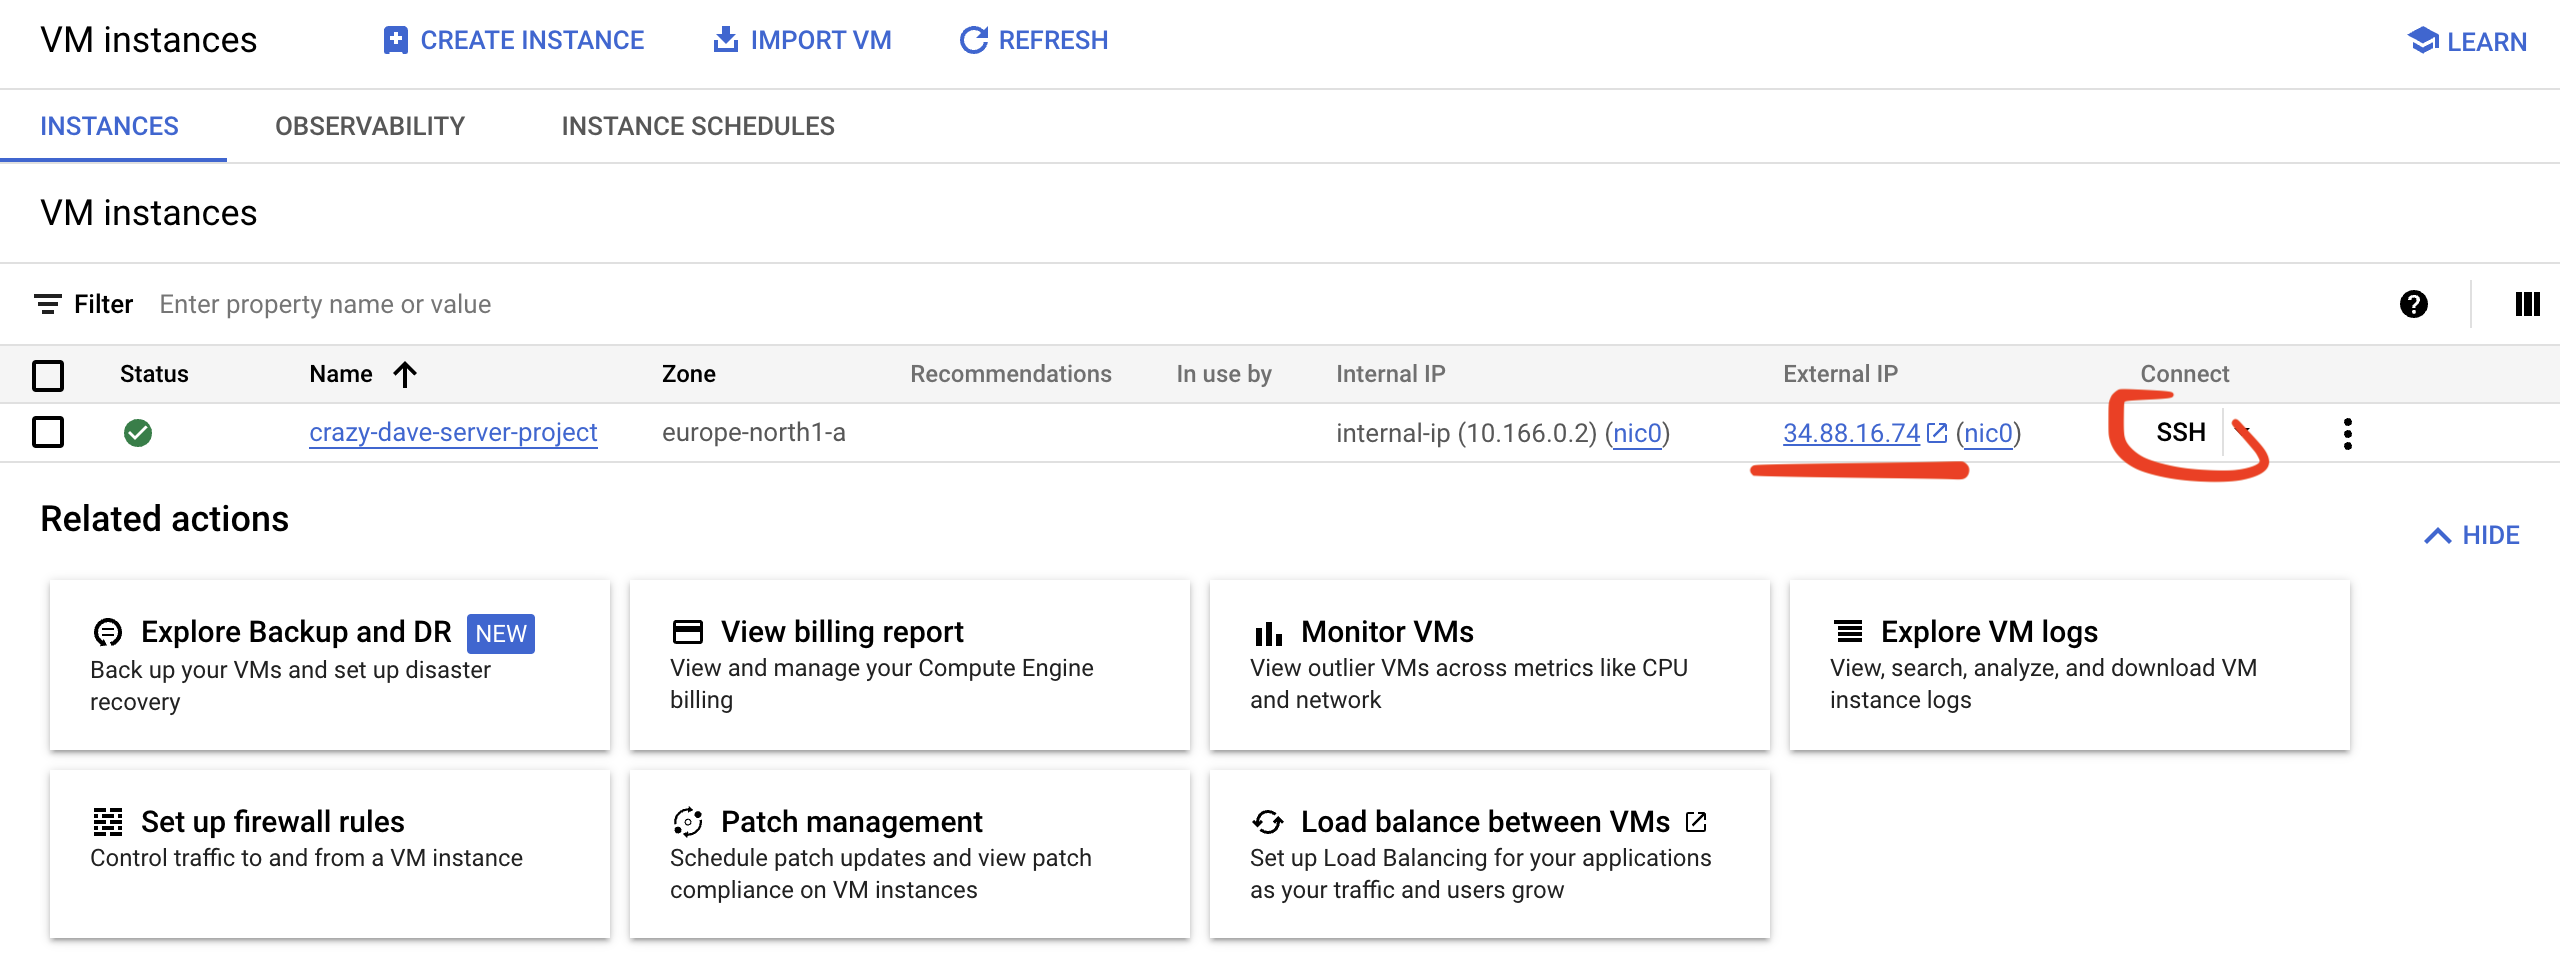
- Once the server configuration process is finished, you'll see the following screen. The external IP address will be different, which is normal. Now head over to the Connect column (right side of the screen) and click on SSH.
- The system will open a terminal window once you click the SSH link. Authorise access and then type the following commands in order to update your server to the latest version: sudo su - and yum update -y. Once finished, type reboot in order to restart the machine. Press the Enter button on your keyboard after you paste in each command. Make sure the computer does not sleep, otherwise the command console will disconnect and you'll loose track and access.

- Installing the Cyberpanel interface for your server is quite easy.
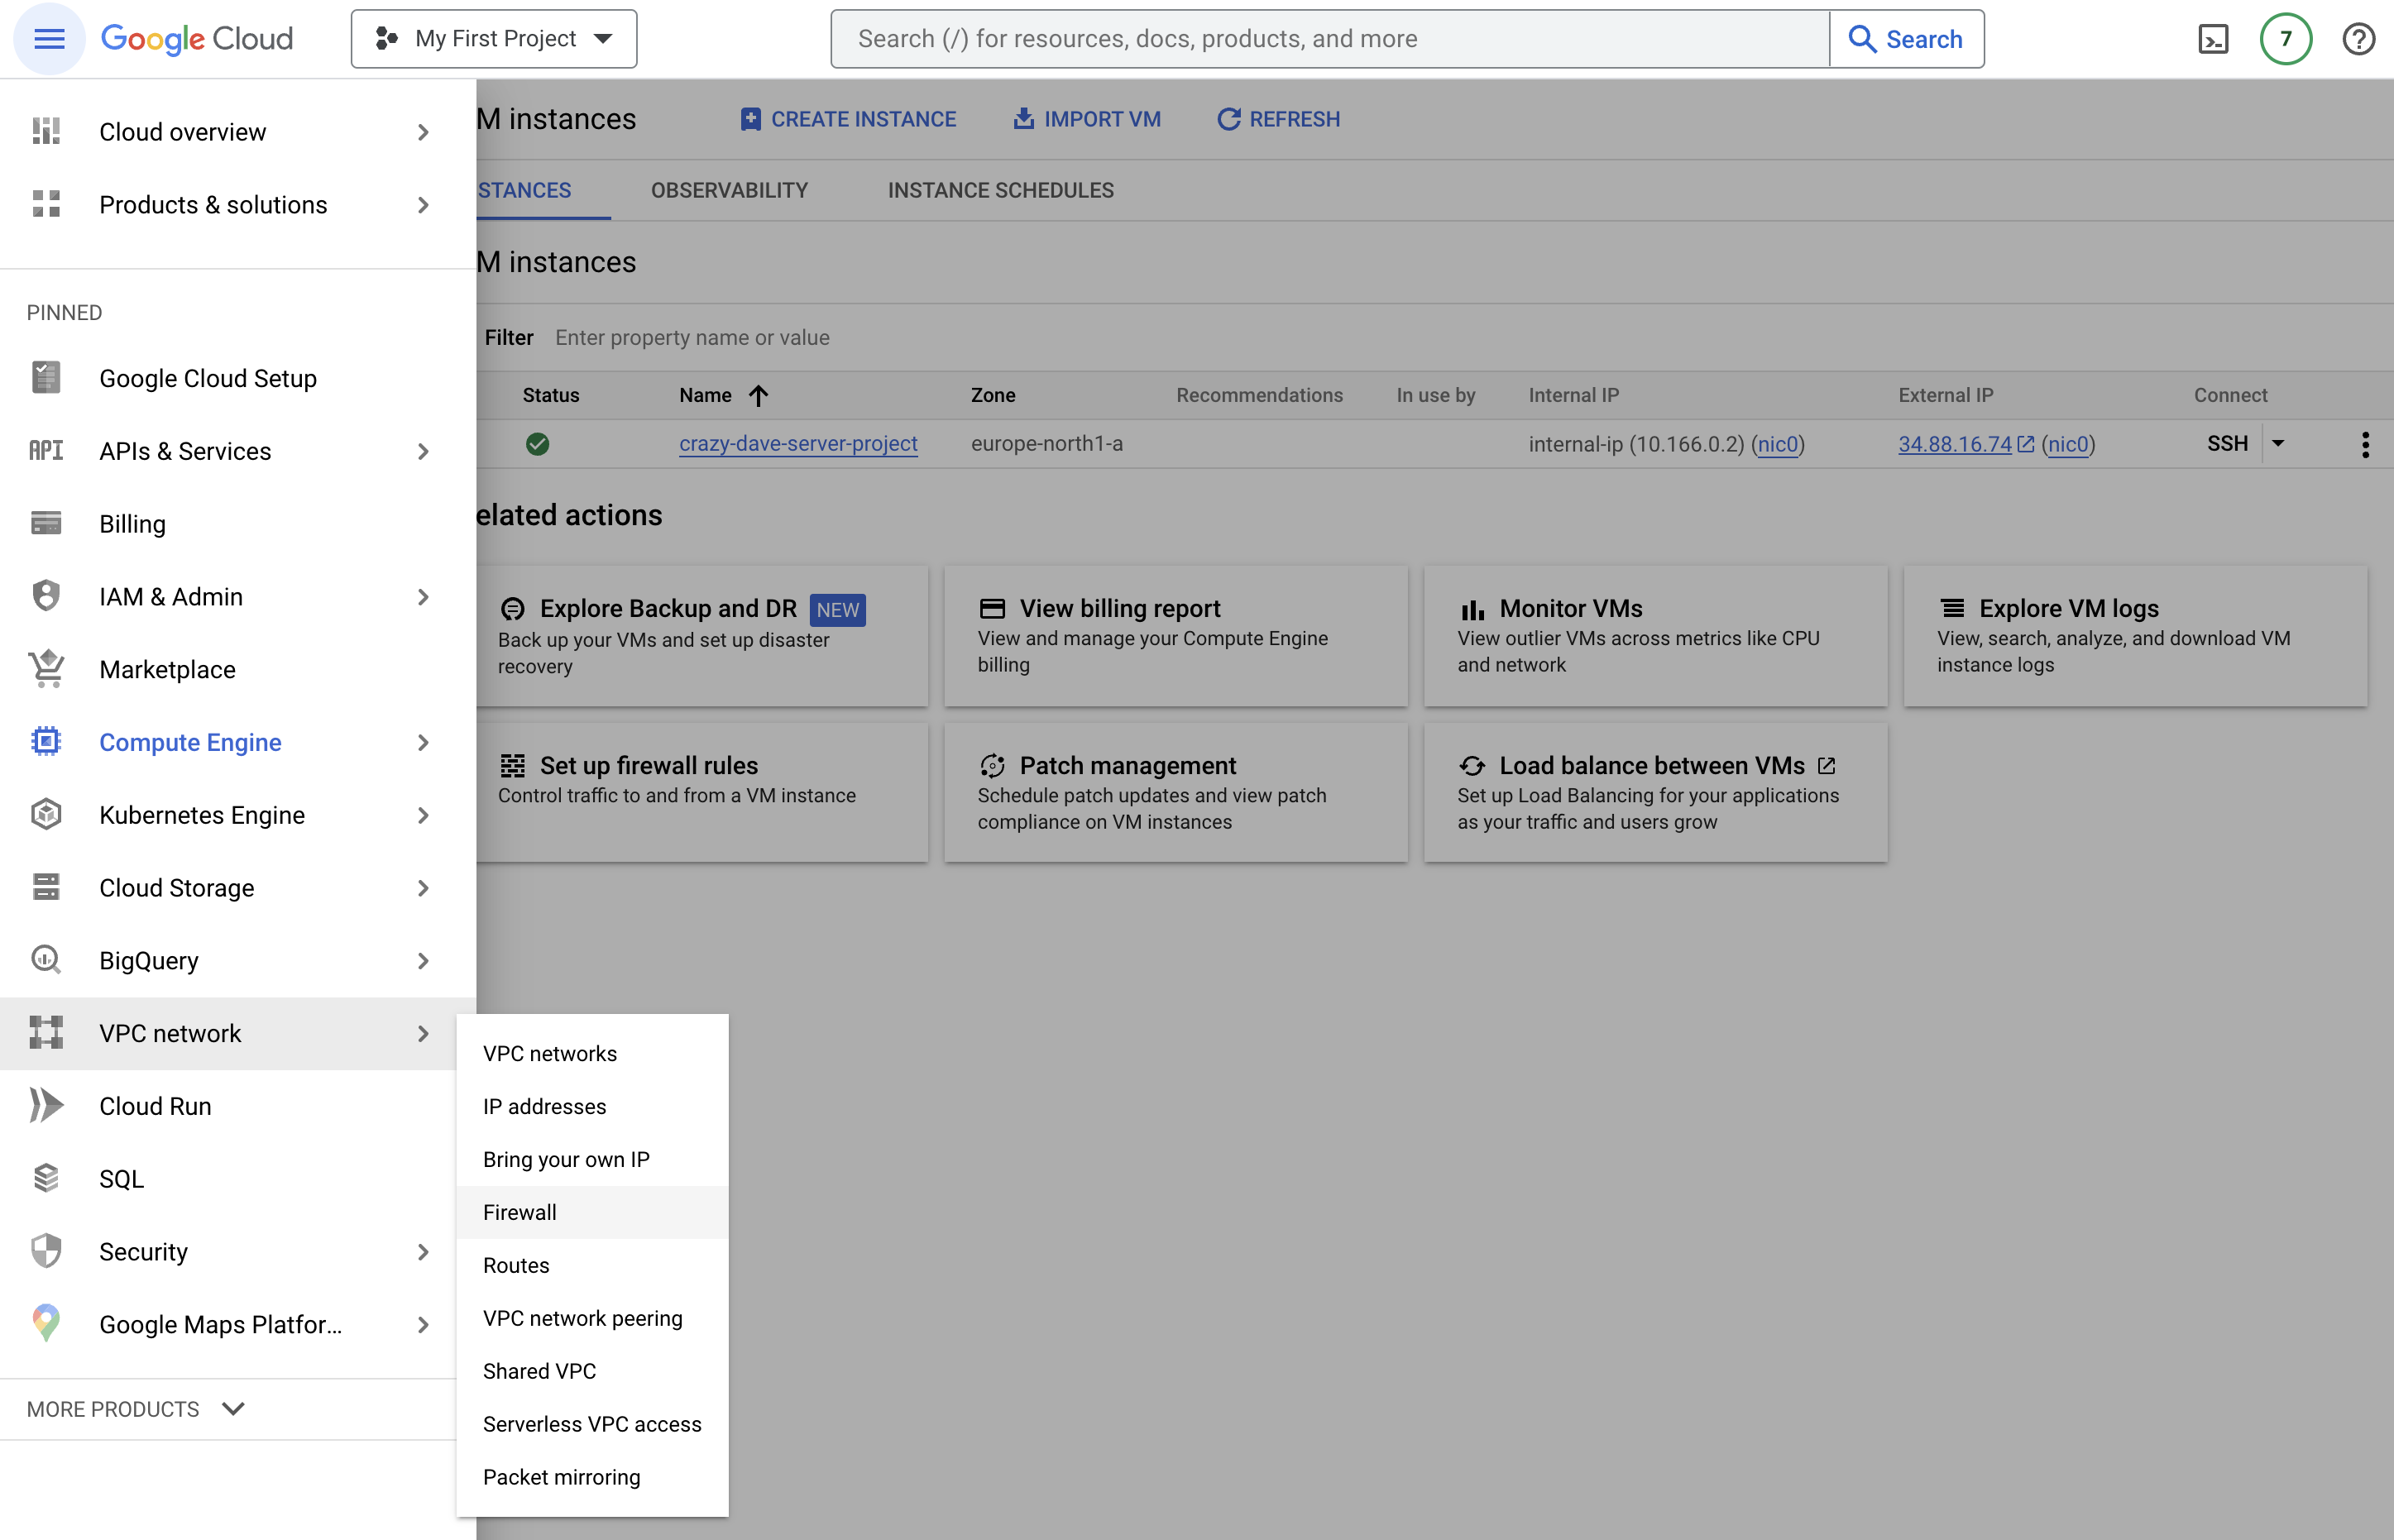
- In order to begin properly, you need to open certain machine ports. To achieve this, go to the burger menu inside your Google Cloud account and Navigate to VPC Network > Firewall.
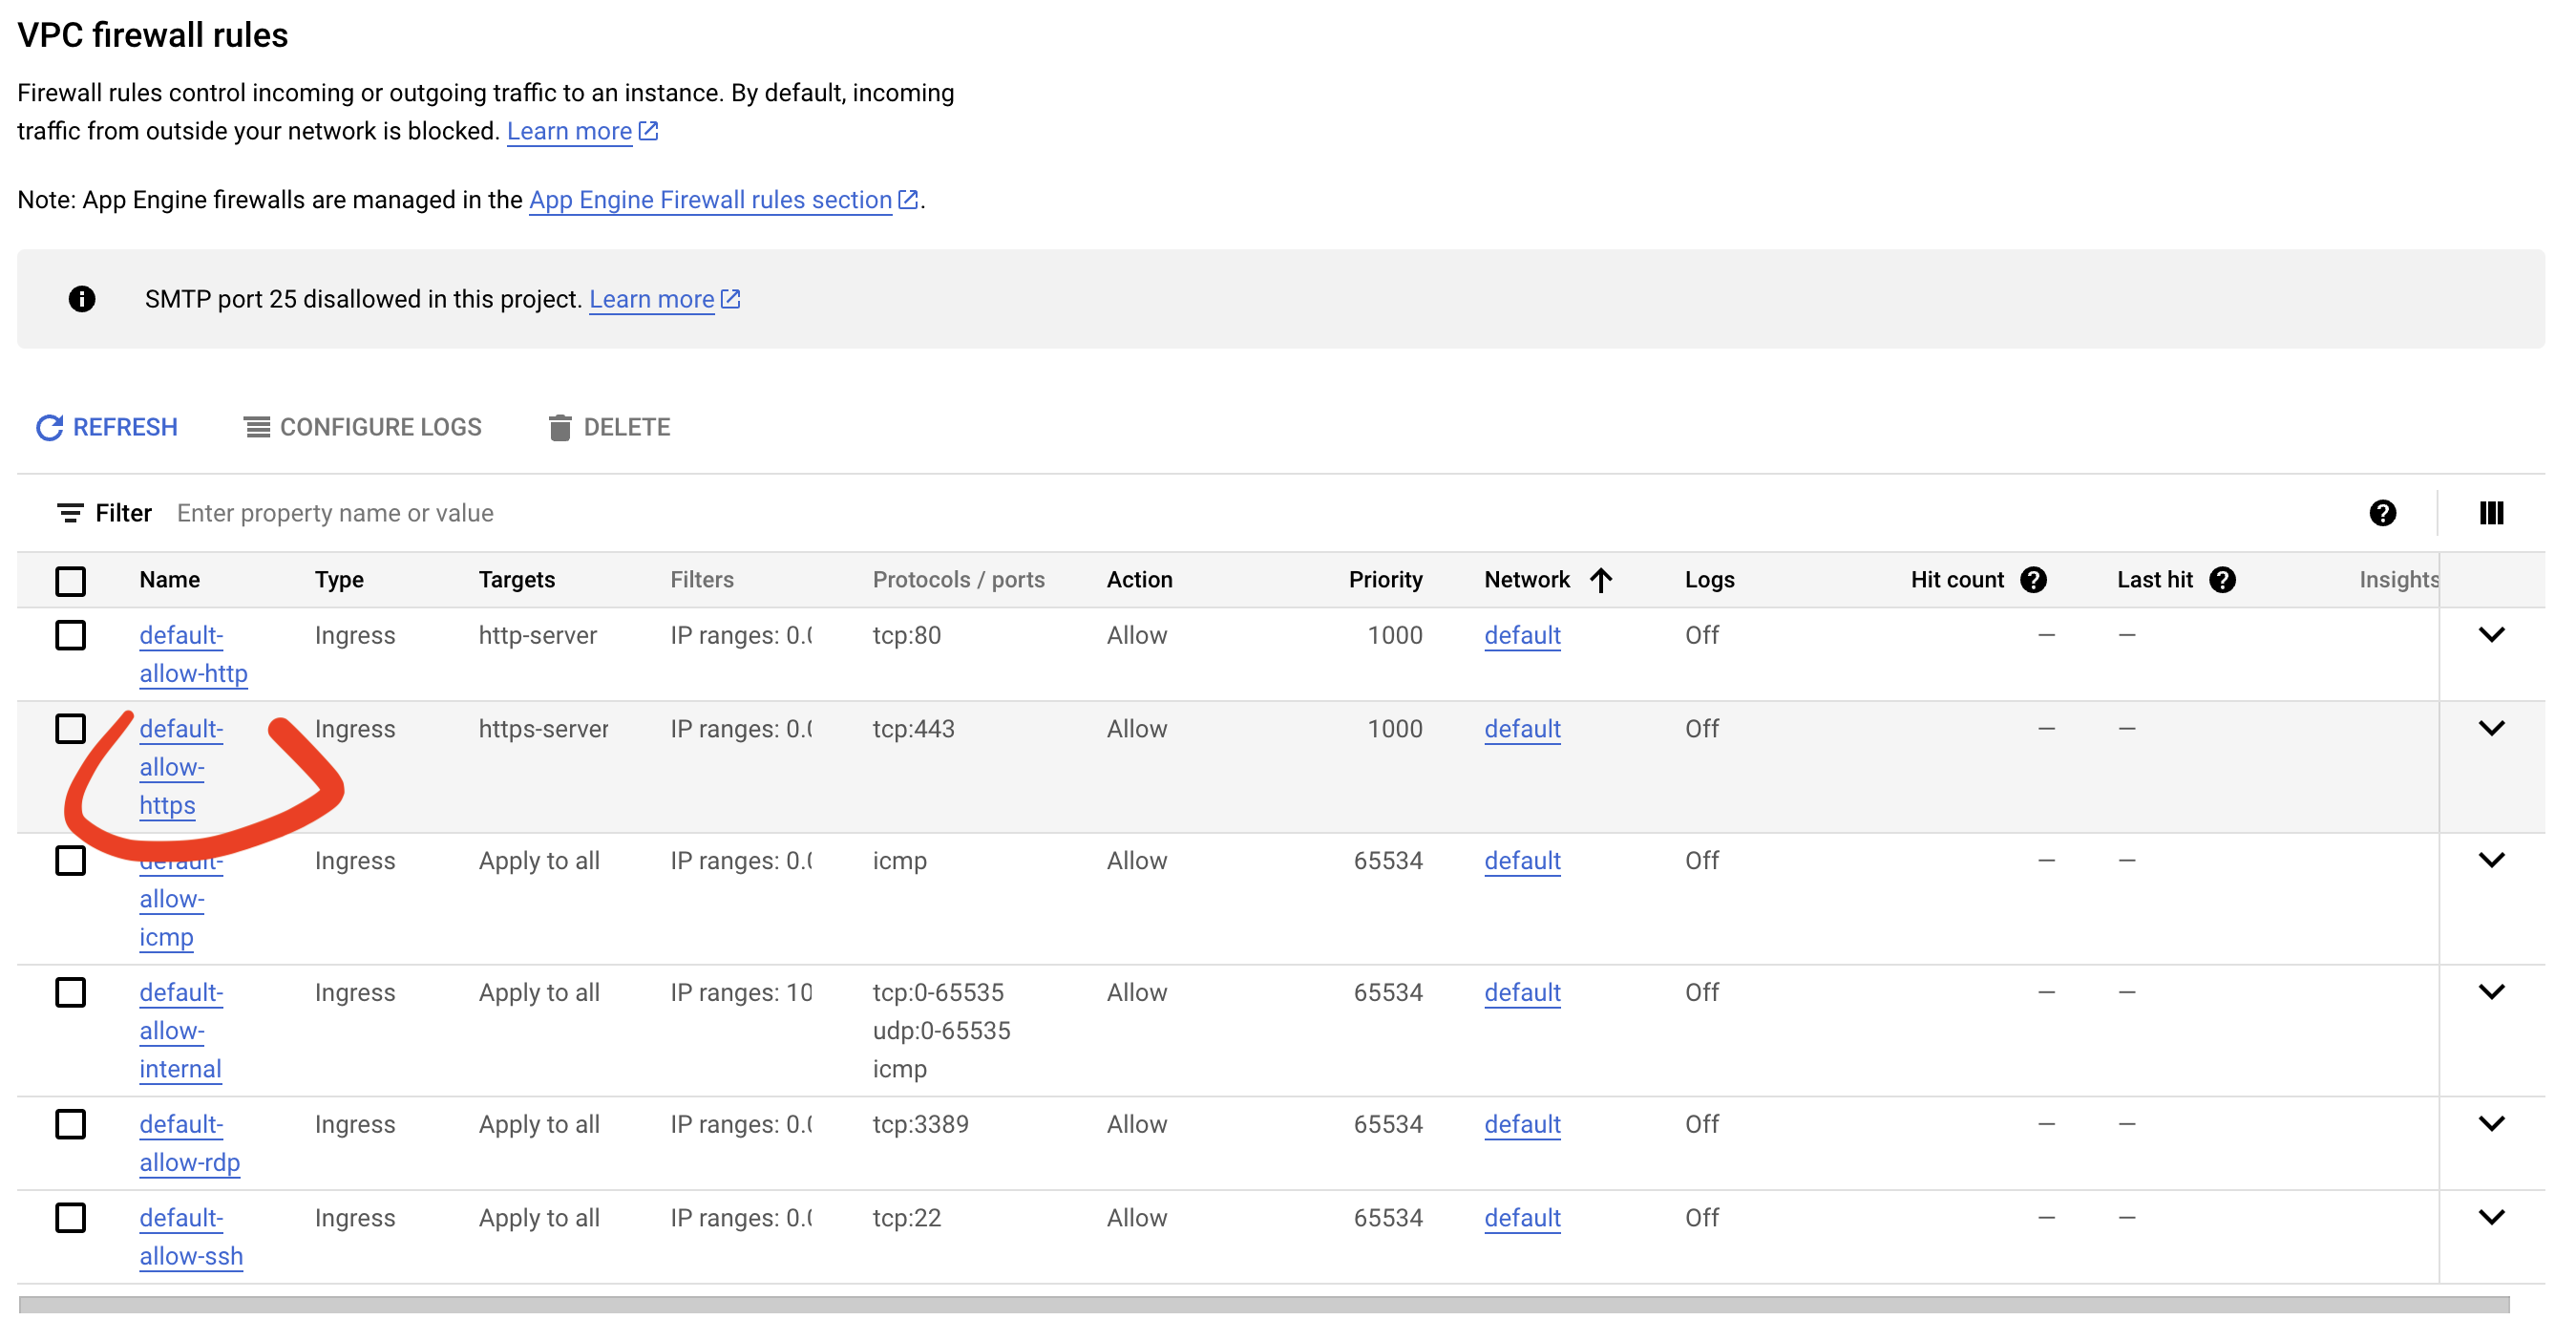
- Inside the VPC firewall rules section click on default-allow-https and then the top EDIT button.
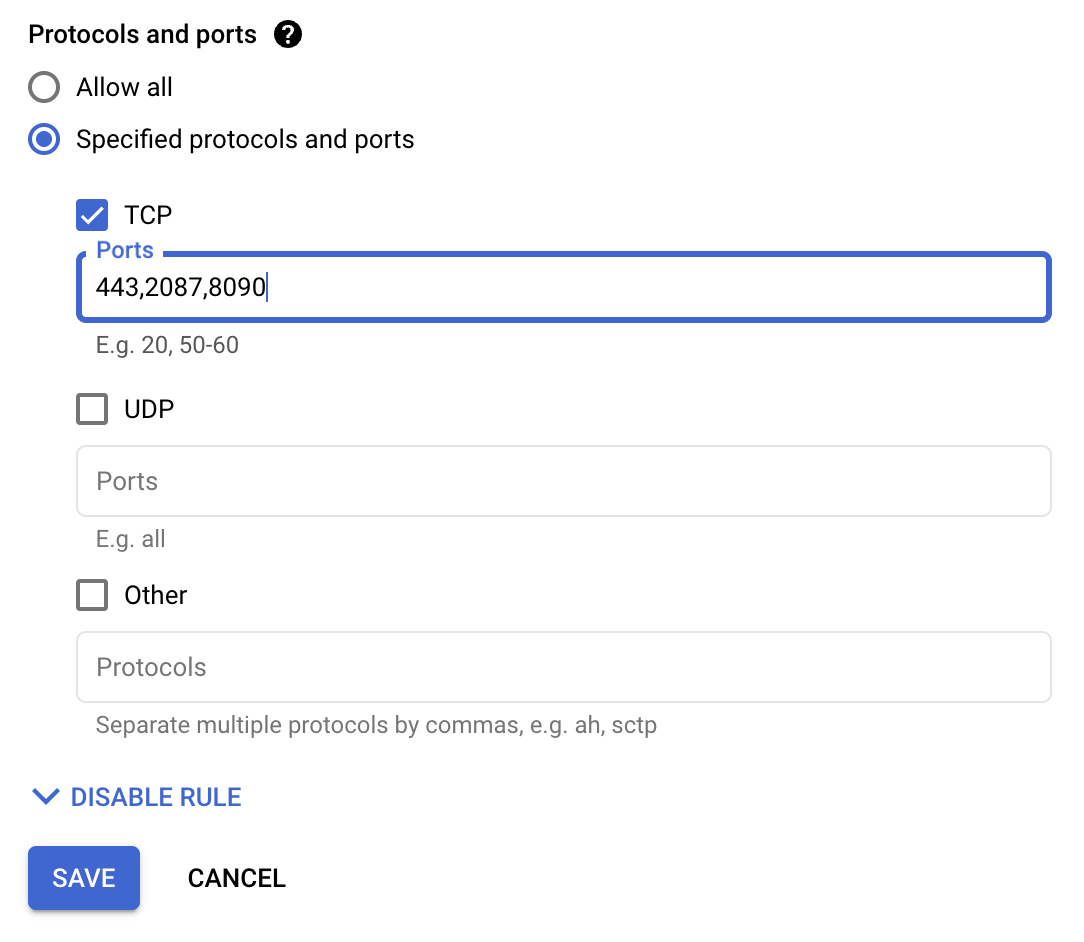
- Go to Protocols and ports, TCP and change from 443 to 443,2087,8090. Click the SAVE button and wait for the system to update. Once the system finishes updating the rules, it will automatically exit the editing mode.
- Using the burger menu, Navigate back to the VM Instances page and access the SSH Console from the Connect column.
- Right after opening the command console type in sudo su - and hit Enter to gain complete access. To start Cyberpanel installation process use the following command:
sh <(curl https://cyberpanel.net/install.sh || wget -O - https://cyberpanel.net/install.sh)
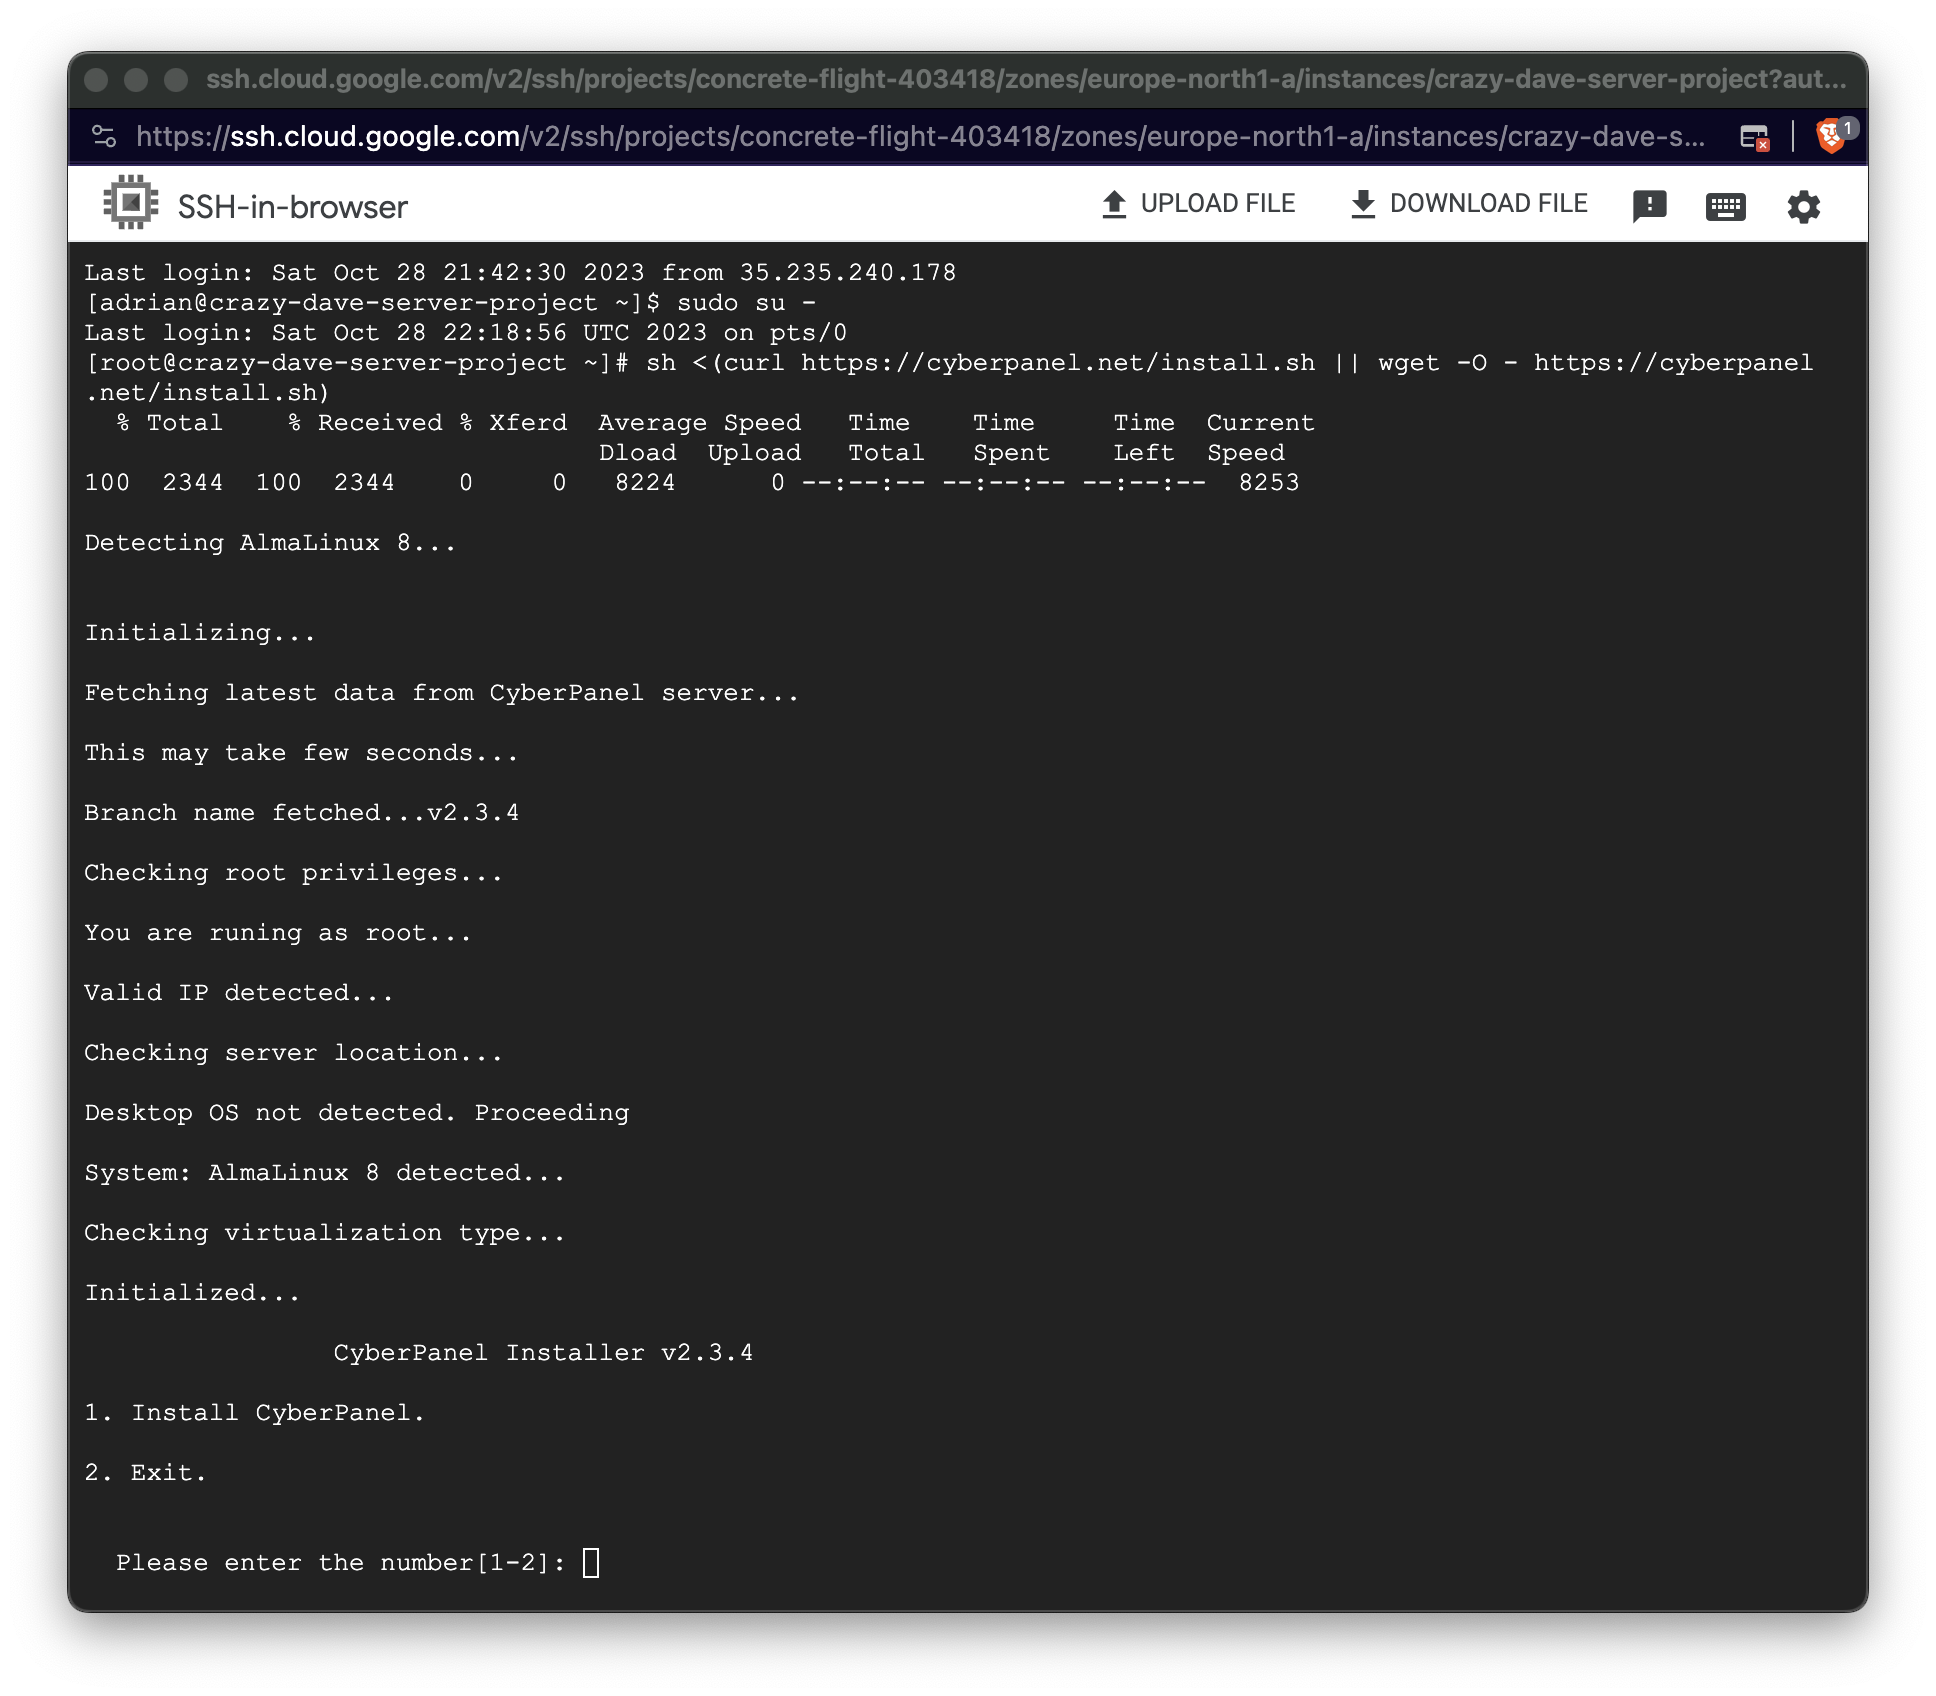
- The system will now ask you if you want to install Cyberpanel. Using your keyboard press 1 then hit Enter.
- Install CyberPanel with OpenLiteSpeed using the same method as above, press 1 then Enter
- Install Full service for CyberPanel? This will include PowerDNS, Postfix and Pure-FTPd, type Y then hit Enter
- Do you want to setup Remote MySQL? (This will skip installation of local MySQL), type N then hit Enter

- Press Enter key to continue with latest version or Enter specific version such as: 1.9.4 , 2.0.1 , 2.0.2 ...etc
- Please choose to use default admin password 1234567, randomly generate one (recommended) or specify the admin password? Choose [d]fault, [r]andom or [s]et password: [d/r/s] - type d then hit Enter
- Do you wish to install Memcached process and its PHP extension? - type Y then hit Enter
- Do you wish to install Redis process and its PHP extension? - type n then hit Enter
- Would you like to set up a WatchDog (beta) for Web service and Database service? - type Yes then hit Enter

- Now hold tight and let the system do its job. Make sure the computer does not sleep, otherwise the command console will disconnect and you'll loose track and access.
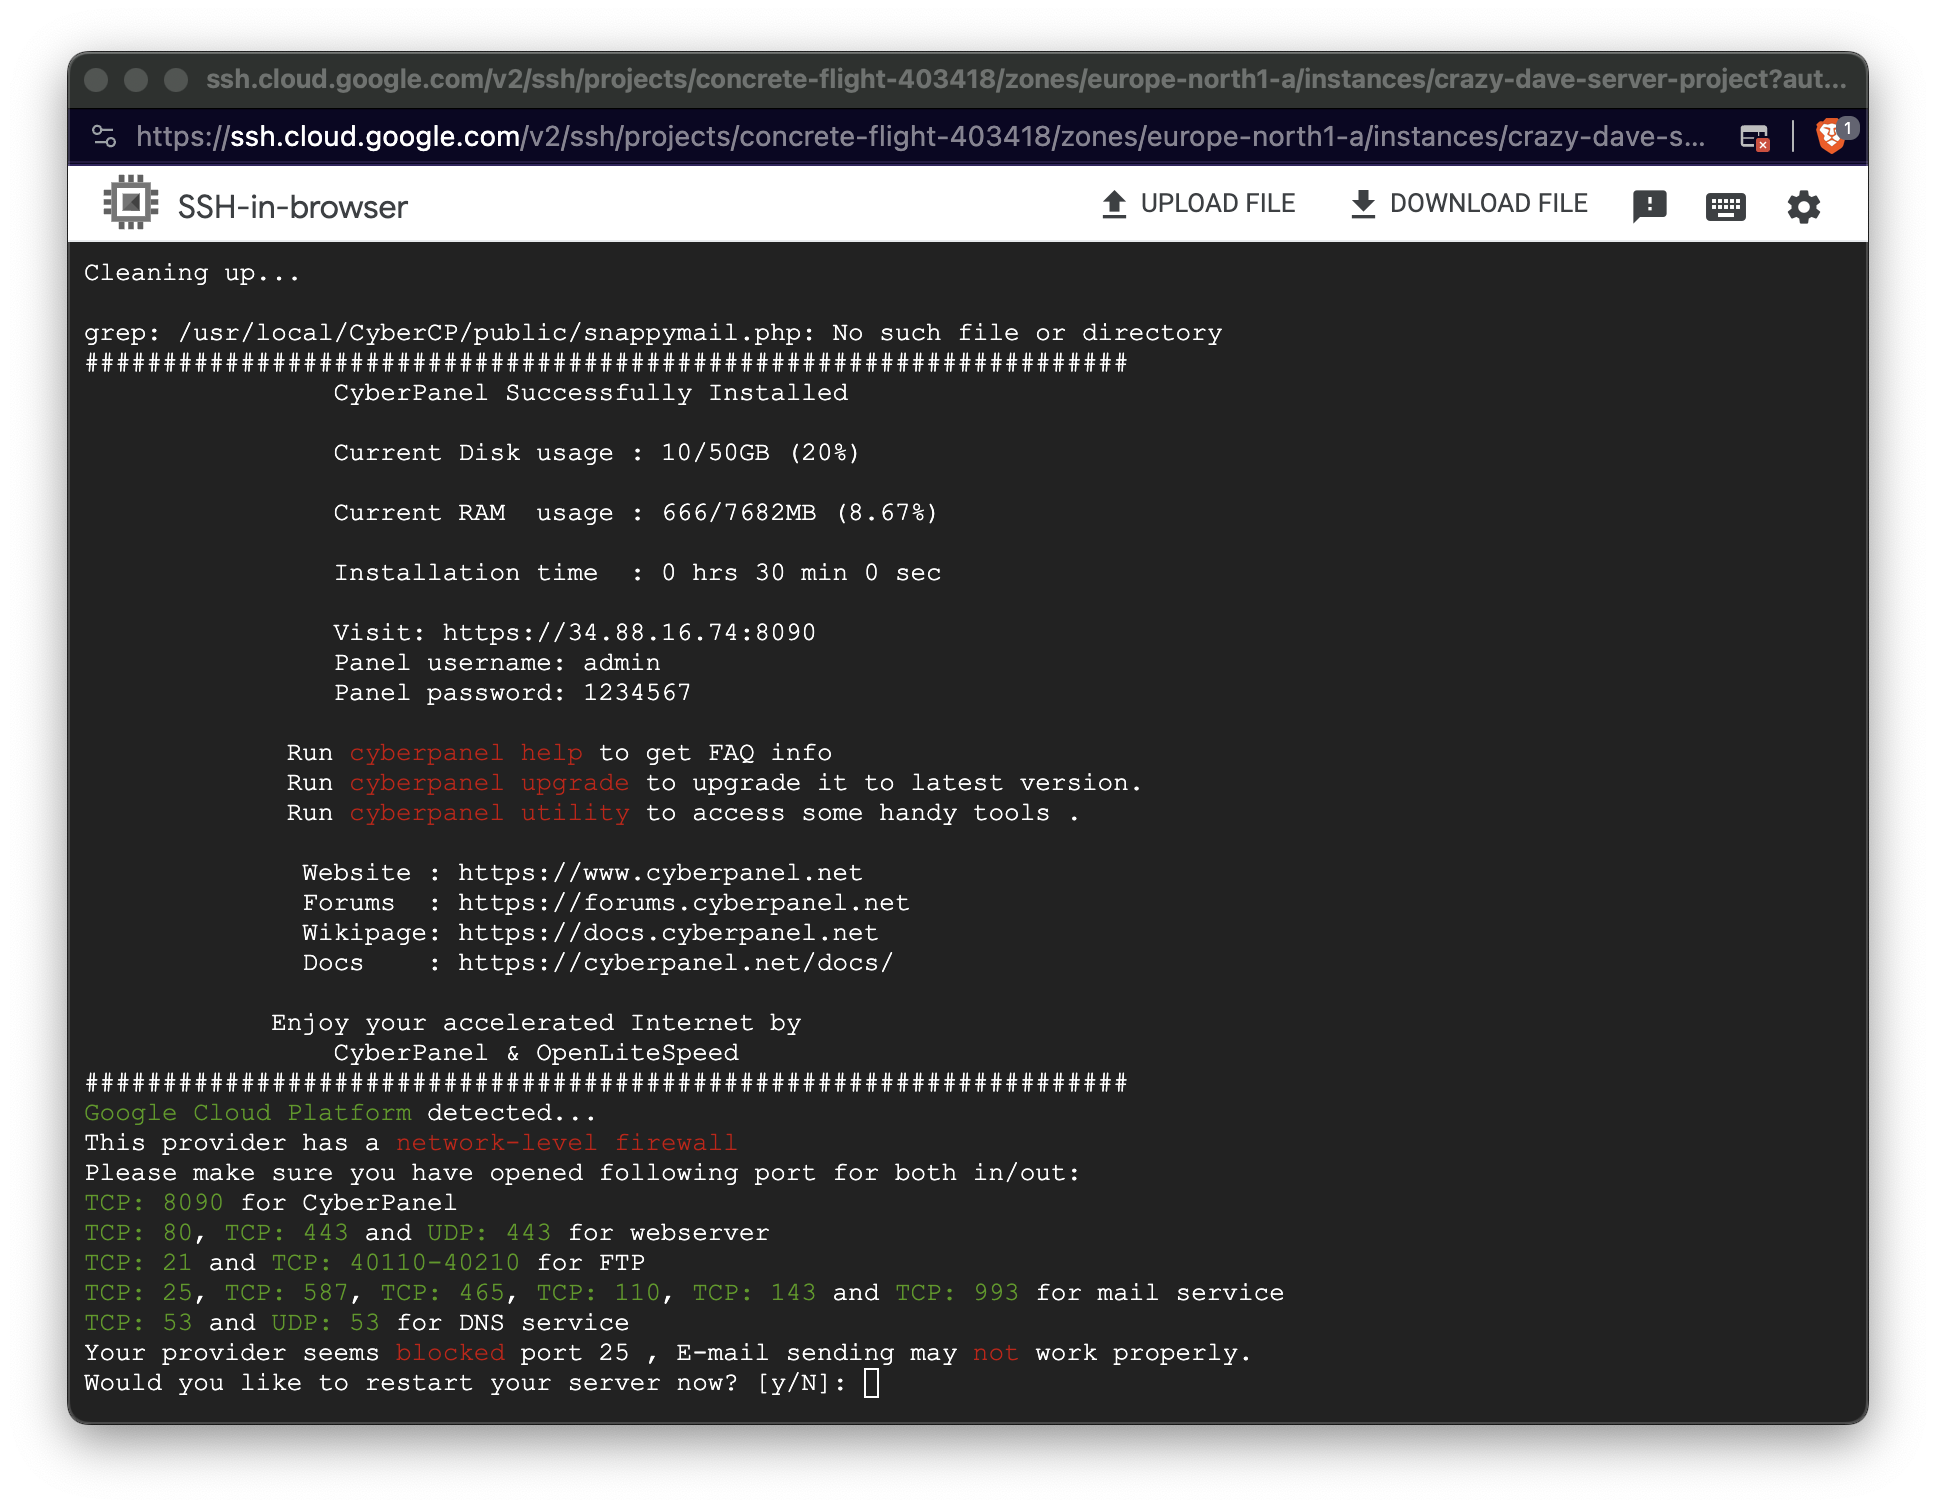
- After the process is finished, the system will ask you Would you like to restart your server now? [y/N] - type y then hit Enter. Restarting your server right after Cyberpanel finishes installing is good practice. Know that once you hit the Enter button, the command console will disconnect and it's imperative to make a copy with your server details.
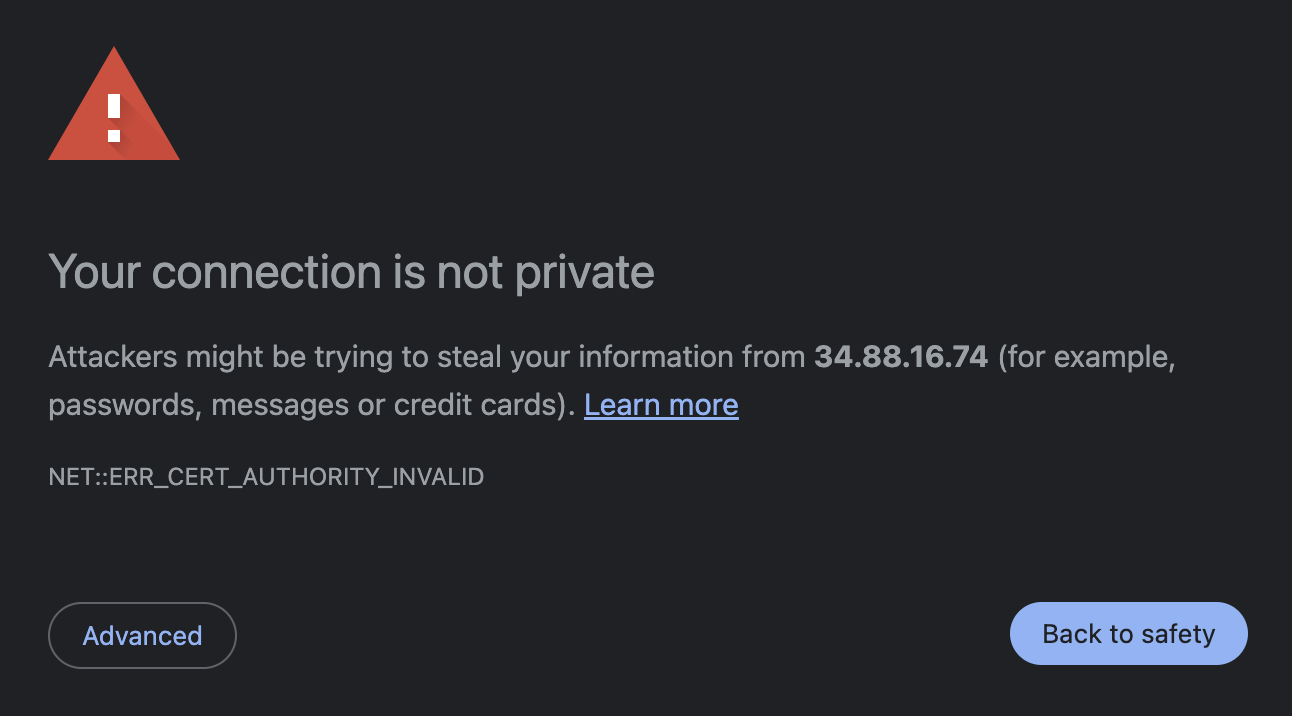
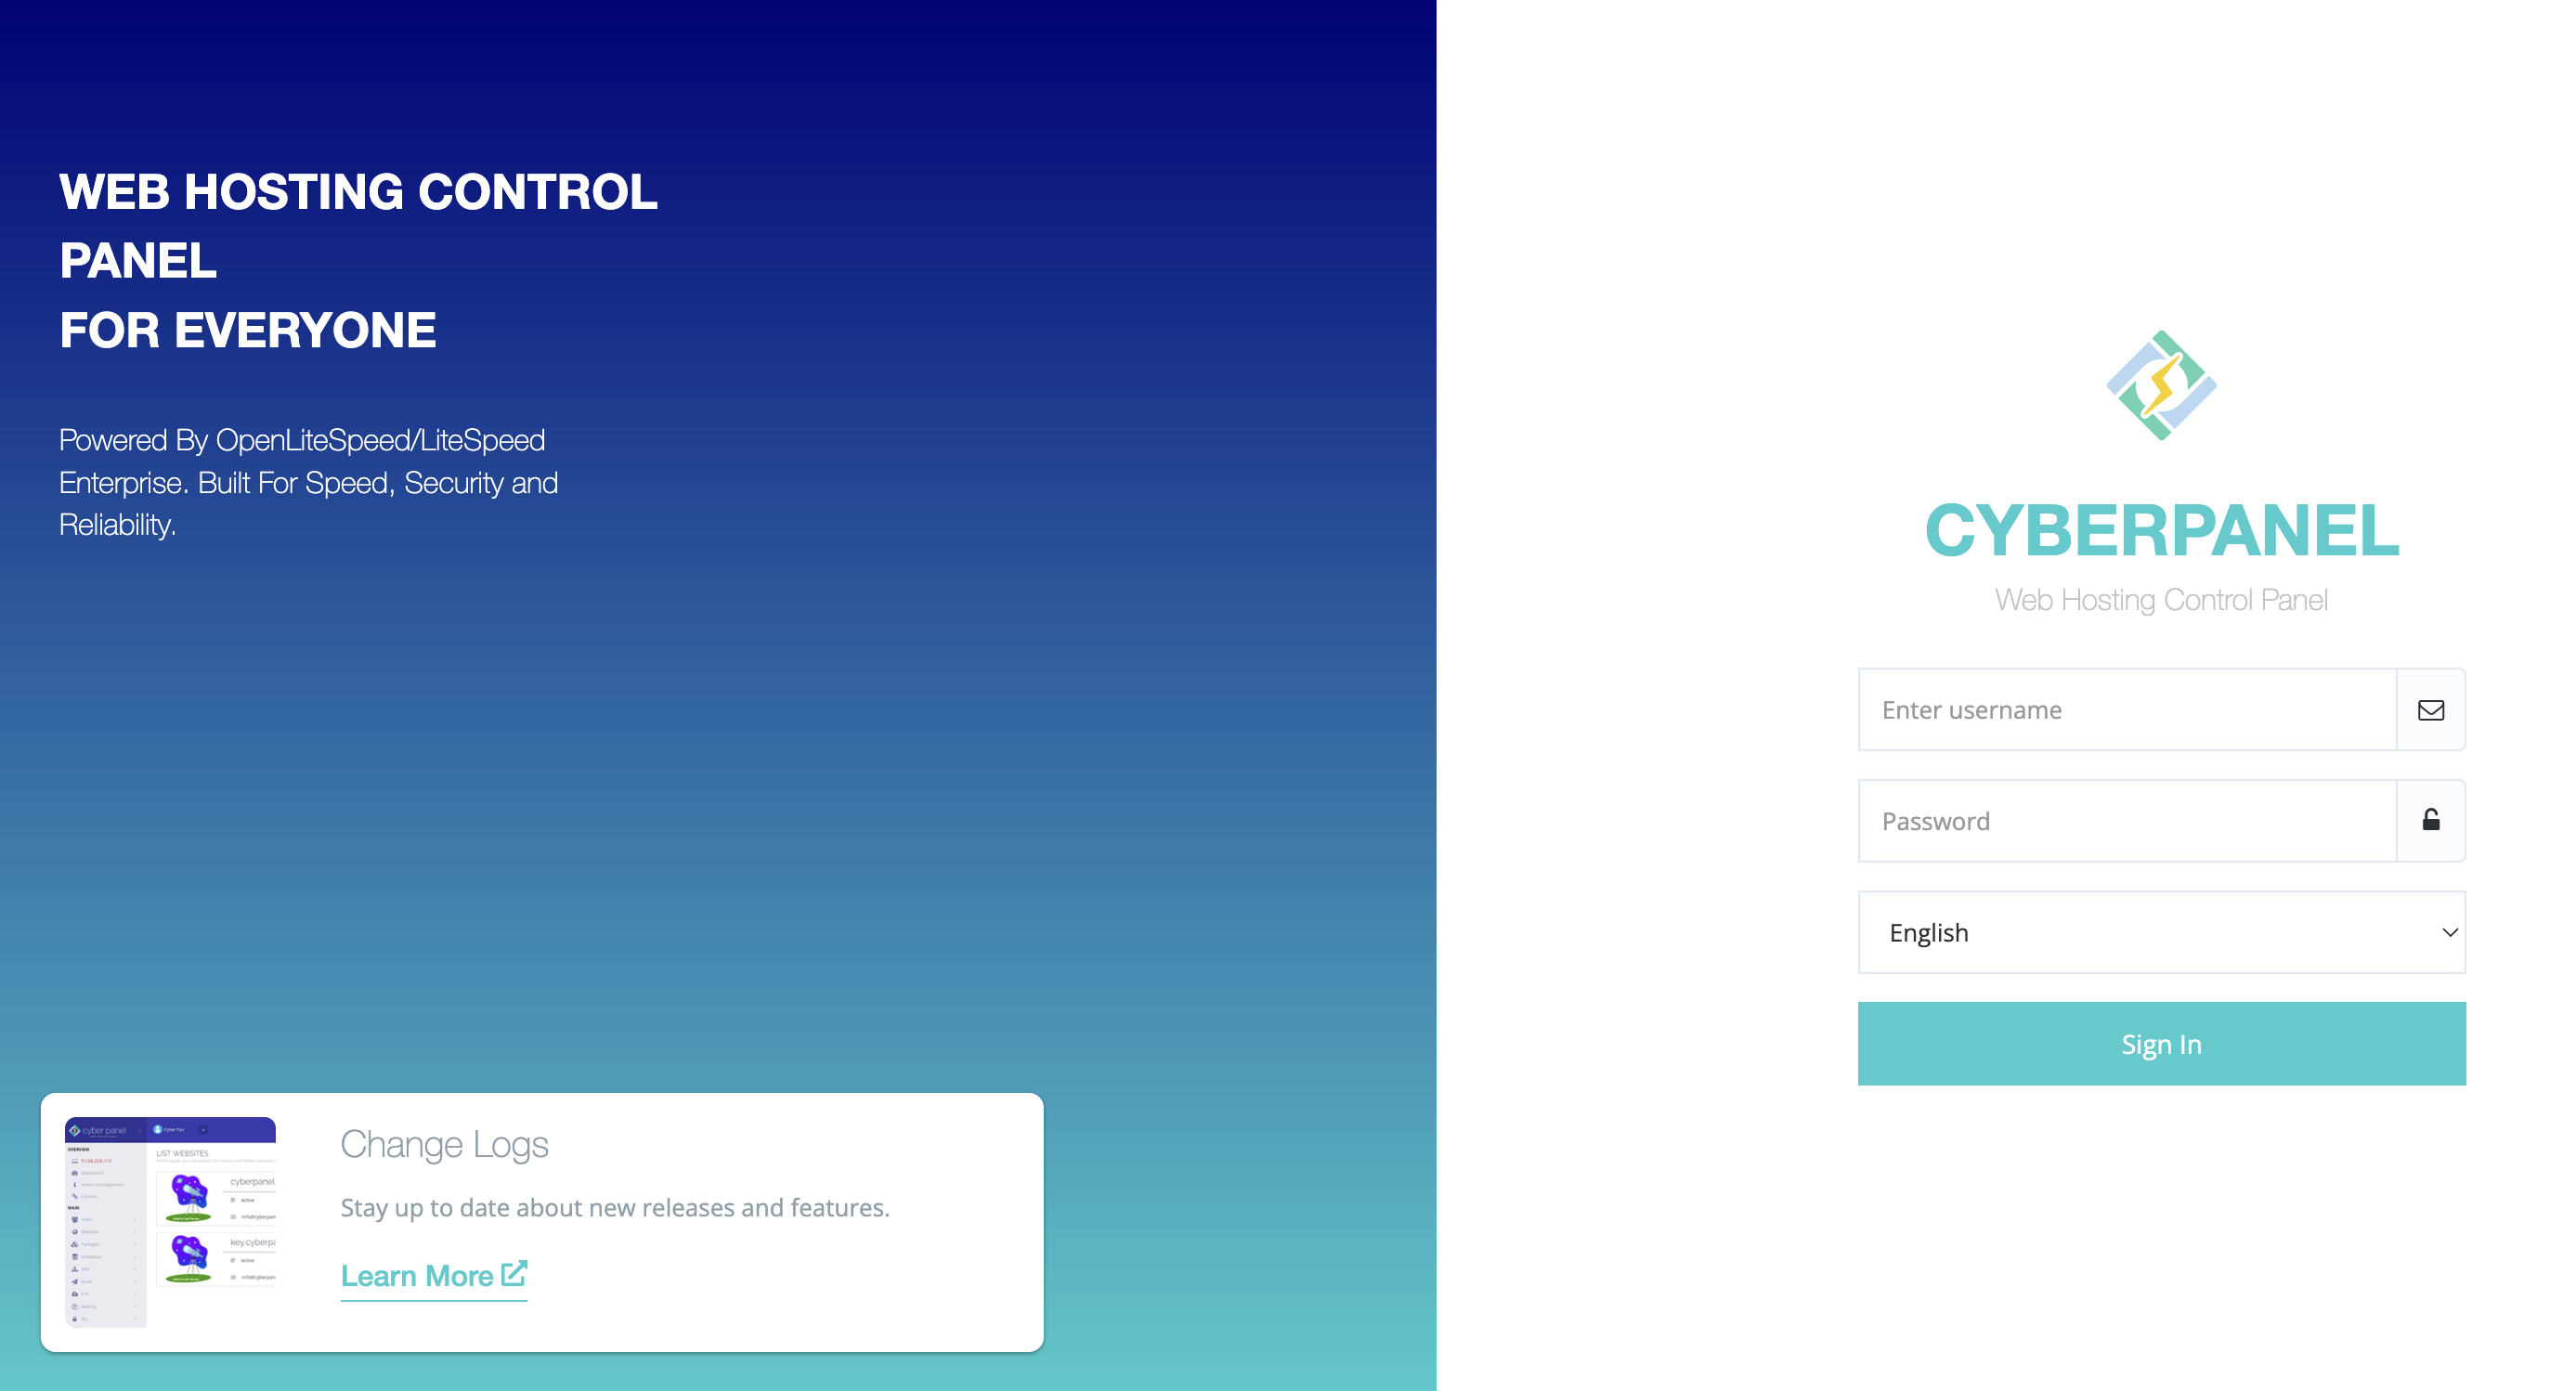
- As you can see the machine is giving you clear instructions on how to access your server (Visit: https://34.88.16.74:8090). Copy and paste the link inside your browser in order to gain access to your Cyberpanel interface. Because it is not yet a secure connection, the browser will tell you that Your connection is not private. Click the Advanced button then click on Proceed to 34.88.16.74 (unsafe). Know that these messages may display differently depending on your browser type.
- In order to access you server graphical interface you need to type in your username and password. These details were mentioned right after the installation process finished.
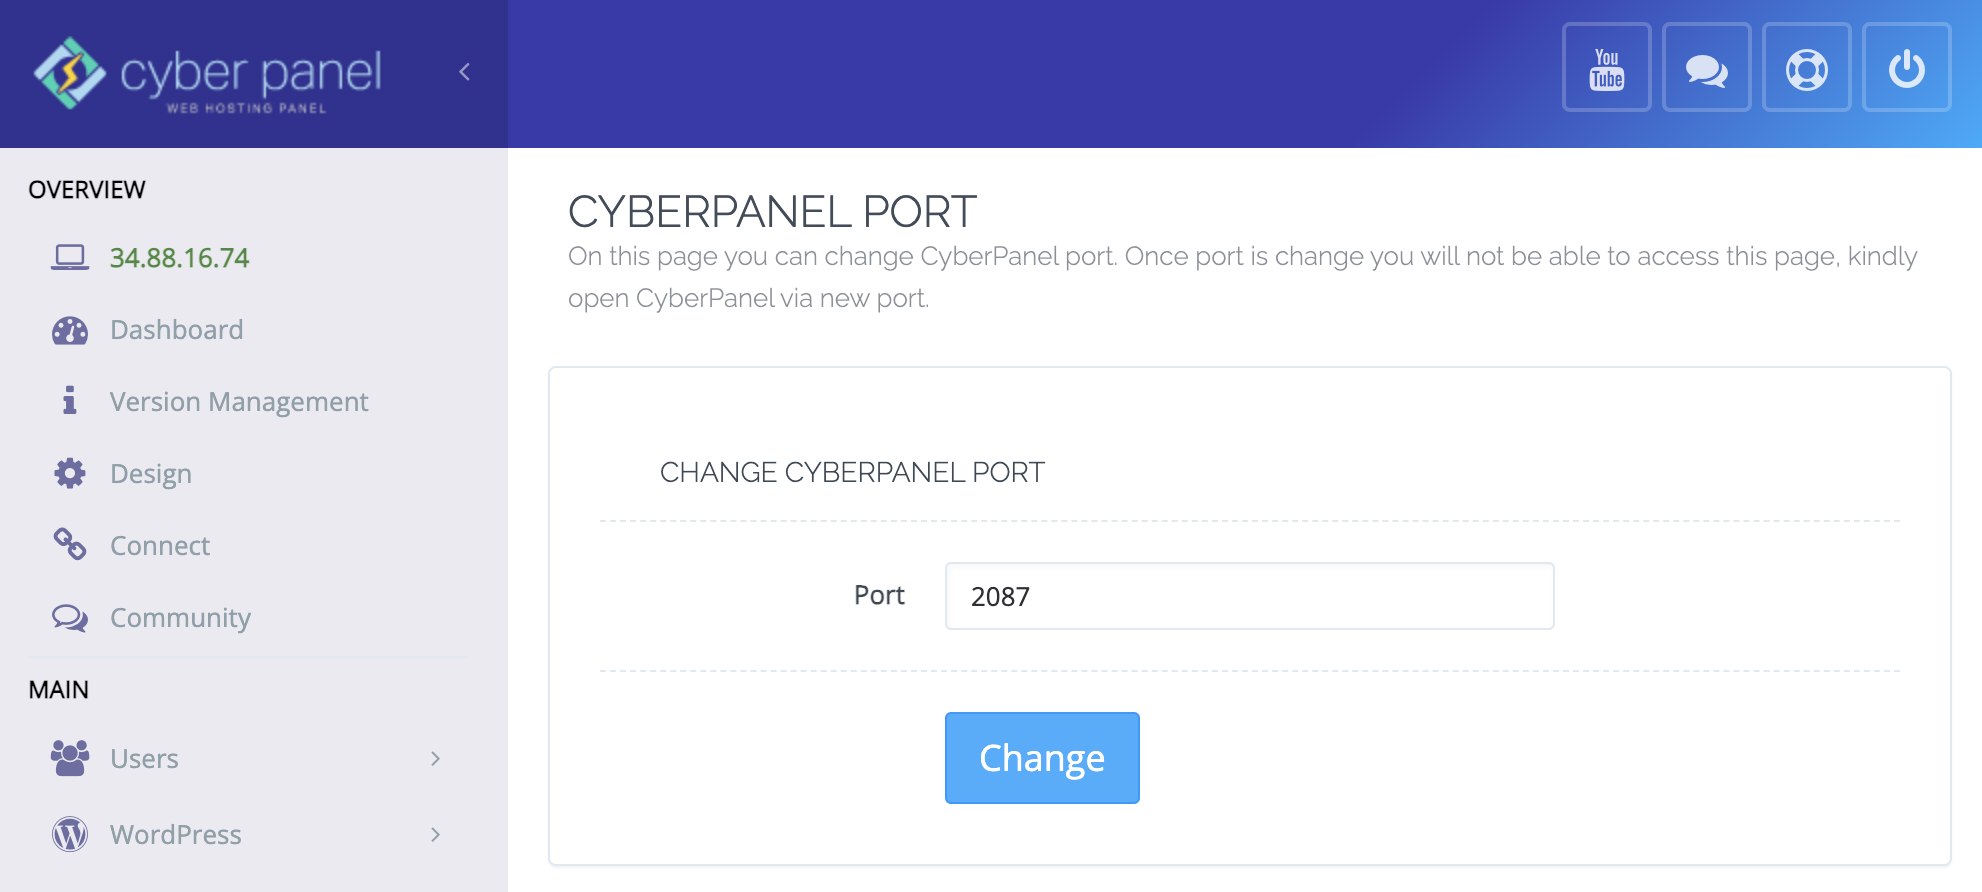
- For security purposes, first thing you should do after you login, navigate using the left side menu to Server Status > Change Port. Replace 8090 with 2087, then hit the Change button. Once the settings are saved, you will no longer be able to access your server using port 8090 (https://34.88.16.74:8090/), being said replace it with 2087 inside the link.
- First thing to do is to setup an encrypted line between your domain name and the server. This way you'll be able to protect data transfers from any attackers. The reason why we are using Cloudflare is strictly related to its Enterprise grade services. You'll learn that Cloudflare has a mechanism which allows you to hide the real IP Address of your server. Integrated services will force encryption on all connections and keep away the bad things that could happen to you.
- Being said, go yo your Cloudflare dashboard.
- Navigate to Websites, then choose the domain name you will be using for server connection.
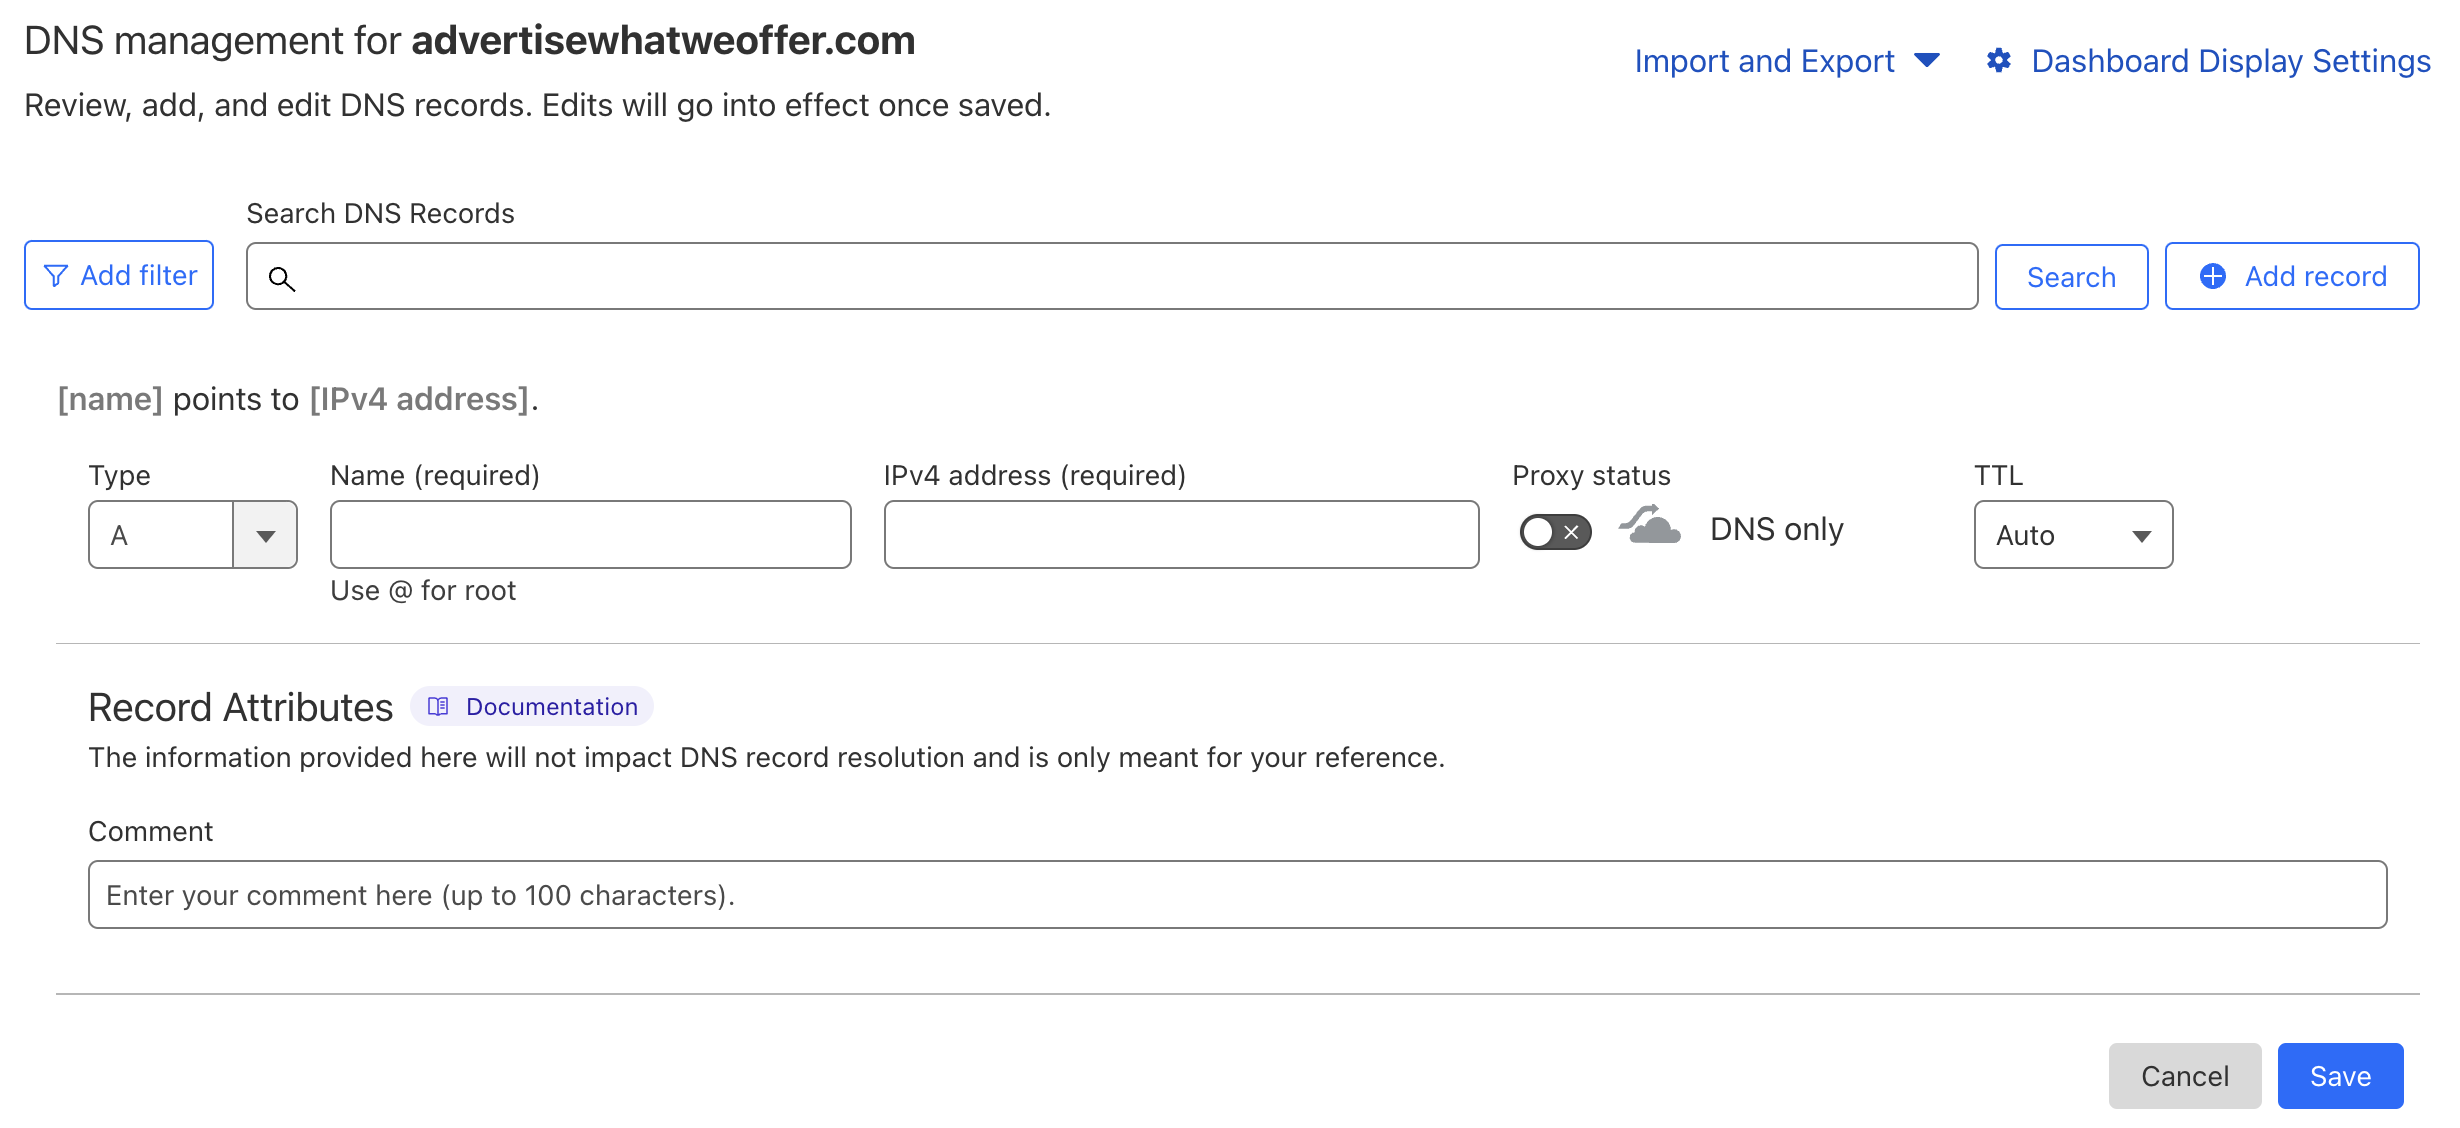
- Through the left side menu, go to DNS > Records. In this page you need to press the Add record button. This action will display new fields for you to fill in.
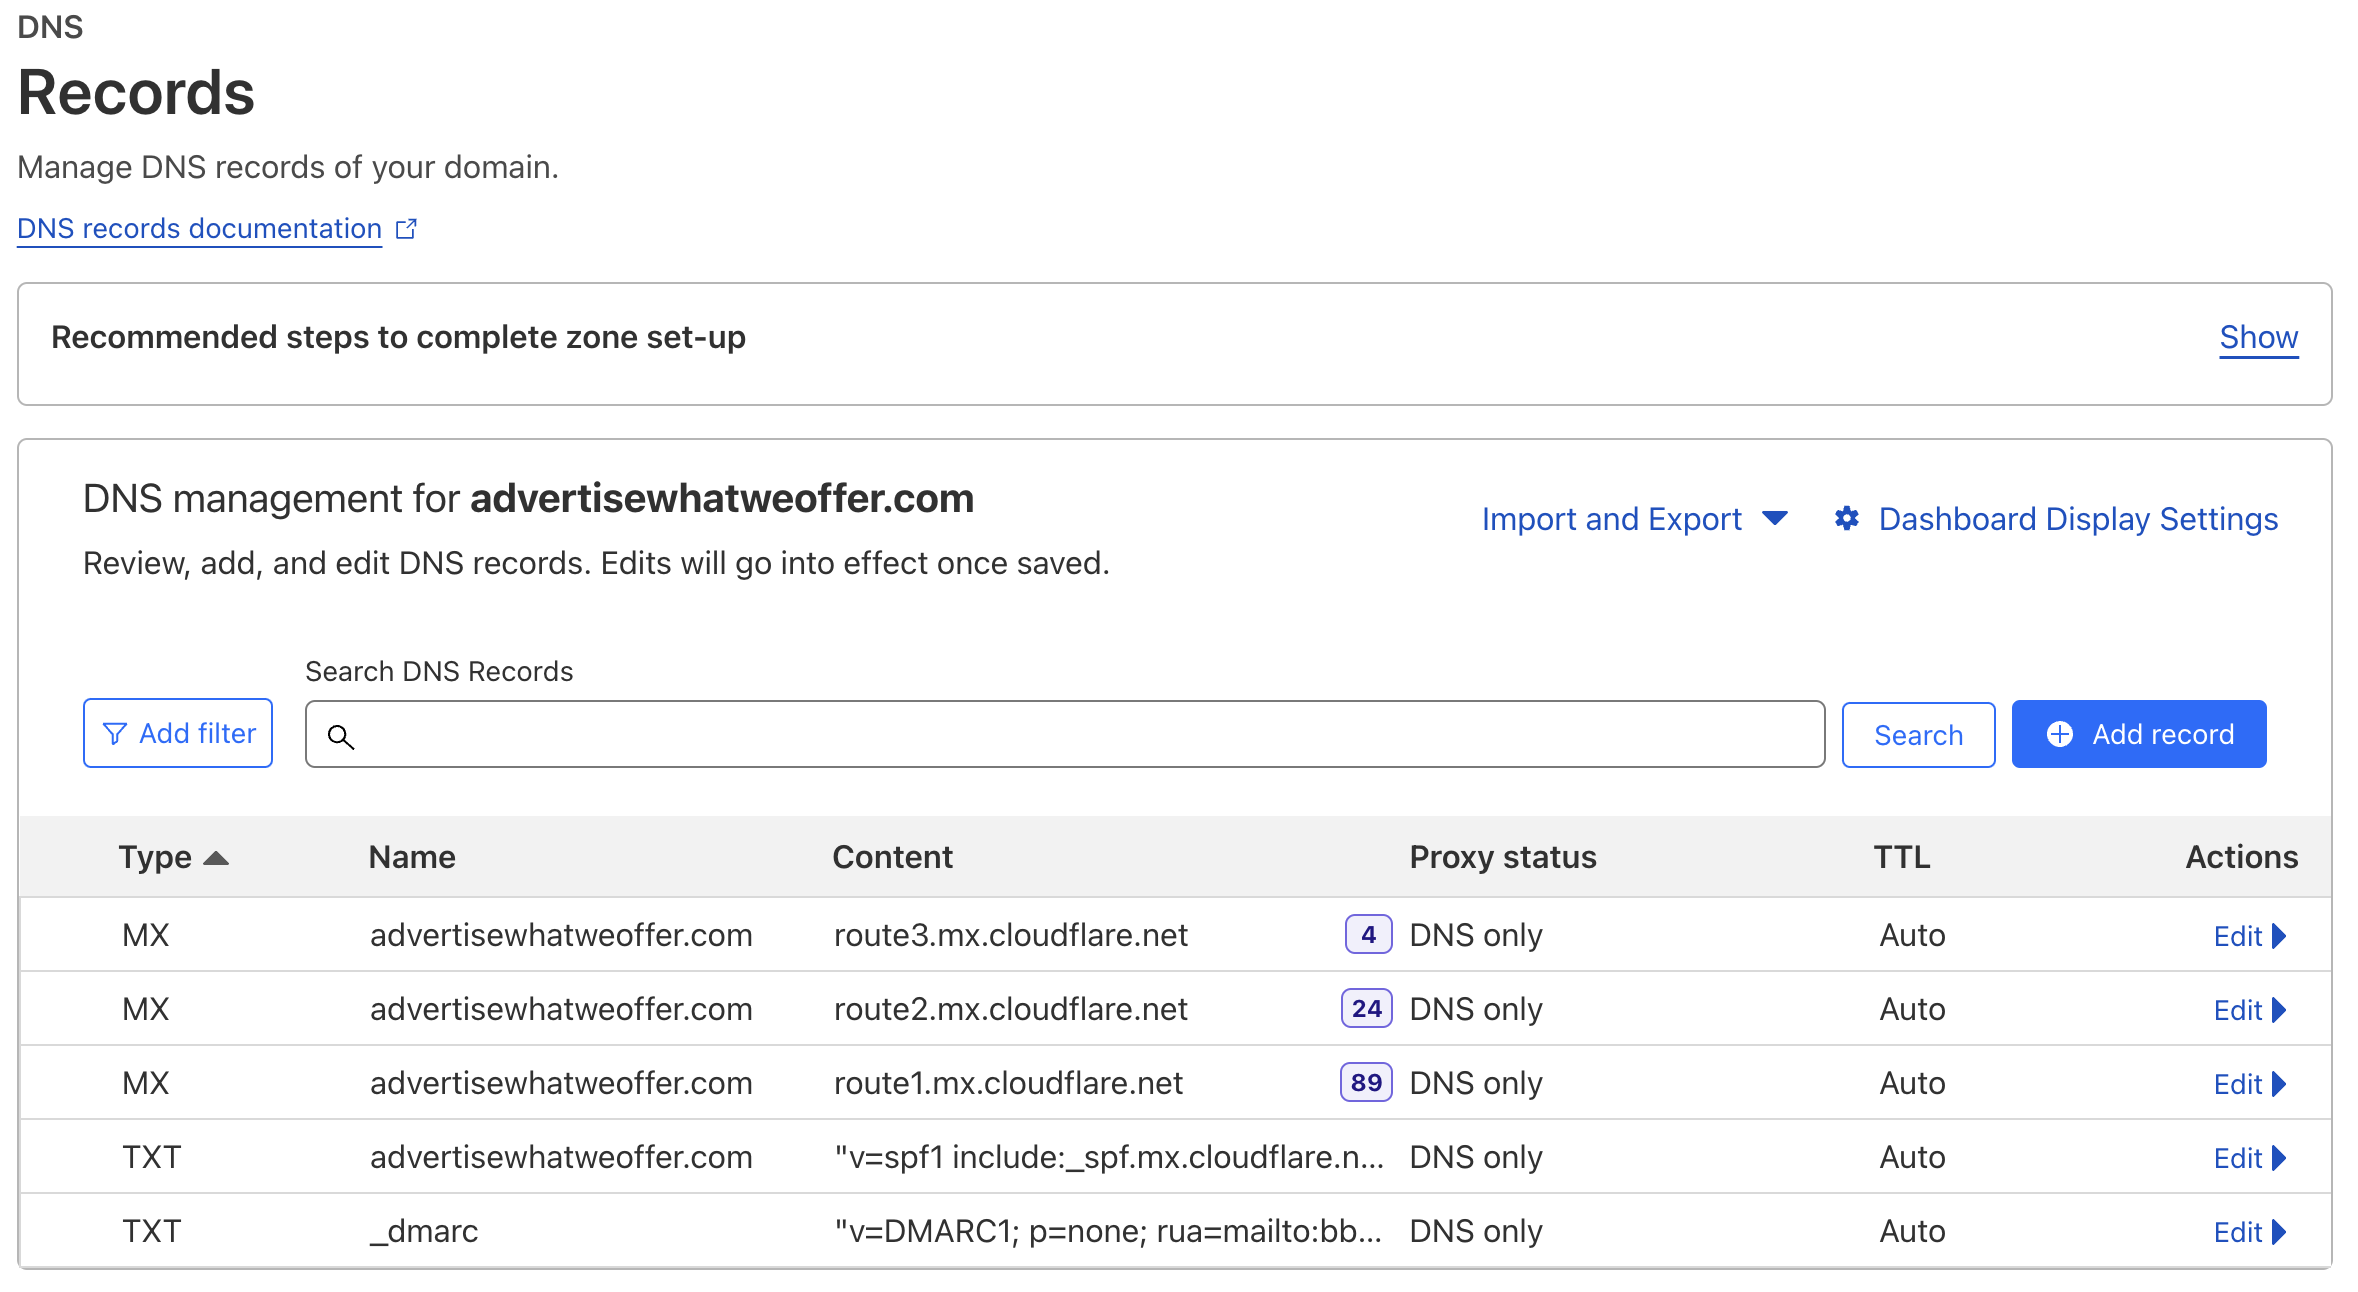
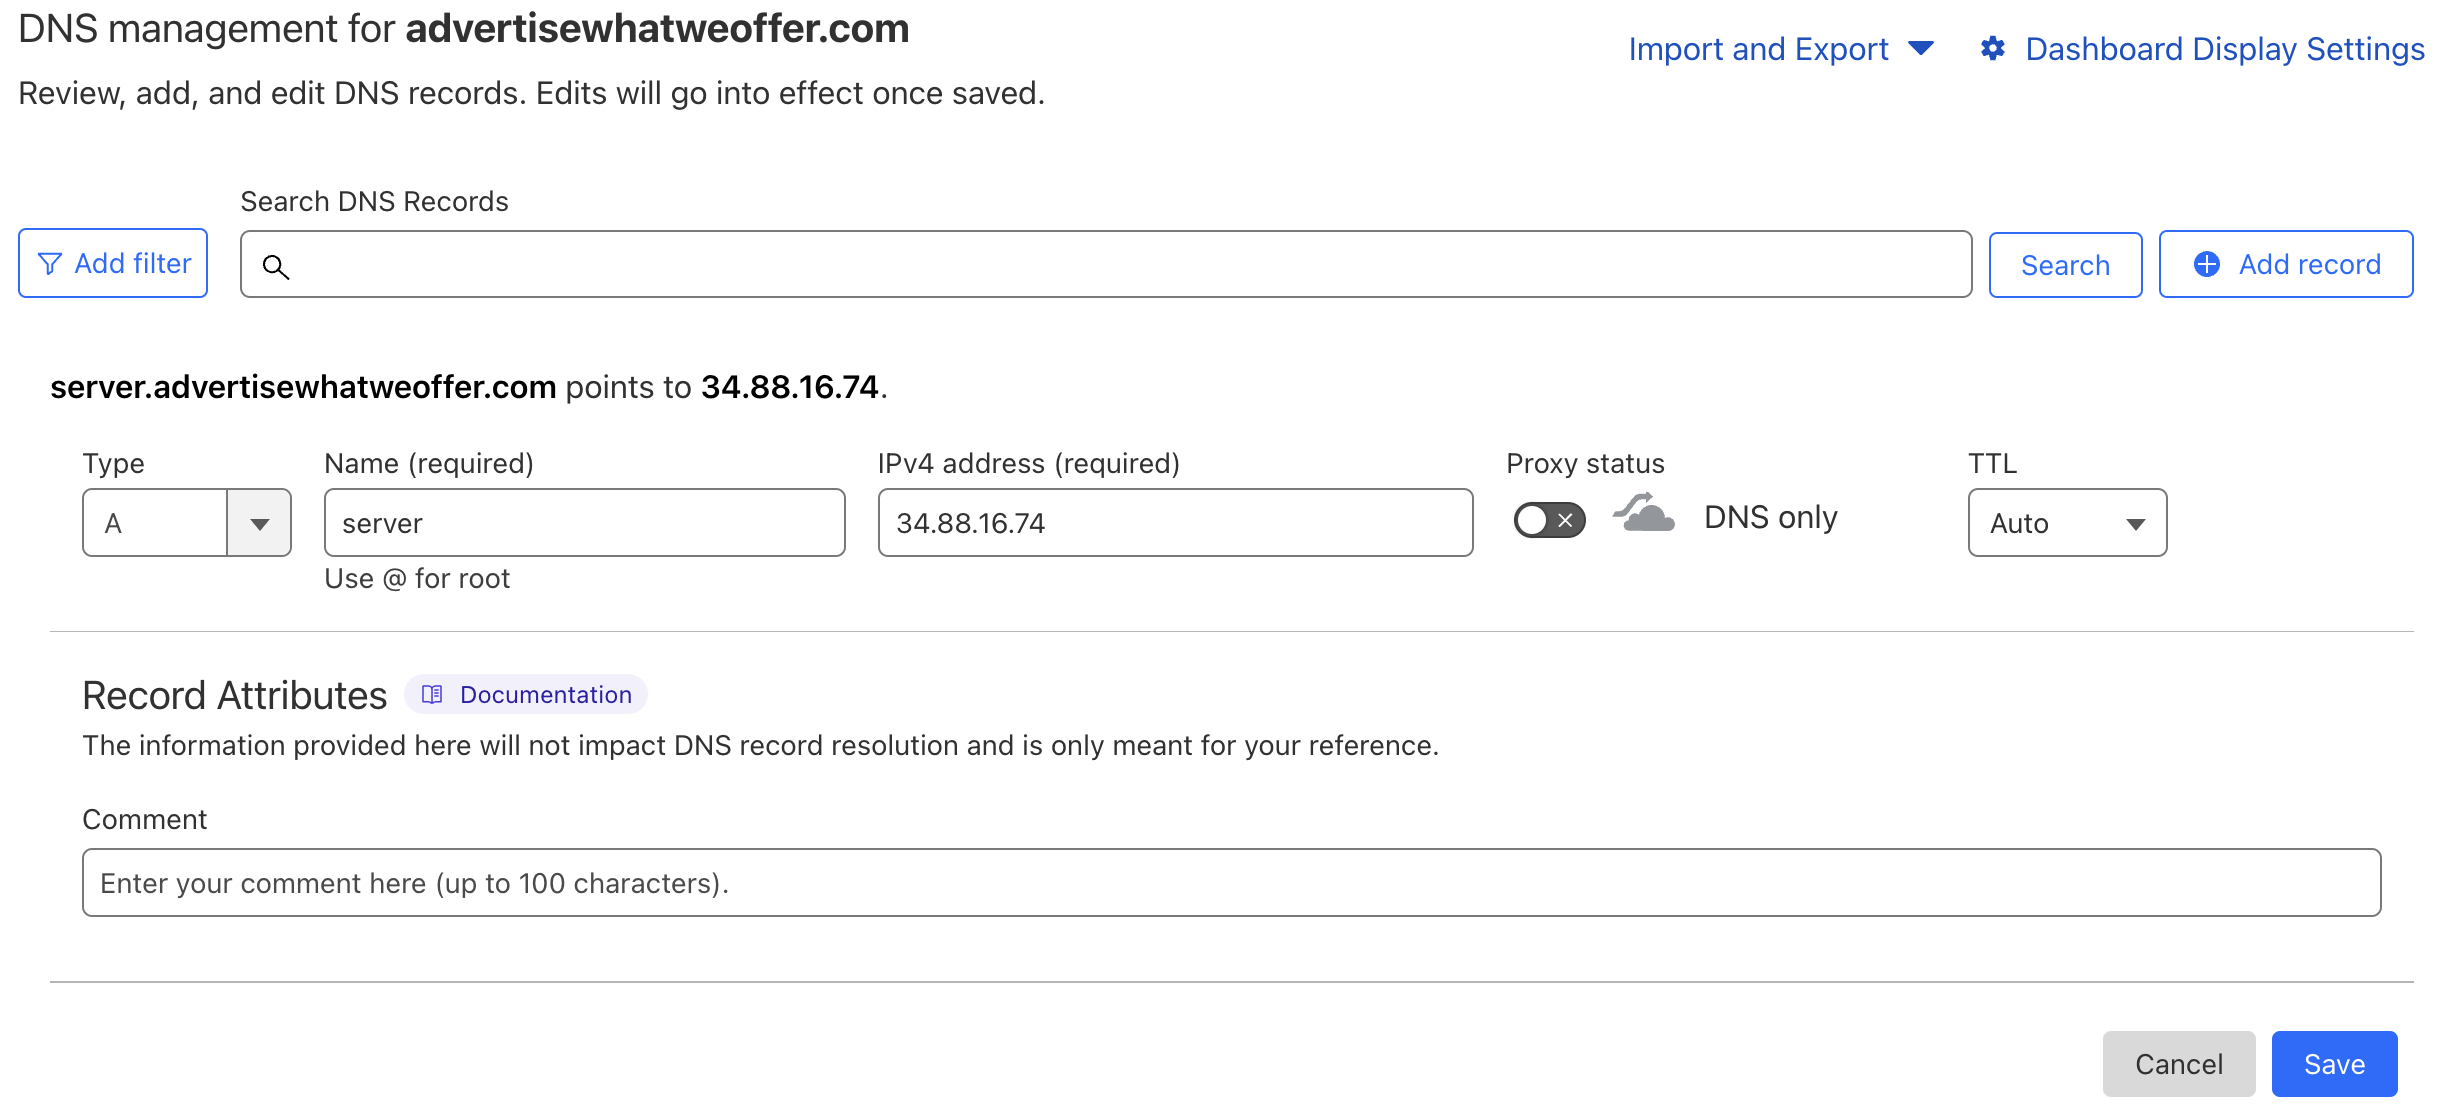
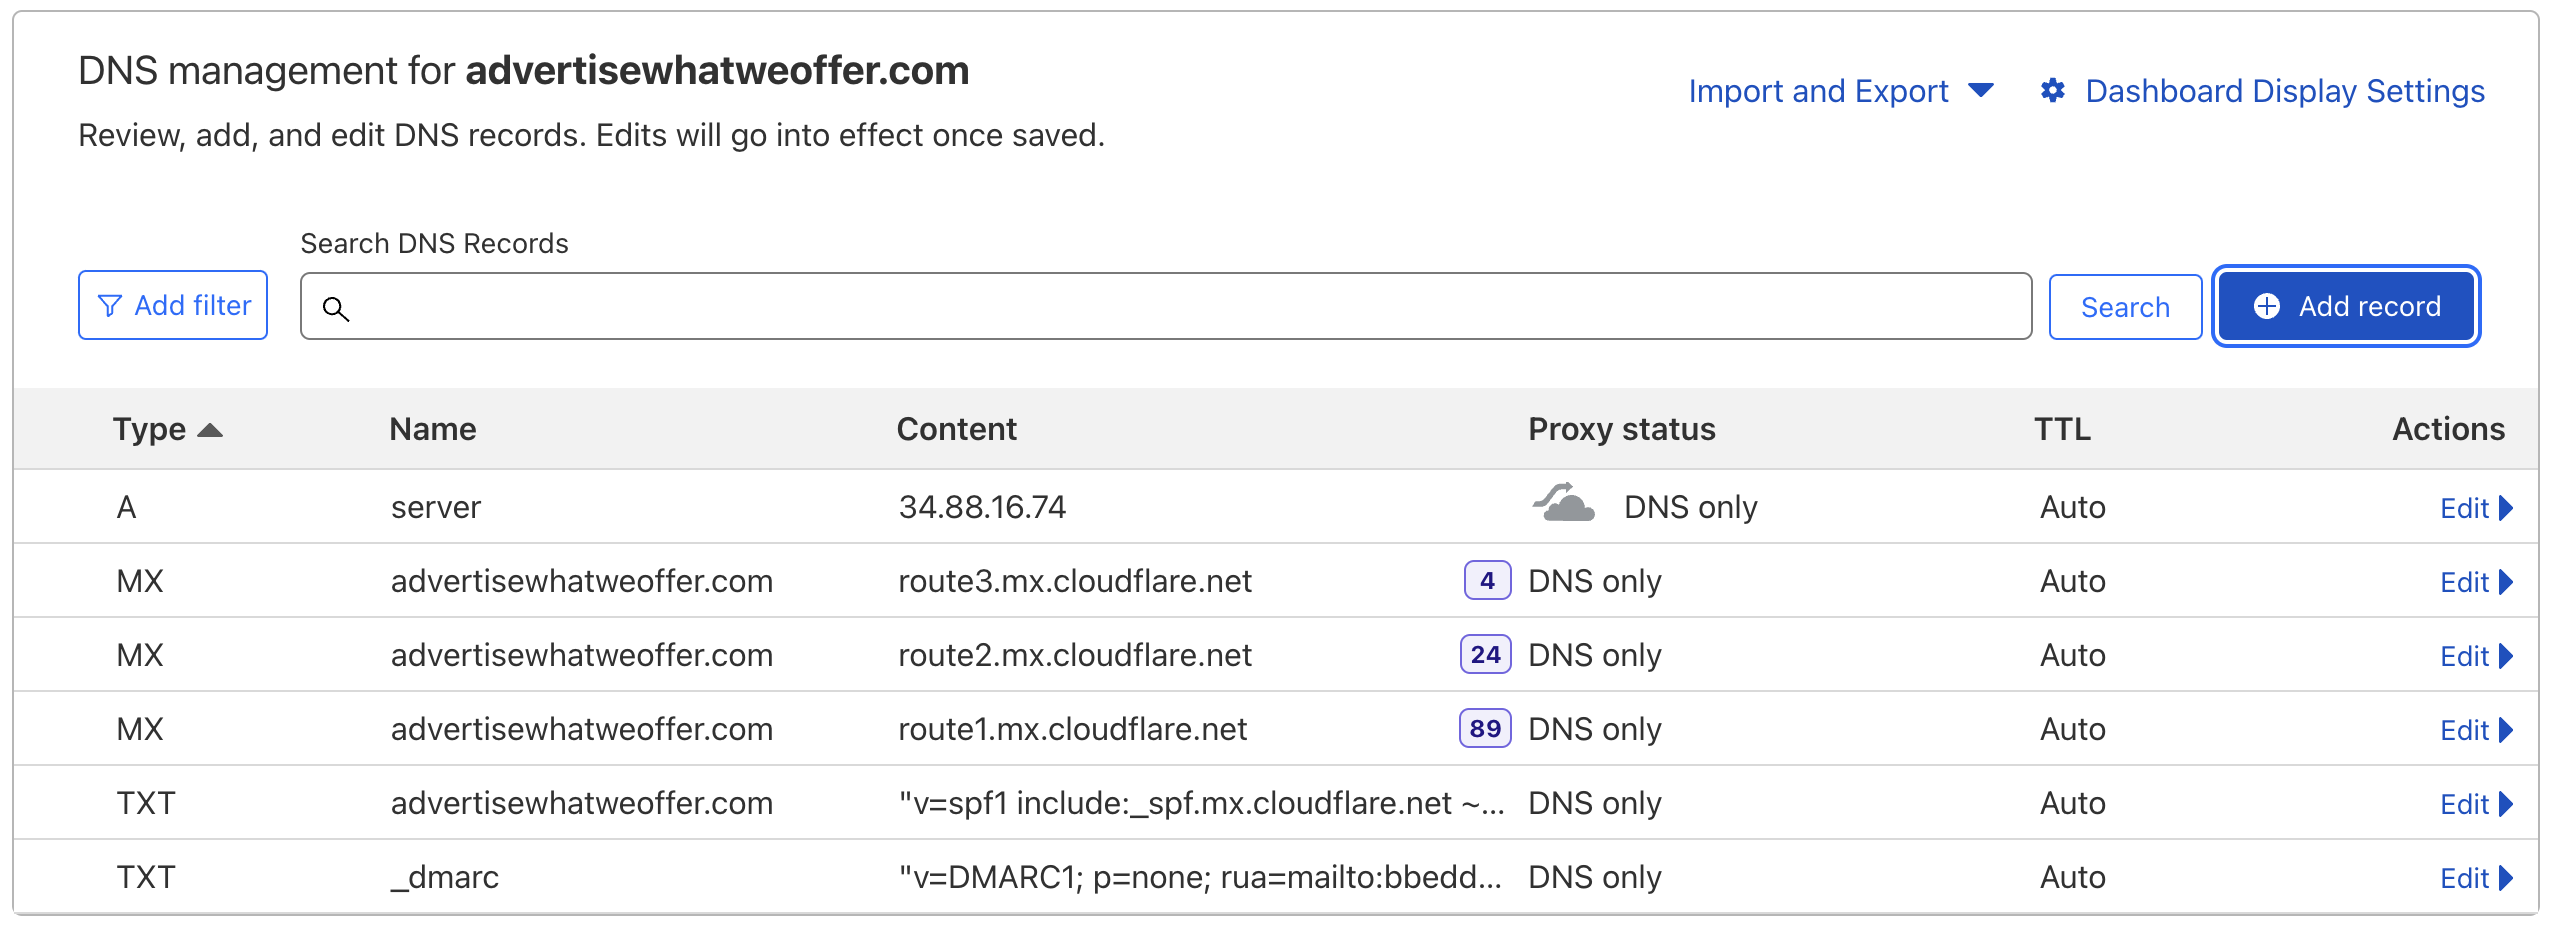
- In order to point your domain name to your server you need to create the A Record. To do so, you need to make sure the Record Type is set to A, inside the Name field type server (this can be anything you want), add the IPv4 address (this will be provided by Google Cloud, same address you used to connect to the Cyberpanel dashboard) and switch off Proxy status. Confirm all your actions, then click the Save button . You'll notice now that there is a new entry inside the record table.
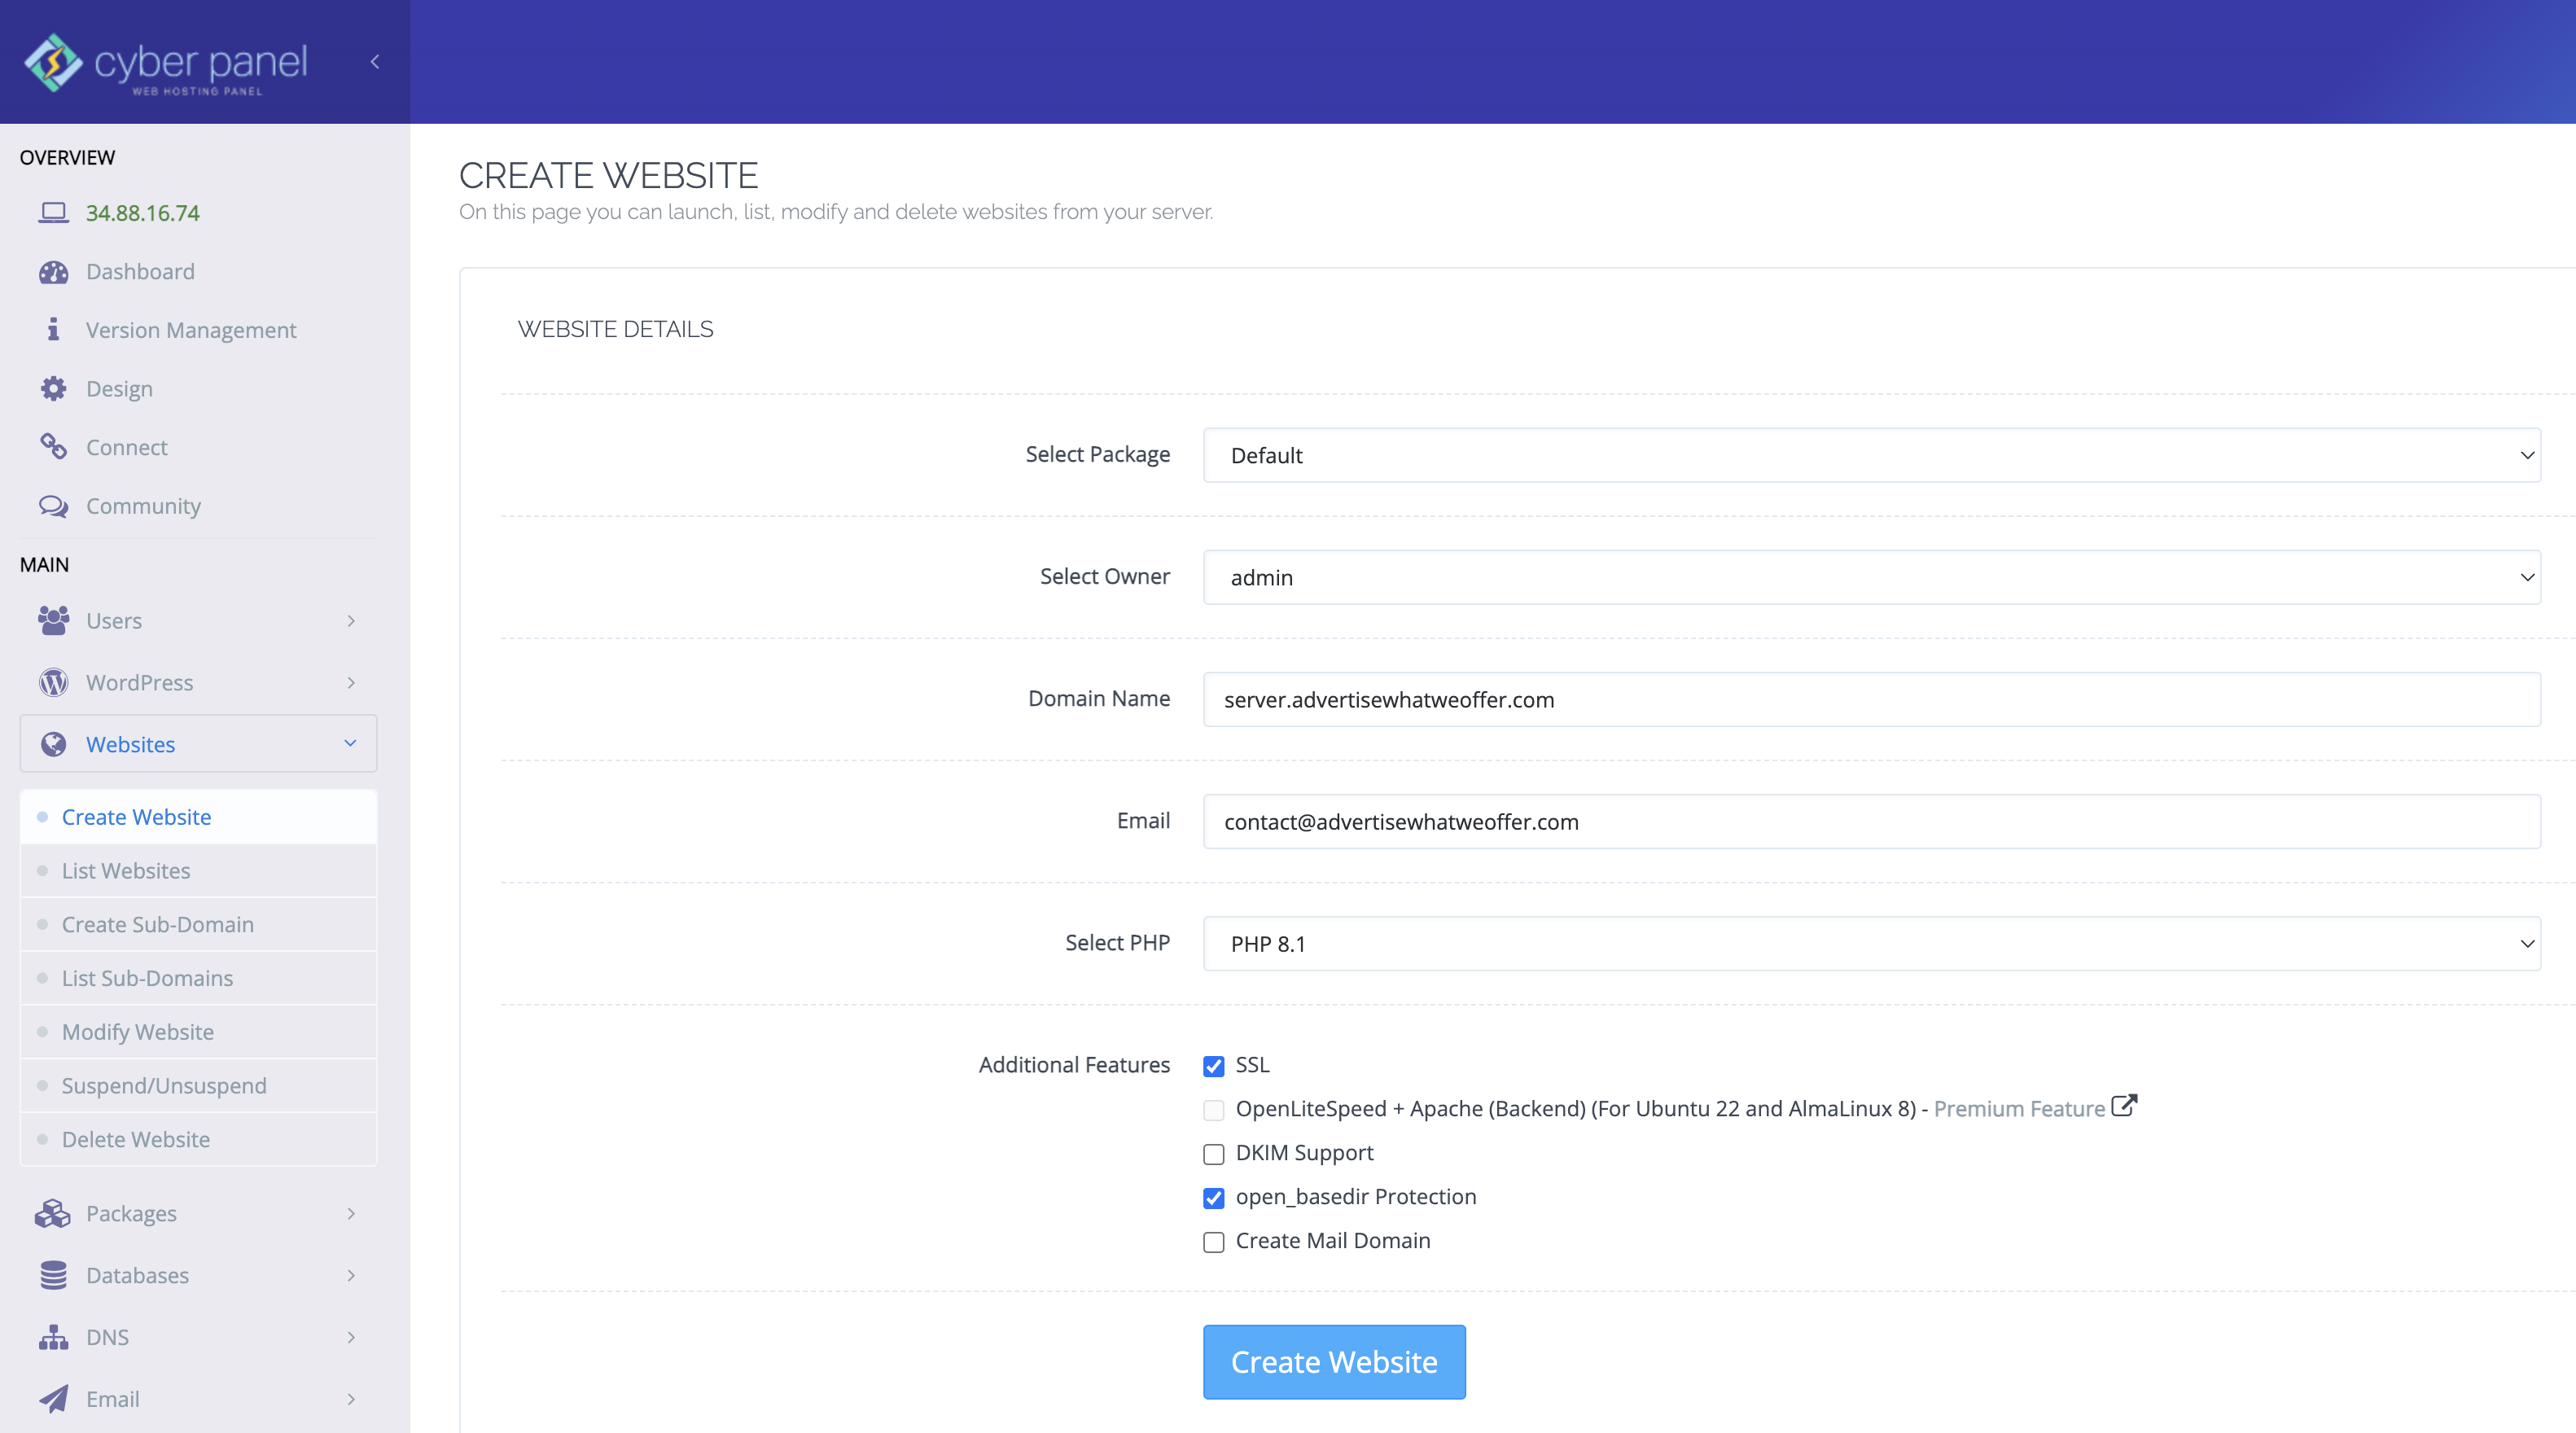
- Now that your domain is pointing to your server it is time to finish the setup. Head back to your Cyberpanel interface (https://34.88.16.74:2087/ - your IP Address is different) and navigate to Websites > Create Website. Mirror the settings we present in the image and remember to replace the domain name and email address with your own choices. After you finish, hit the Create Website button and wait for the system to finish the job. You will notice that Cyberpanel will try to issue an SSL certificate for your domain so be patient. If everything went well, you'll see the Successfully Installed message.
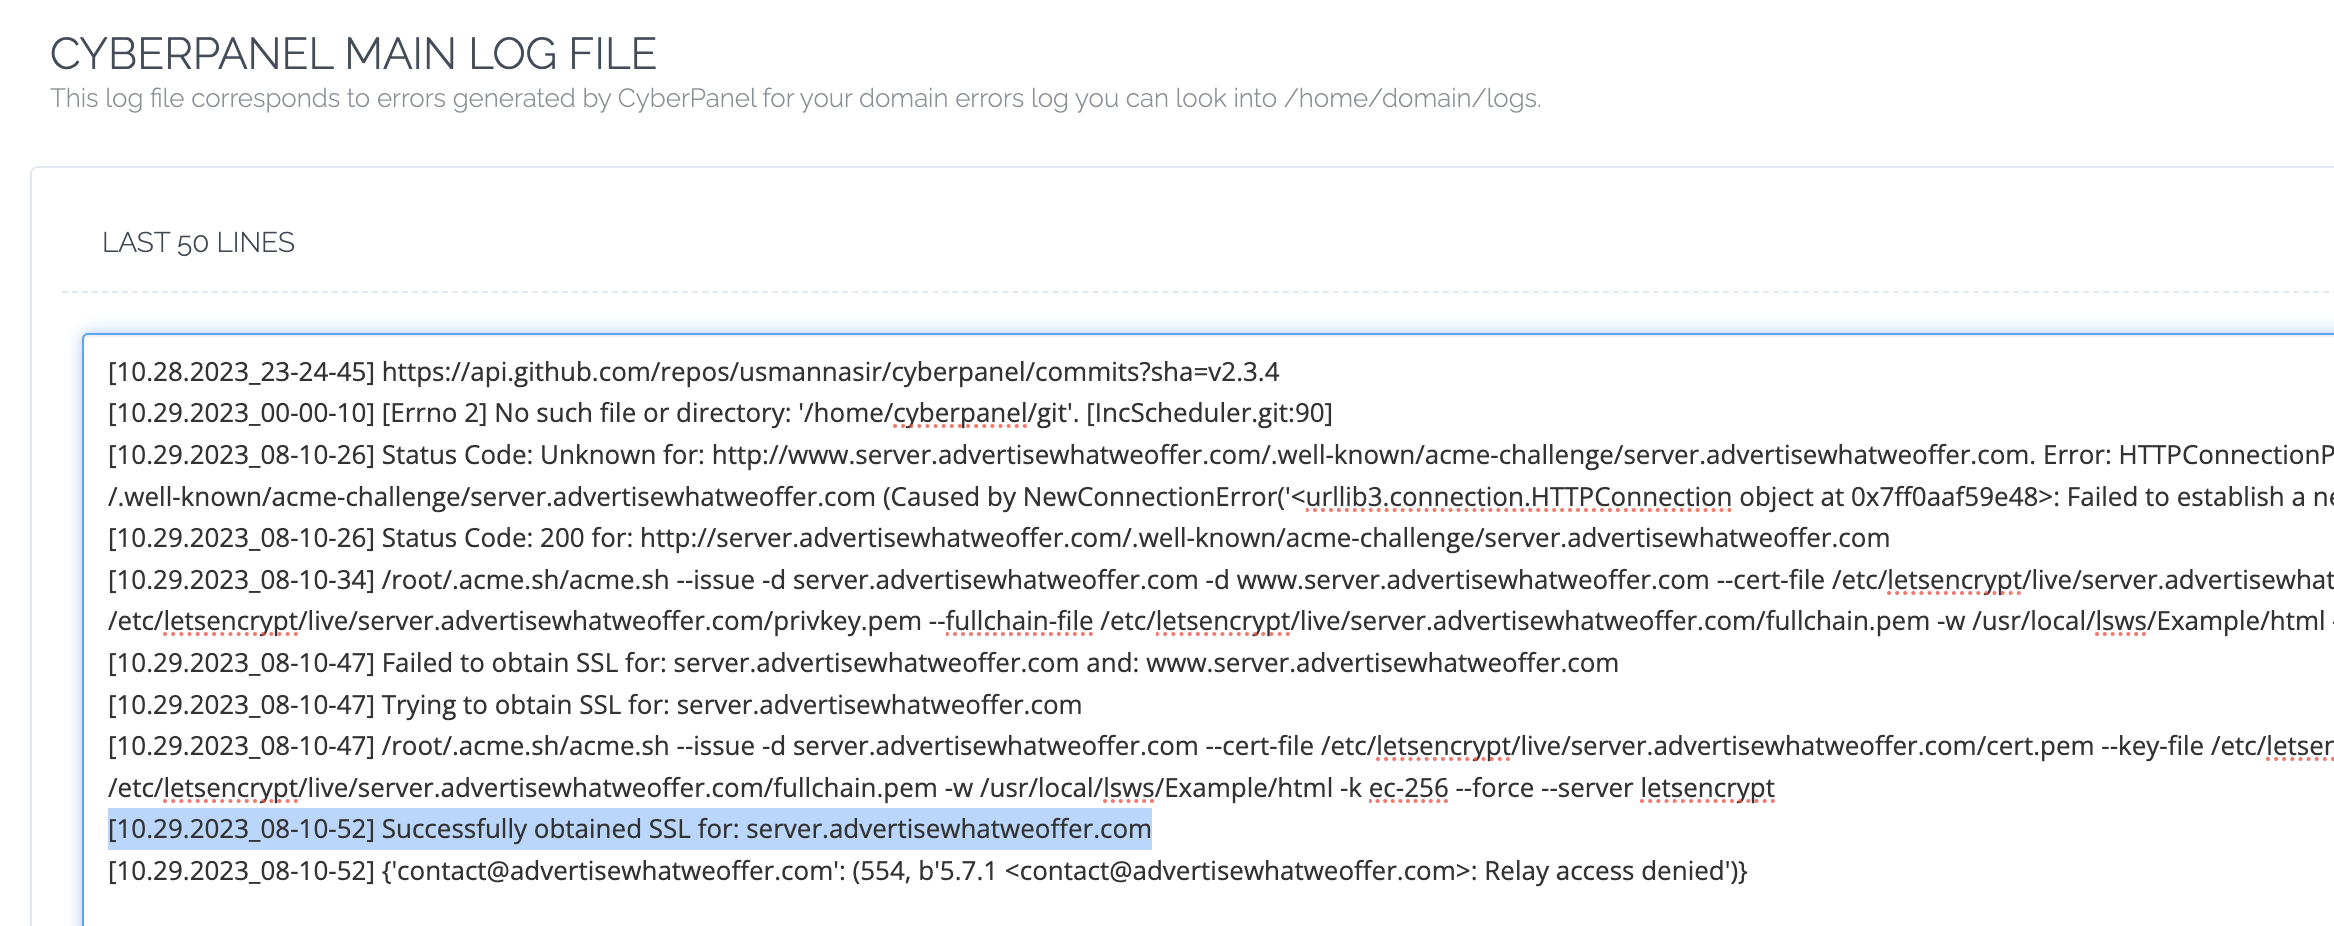
- In order to double check if your server received an SSL certificate, navigate to Logs > CyberPanel Main Log File. In this page, the system is recording all major modifications to your server, meaning that the issuance of your SSL certificate should be logged. In our case this was a successful process, we can visually confirm this.
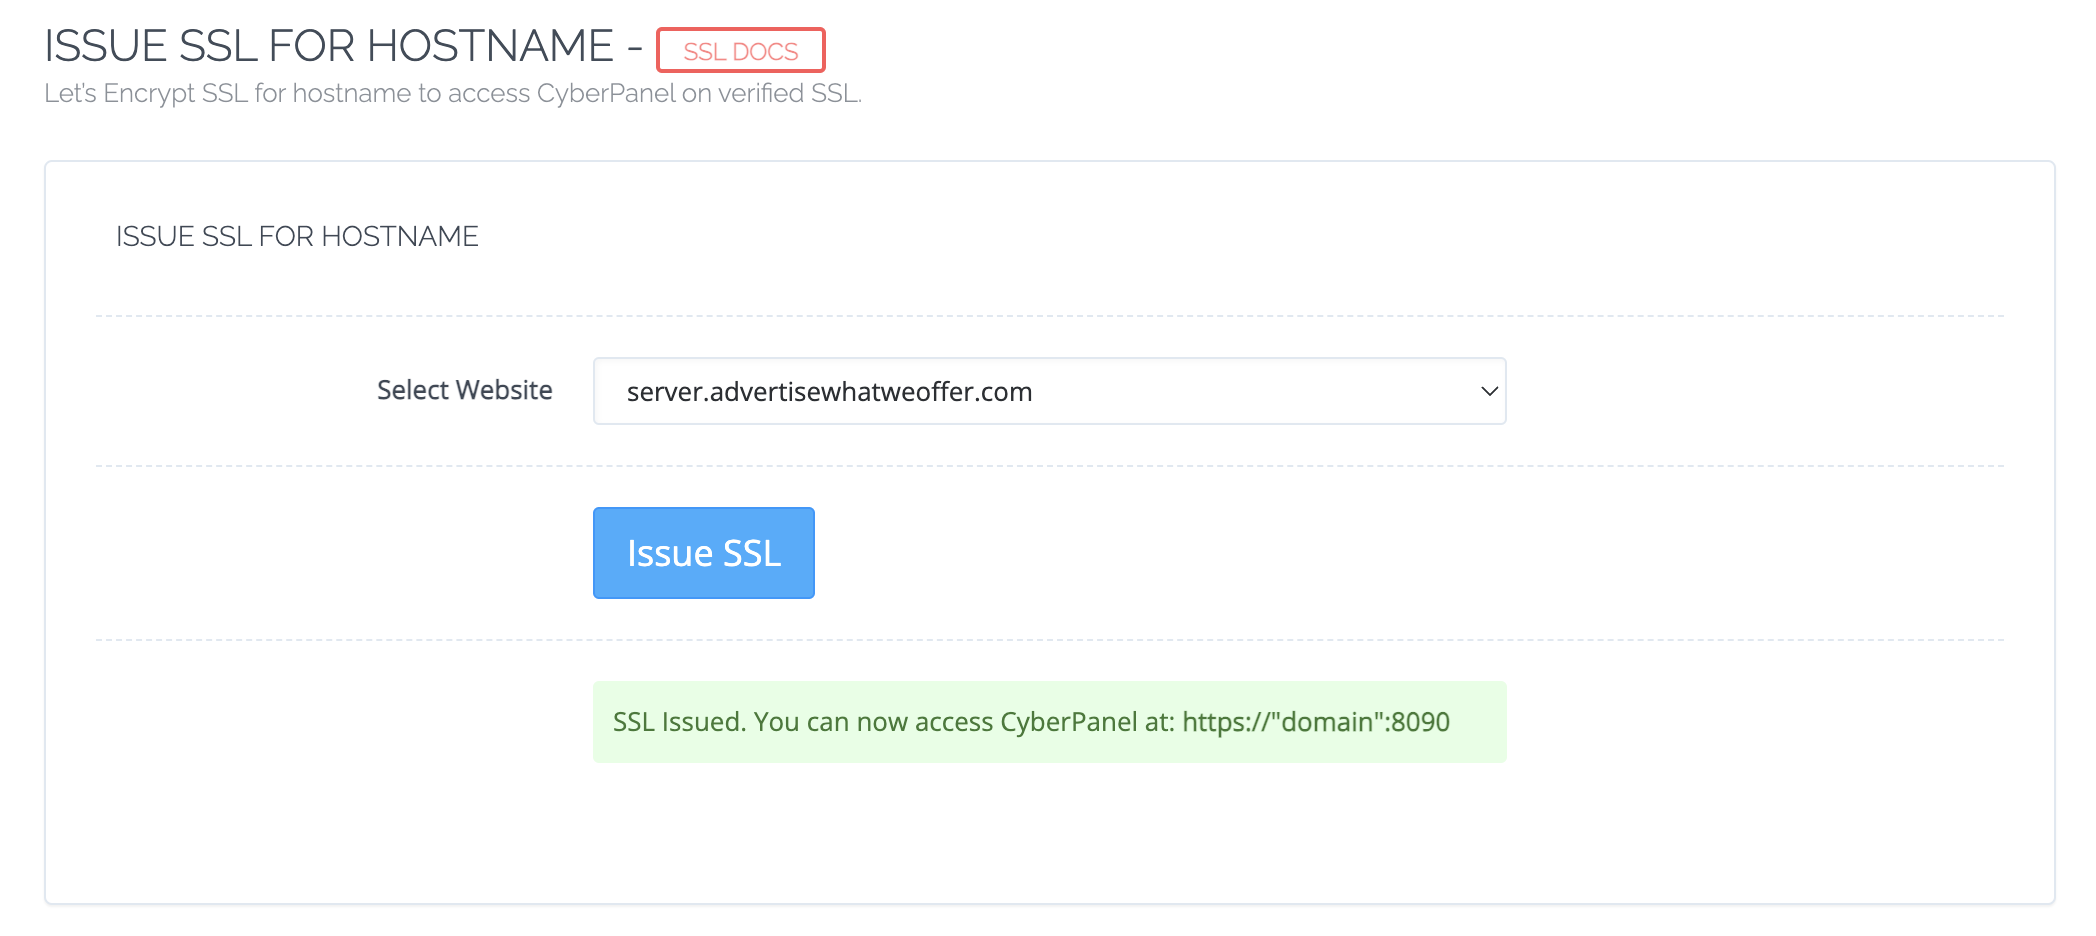
- Now you need to instruct your server to use communicate through this connection and in order to do so, navigate to SSL > Hostname SSL. Select Website, in our case it is server.advertisewhatweoffer.com and hit the Issue SSL button. This process will reconfirm server connection and validate everything in order to redirect all traffic through a secure line. If the process was successful, the system will display this message SSL Issued. You can now access CyberPanel at: https://"domain":8090. Even if you're seeing 8090, know that your port in fact is still 2087. If you want to double check things, head to the CyberPanel Main Log File page and look for the message related to your latest action.
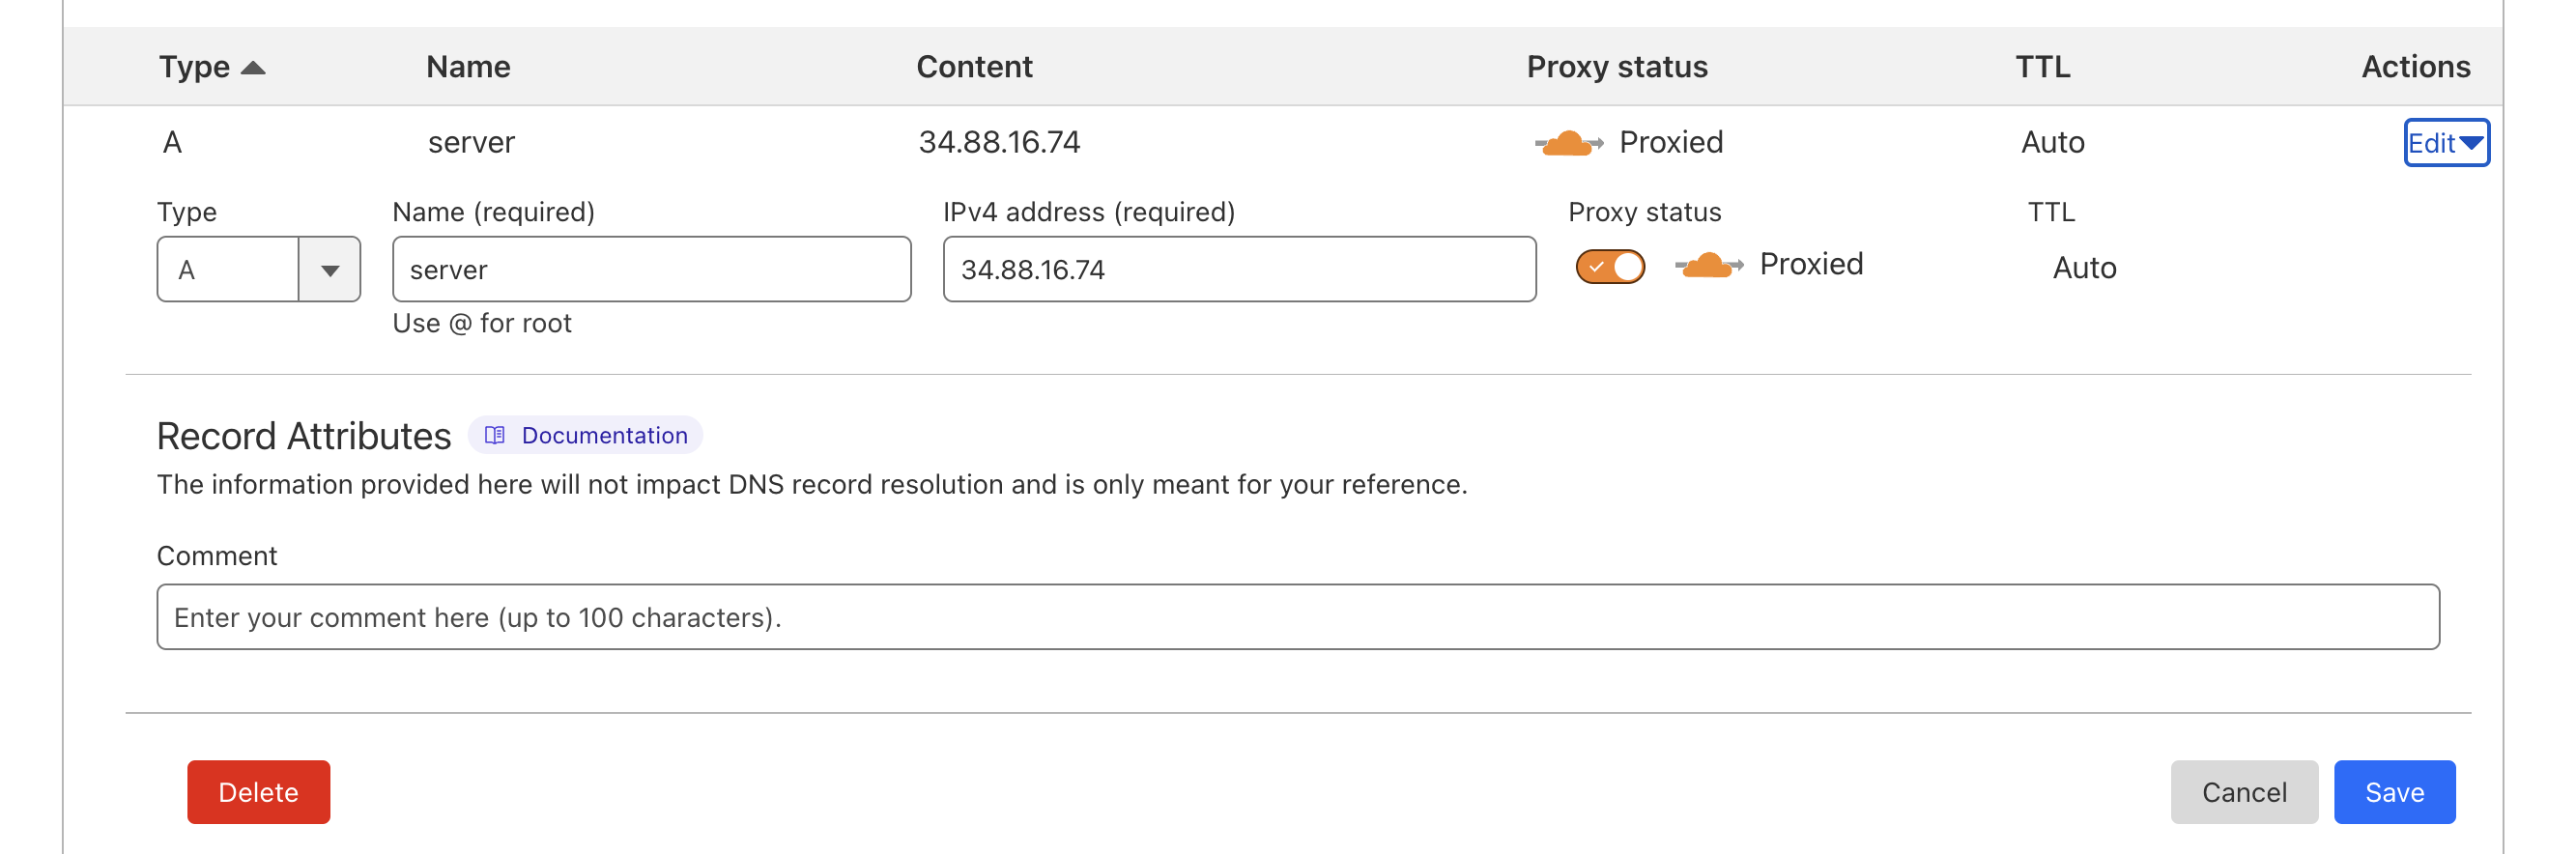
- Last step, go back to Cloudflare's dashboard, your DNS Records page and edit the A record. To do so, navigate to the Actions column of the table and click Edit. Switch the Proxy status from DNS Only to Proxied and then click the Save button. Wait for a few minutes for the settings to propagate and the try to access your Cyberpanel interface through the secure connection. Instead of using https://34.88.16.74:2087/ go with https://server.advertisewhatweoffer.com:2087/ (your domain name will be different according to your choices). You'll notice that the browser will no longer display the error message for your connection, which means you can safely interact with your server.
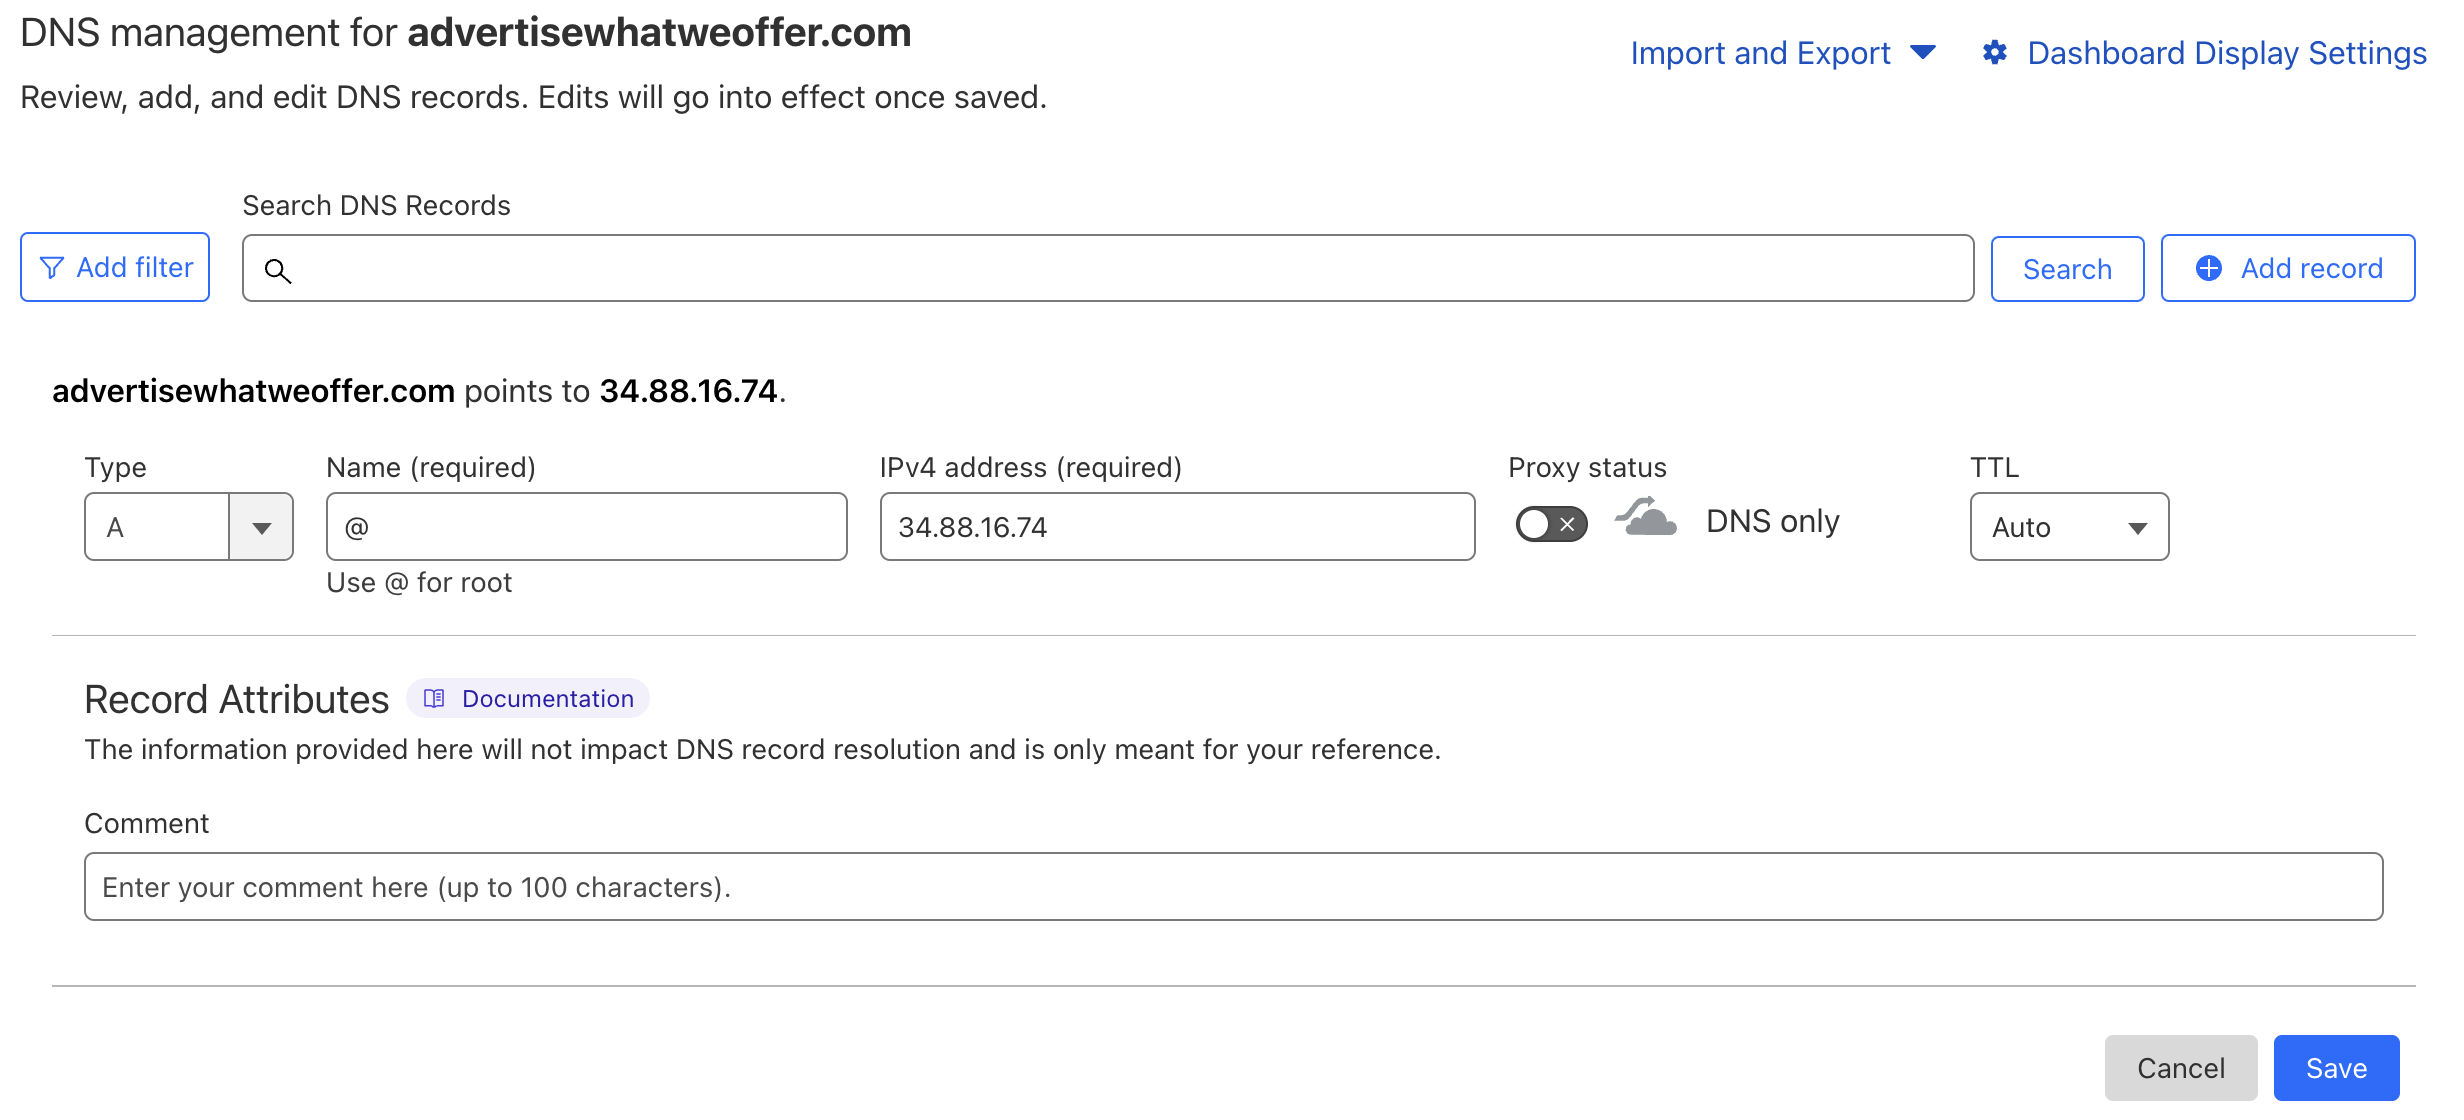
- If you want to add another domain/website, you'll have to repeat the steps we mentioned before. You'll want to do your main website setup, and in order to achieve this, you'll have to start again from the Cloudflare dashboard. Point your domain name to the server, head back to Cyberpanel, Create Website and finally and always remember to do so, switch the Cloudflare's protection on. Know that inside the Name field for your A record you need to type in the @ symbol. In our case advertisewhatweoffer.com will now point to 34.88.16.74. This message visually confirms you're doing things correctly. Now go back to Cyberpanel and create your website... and again, don't forget to switch on the proxy protection on Cloudflare in the end.
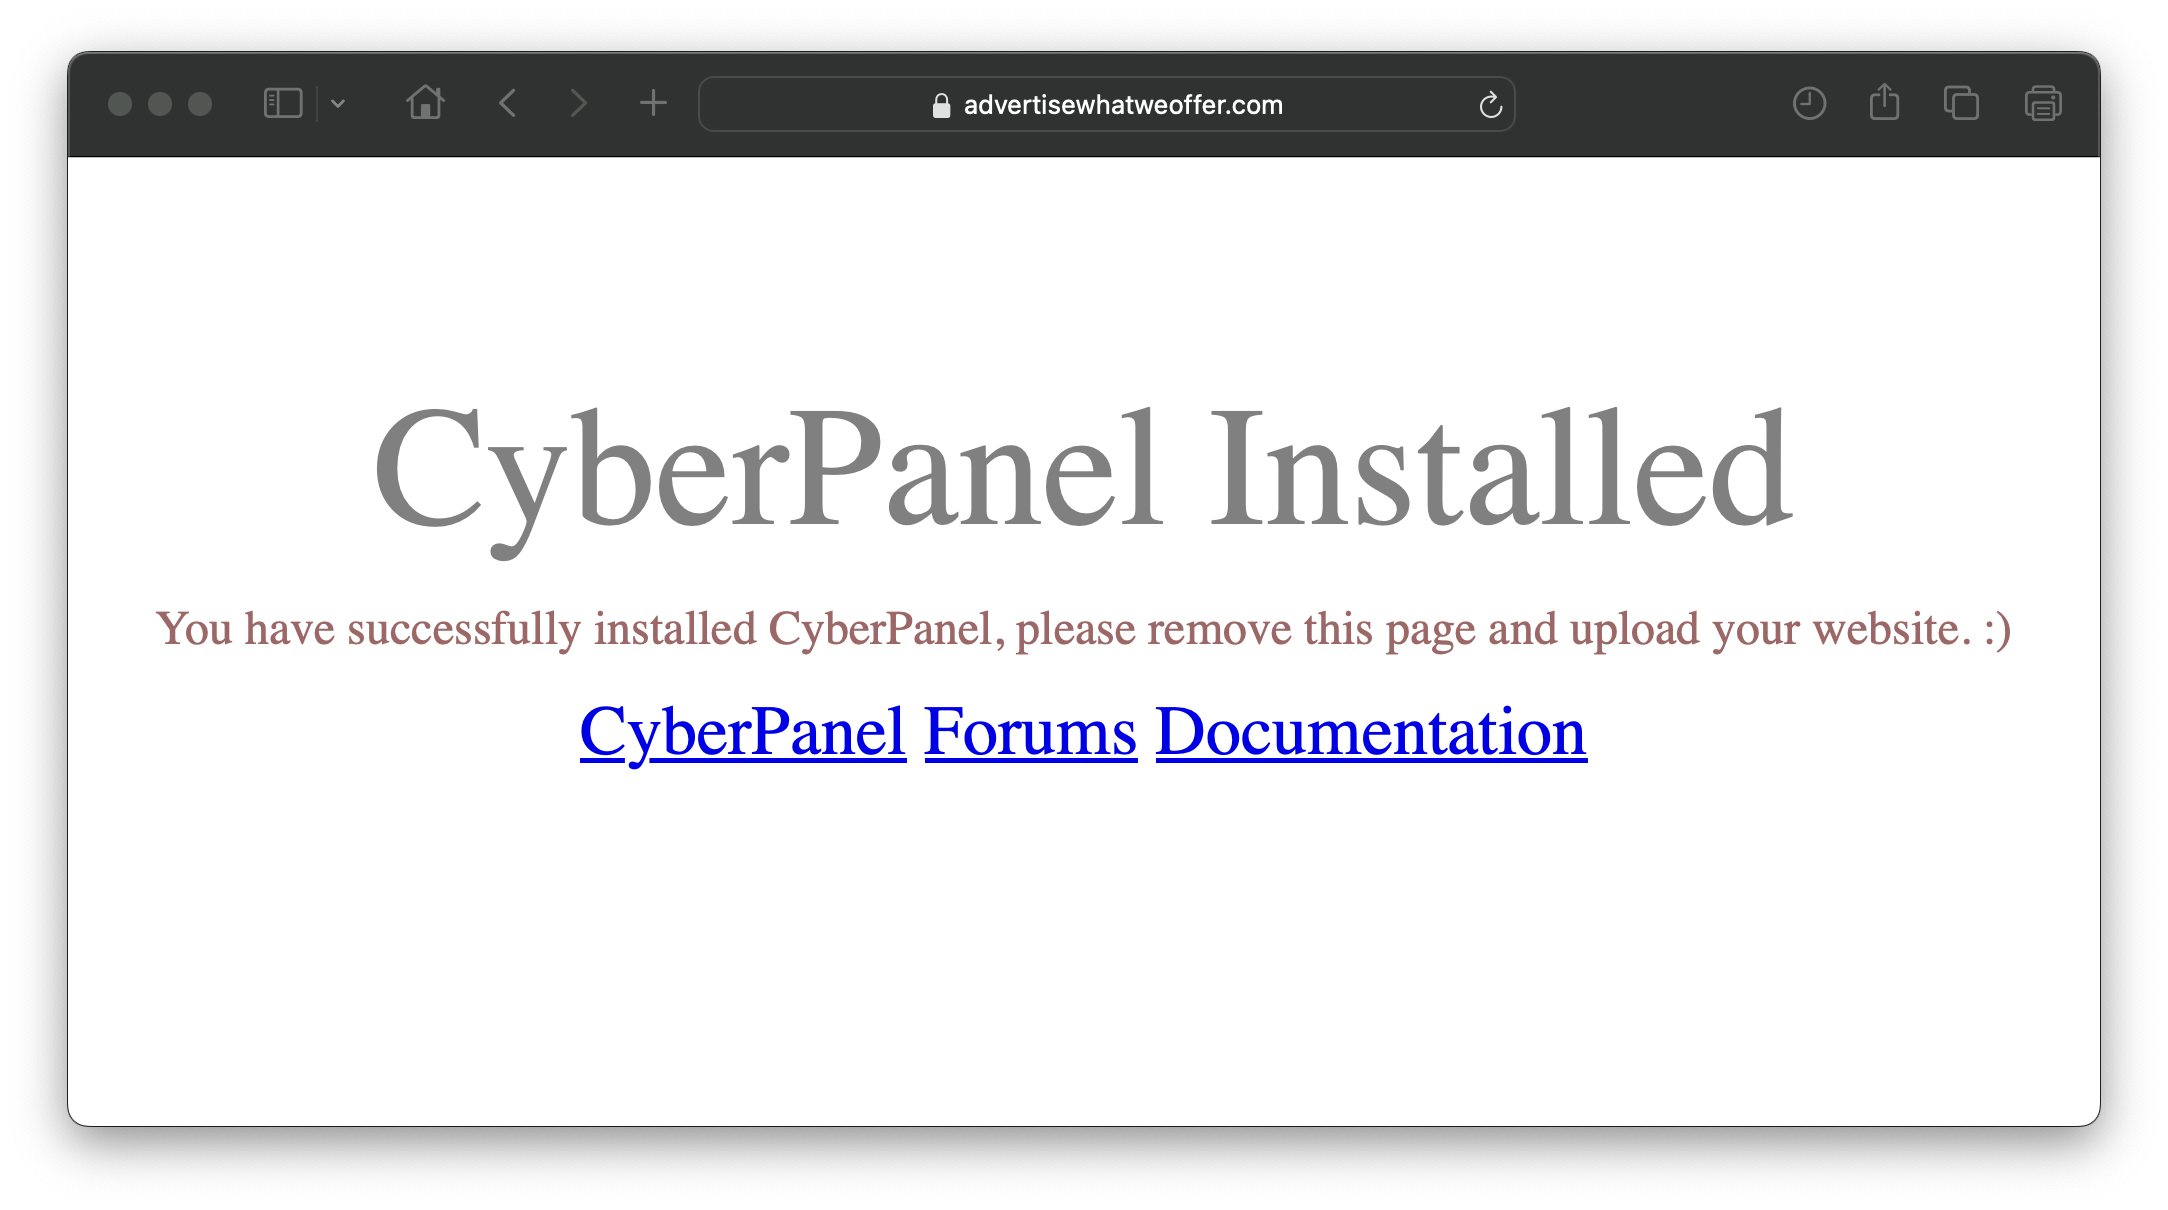
- Once you managed to setup your main website, you should be able to access it through a secure connection. Go ahead and type your domain name inside your browser's address bar https://advertisewhatweoffer.com/. Cyberpanel will display a default message, which is perfectly normal as this confirms you've done things correctly.