CyberPanel is a next-generation web hosting control panel powered by OpenLiteSpeed, offering a user-friendly and feature-rich experience to manage your web hosting environment. Its intuitive interface provides easy access to a range of functions including website creation, database management, email setup, and domain handling. Built for speed and security, CyberPanel comes with built-in support for LiteSpeed caching, SSL integration, and DDoS protection, ensuring that your websites run at peak performance and are safeguarded from potential threats. Additionally, it offers auto-backups, PHP management, and Docker support, making it a versatile choice for users ranging from beginners to seasoned developers. Experience seamless web management with the efficiency and power of CyberPanel.
Cyberpanel Admin Account Security
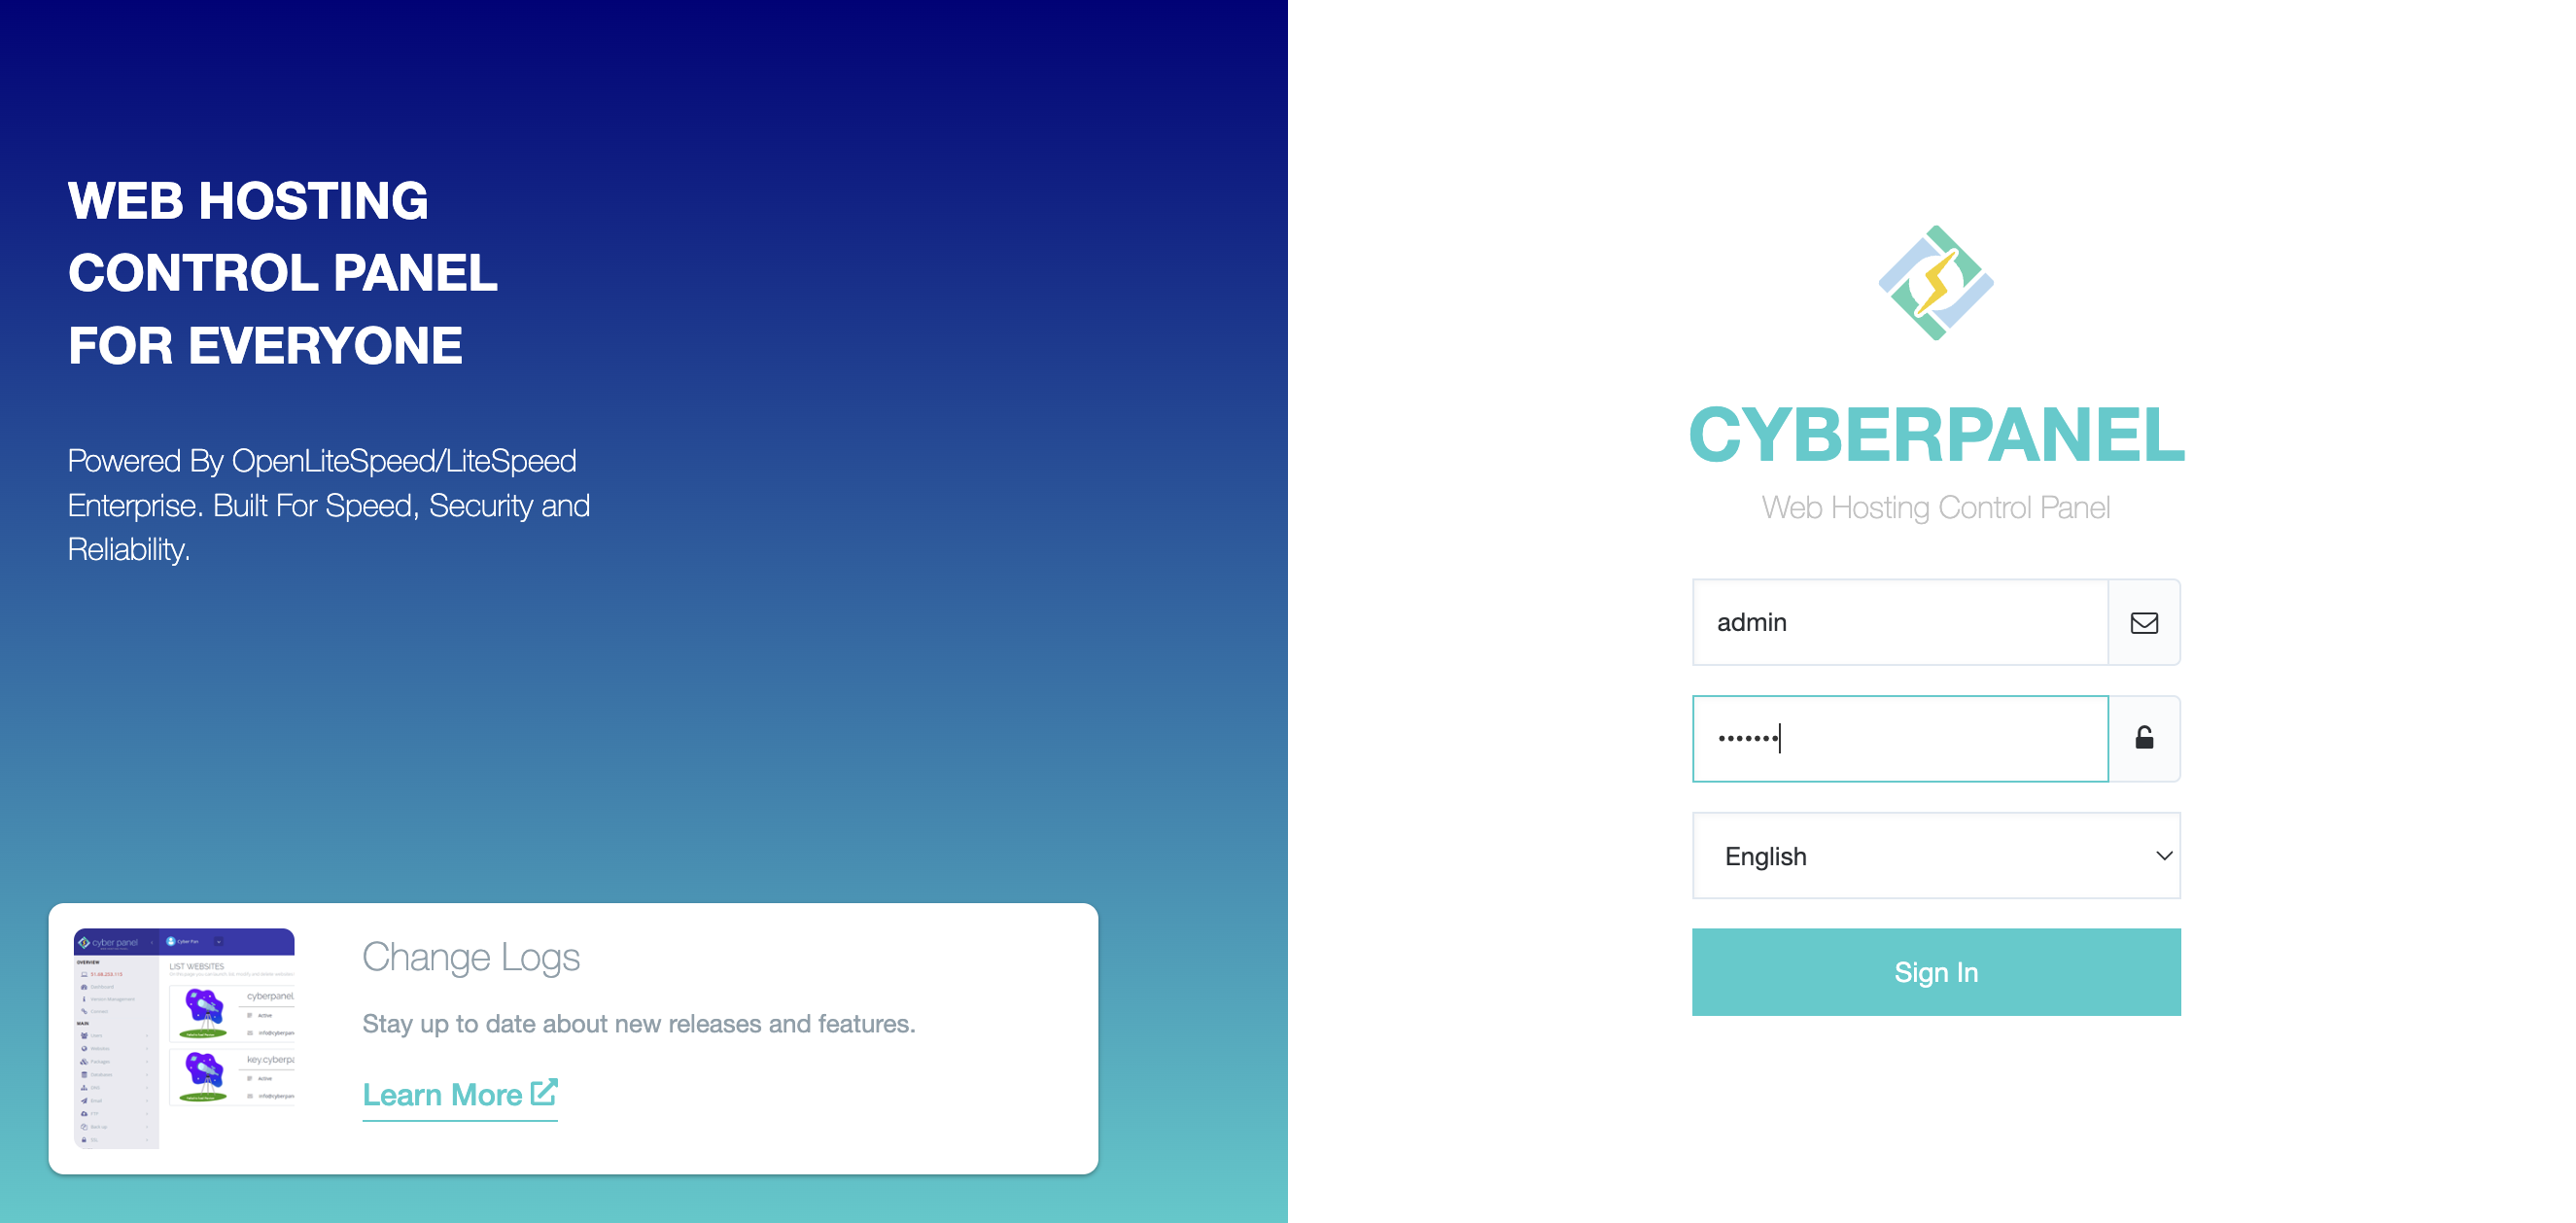
- Go yo your server web interface (https://[yourdomainname]:2087/) using the address you personally configured in the previous chapters of this course. Using the provided default credentials from server setup, connect to the interface.
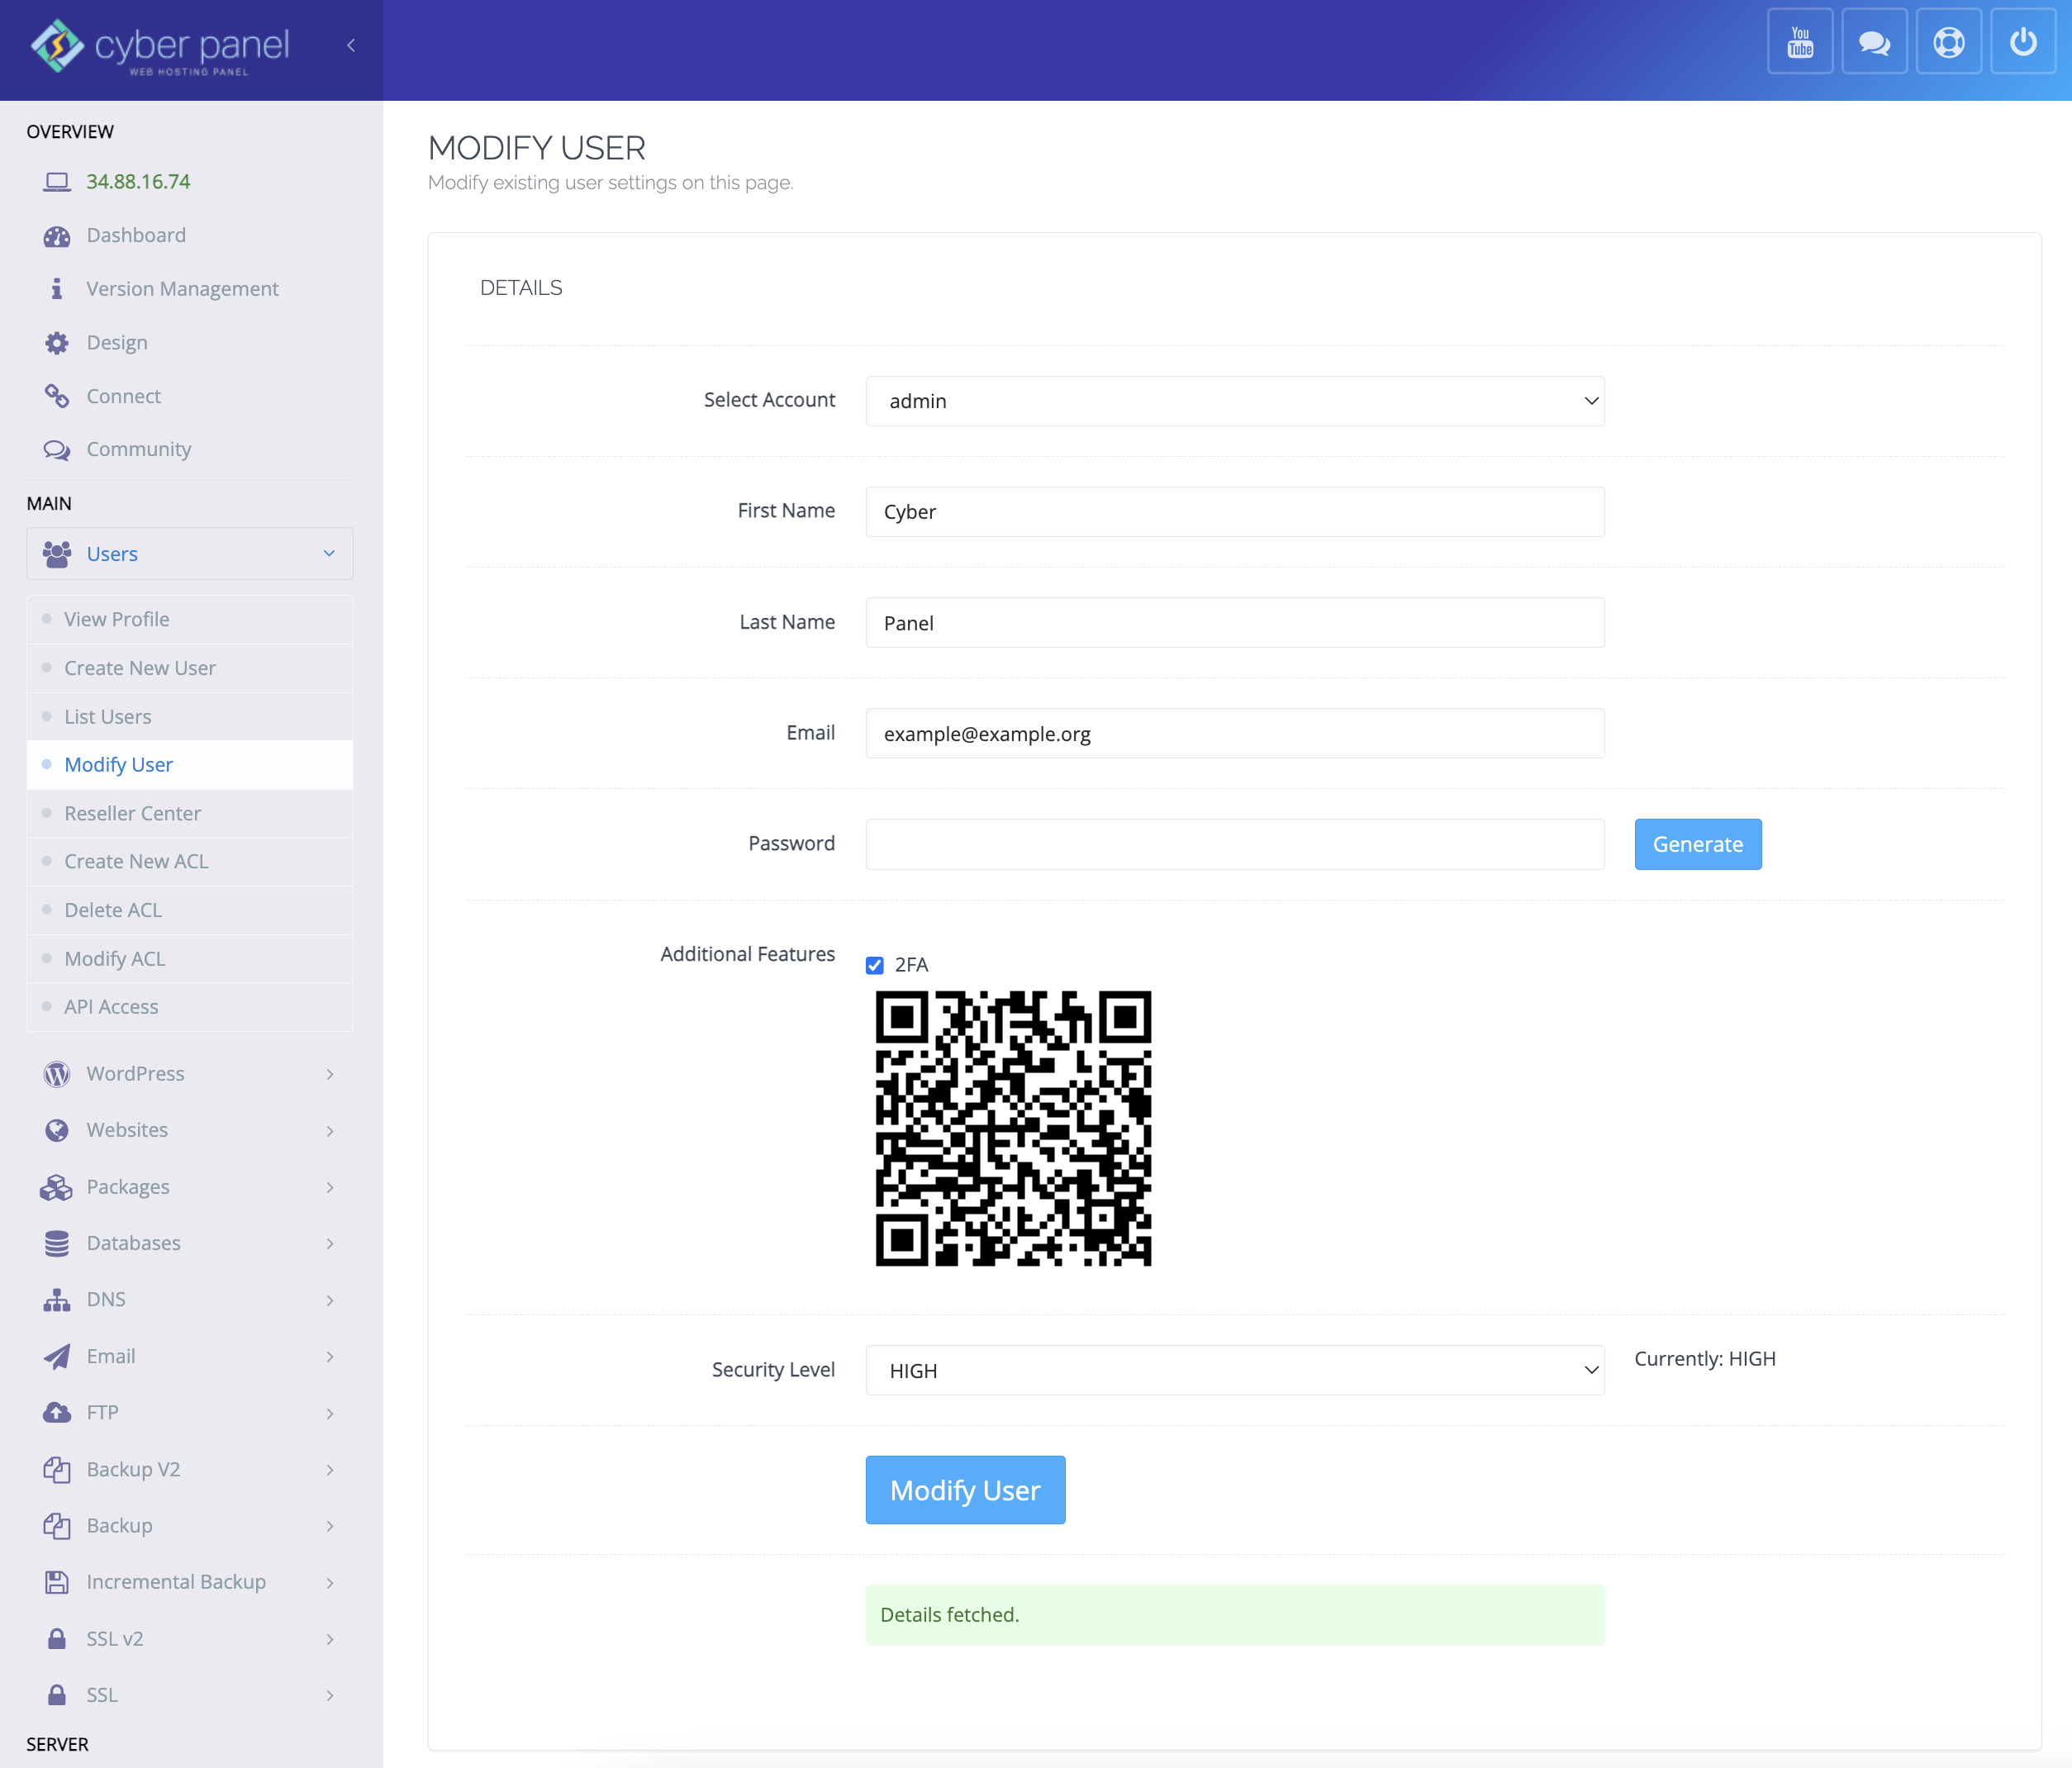
- Navigate using the left side menu to Users > Modify User. In this page Select Account > admin and update the following fields: First Name, Last Name, Email, Password. Use checkbox for Additional Features to activate 2FA (two factor authentication). Depending on your type of smartphone, install and activate an app called Authy. You can also use Google Authenticator app, but we recommend using Authy because you can also install it on your PC or Mac.
- For a complete setup guide, access the official Authy website here.
- Finish the Authy app setup and scan the QR code in order to generate temporary tokens. These tokens expire each 30s.
- It is imperative activating the 2FA system, this will protect you from any unauthorized logins to your server interface.
- Now hit the Modify User button in order to submit account changes.
- If everything went well, you'll see the following message: Account with username: admin is successfully modified.
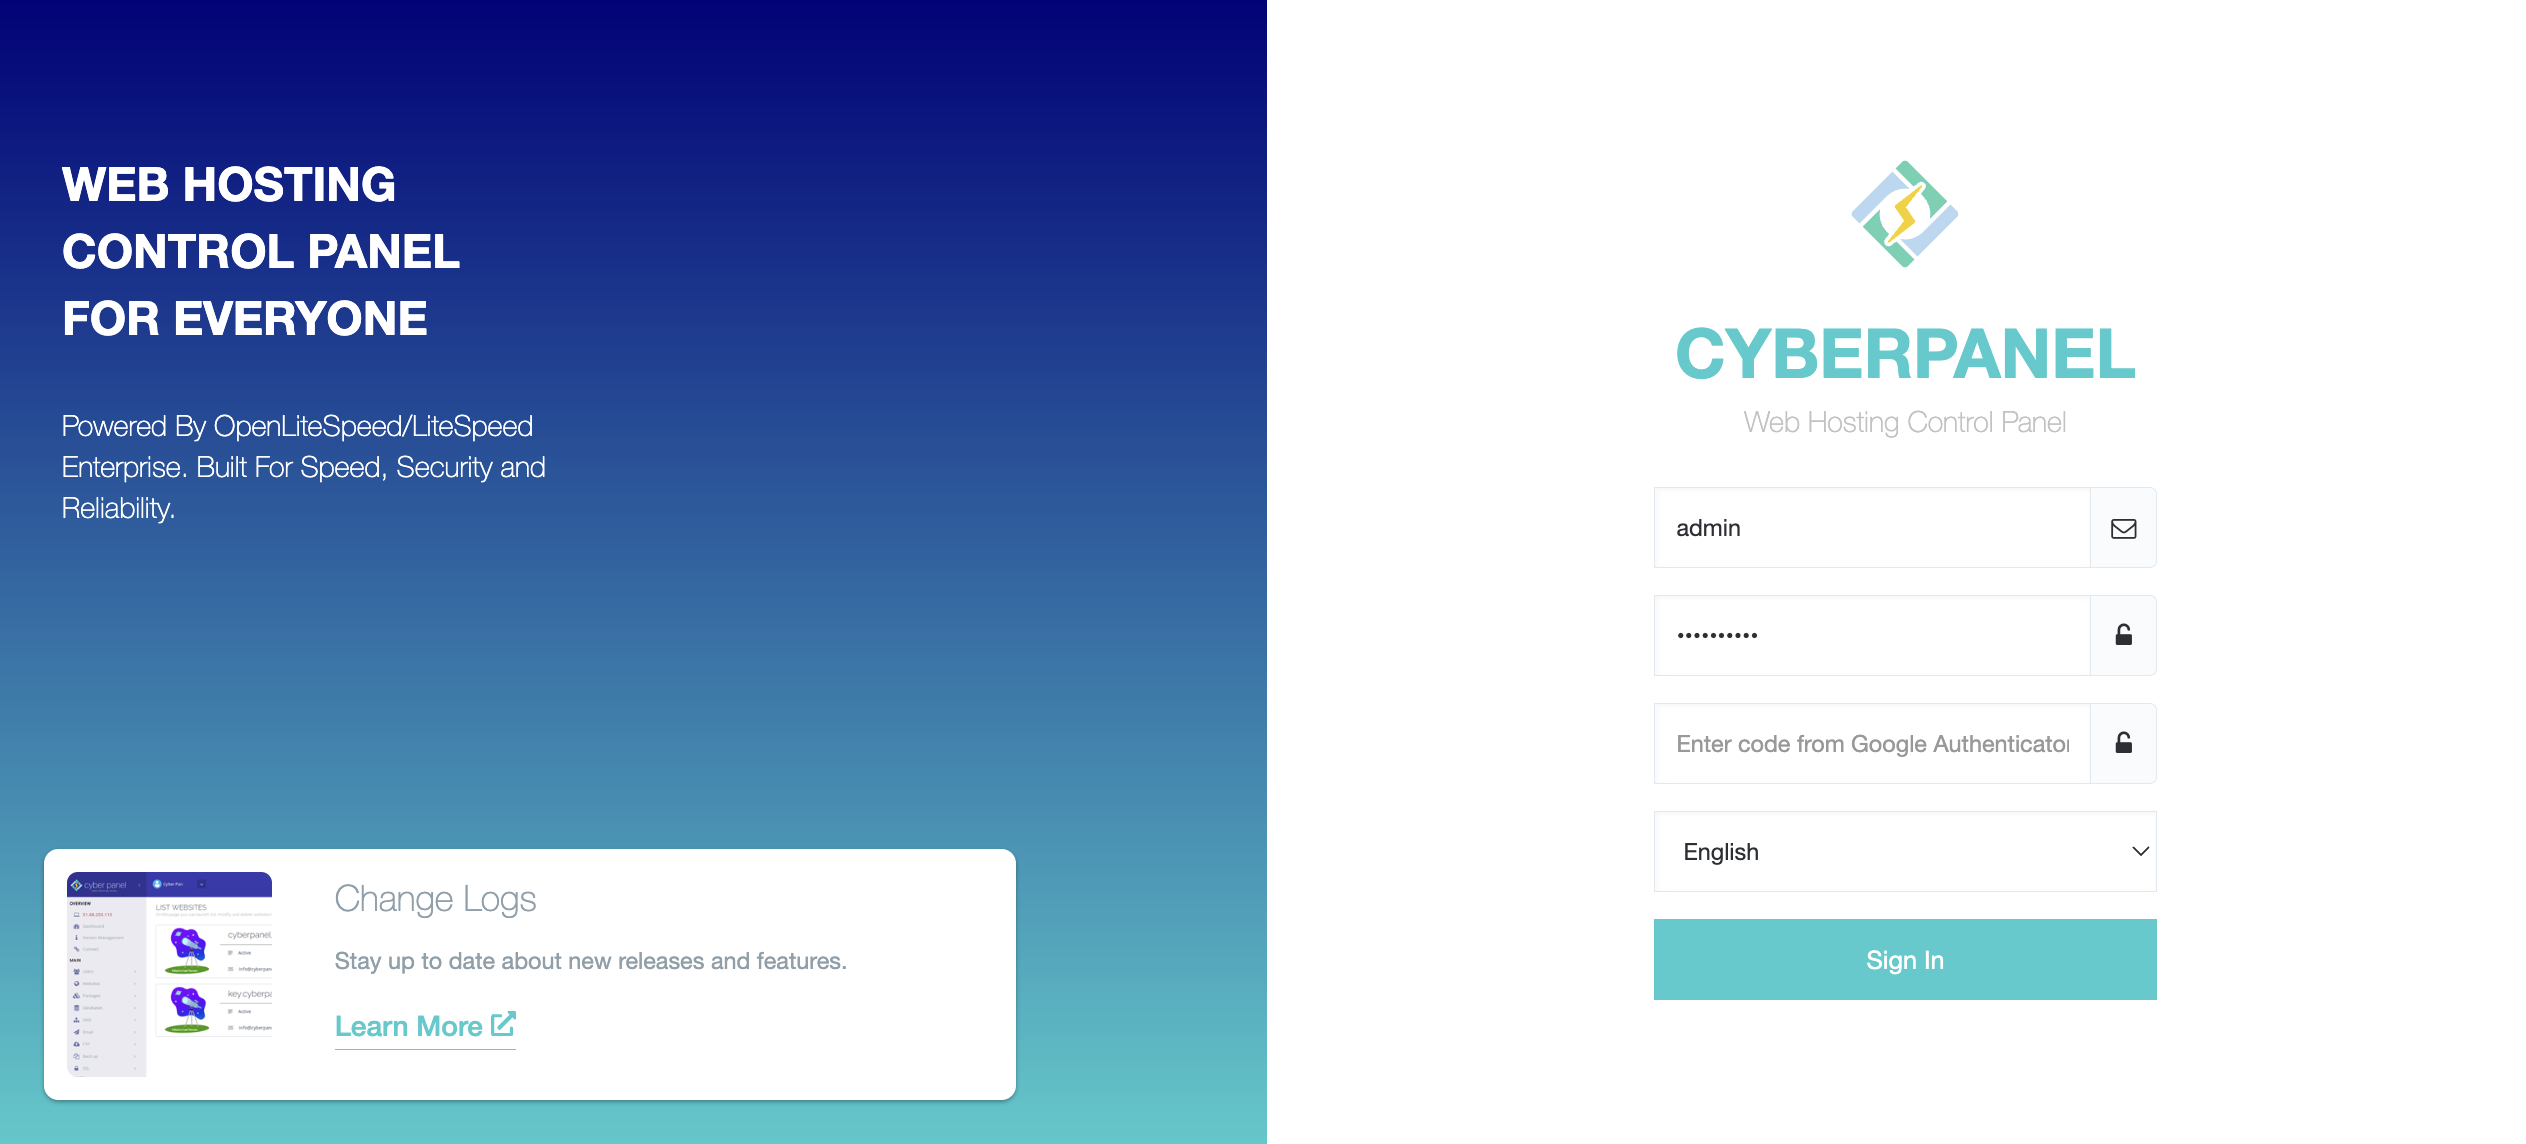
- Logout from your server interface authenticate with the new credentials. Keep your smartphone close, as you'll need to input the 2FA code.

- After you fill in your username and password, the system will ask you for the token, check your app for the code. If your credentials are valid, you'll gain full access to the server interface.
Cyberpanel Resources Package
- Resource Packages allow you to manage available resources for you websites. Mainly you should focus on Disk Space and Bandwidth as these are related to the storage space and traffic volume. We recommend modifying the default package for a seamless experience.
- Inside your Cyberpanel web interface, Navigate to Packages > List Packages.
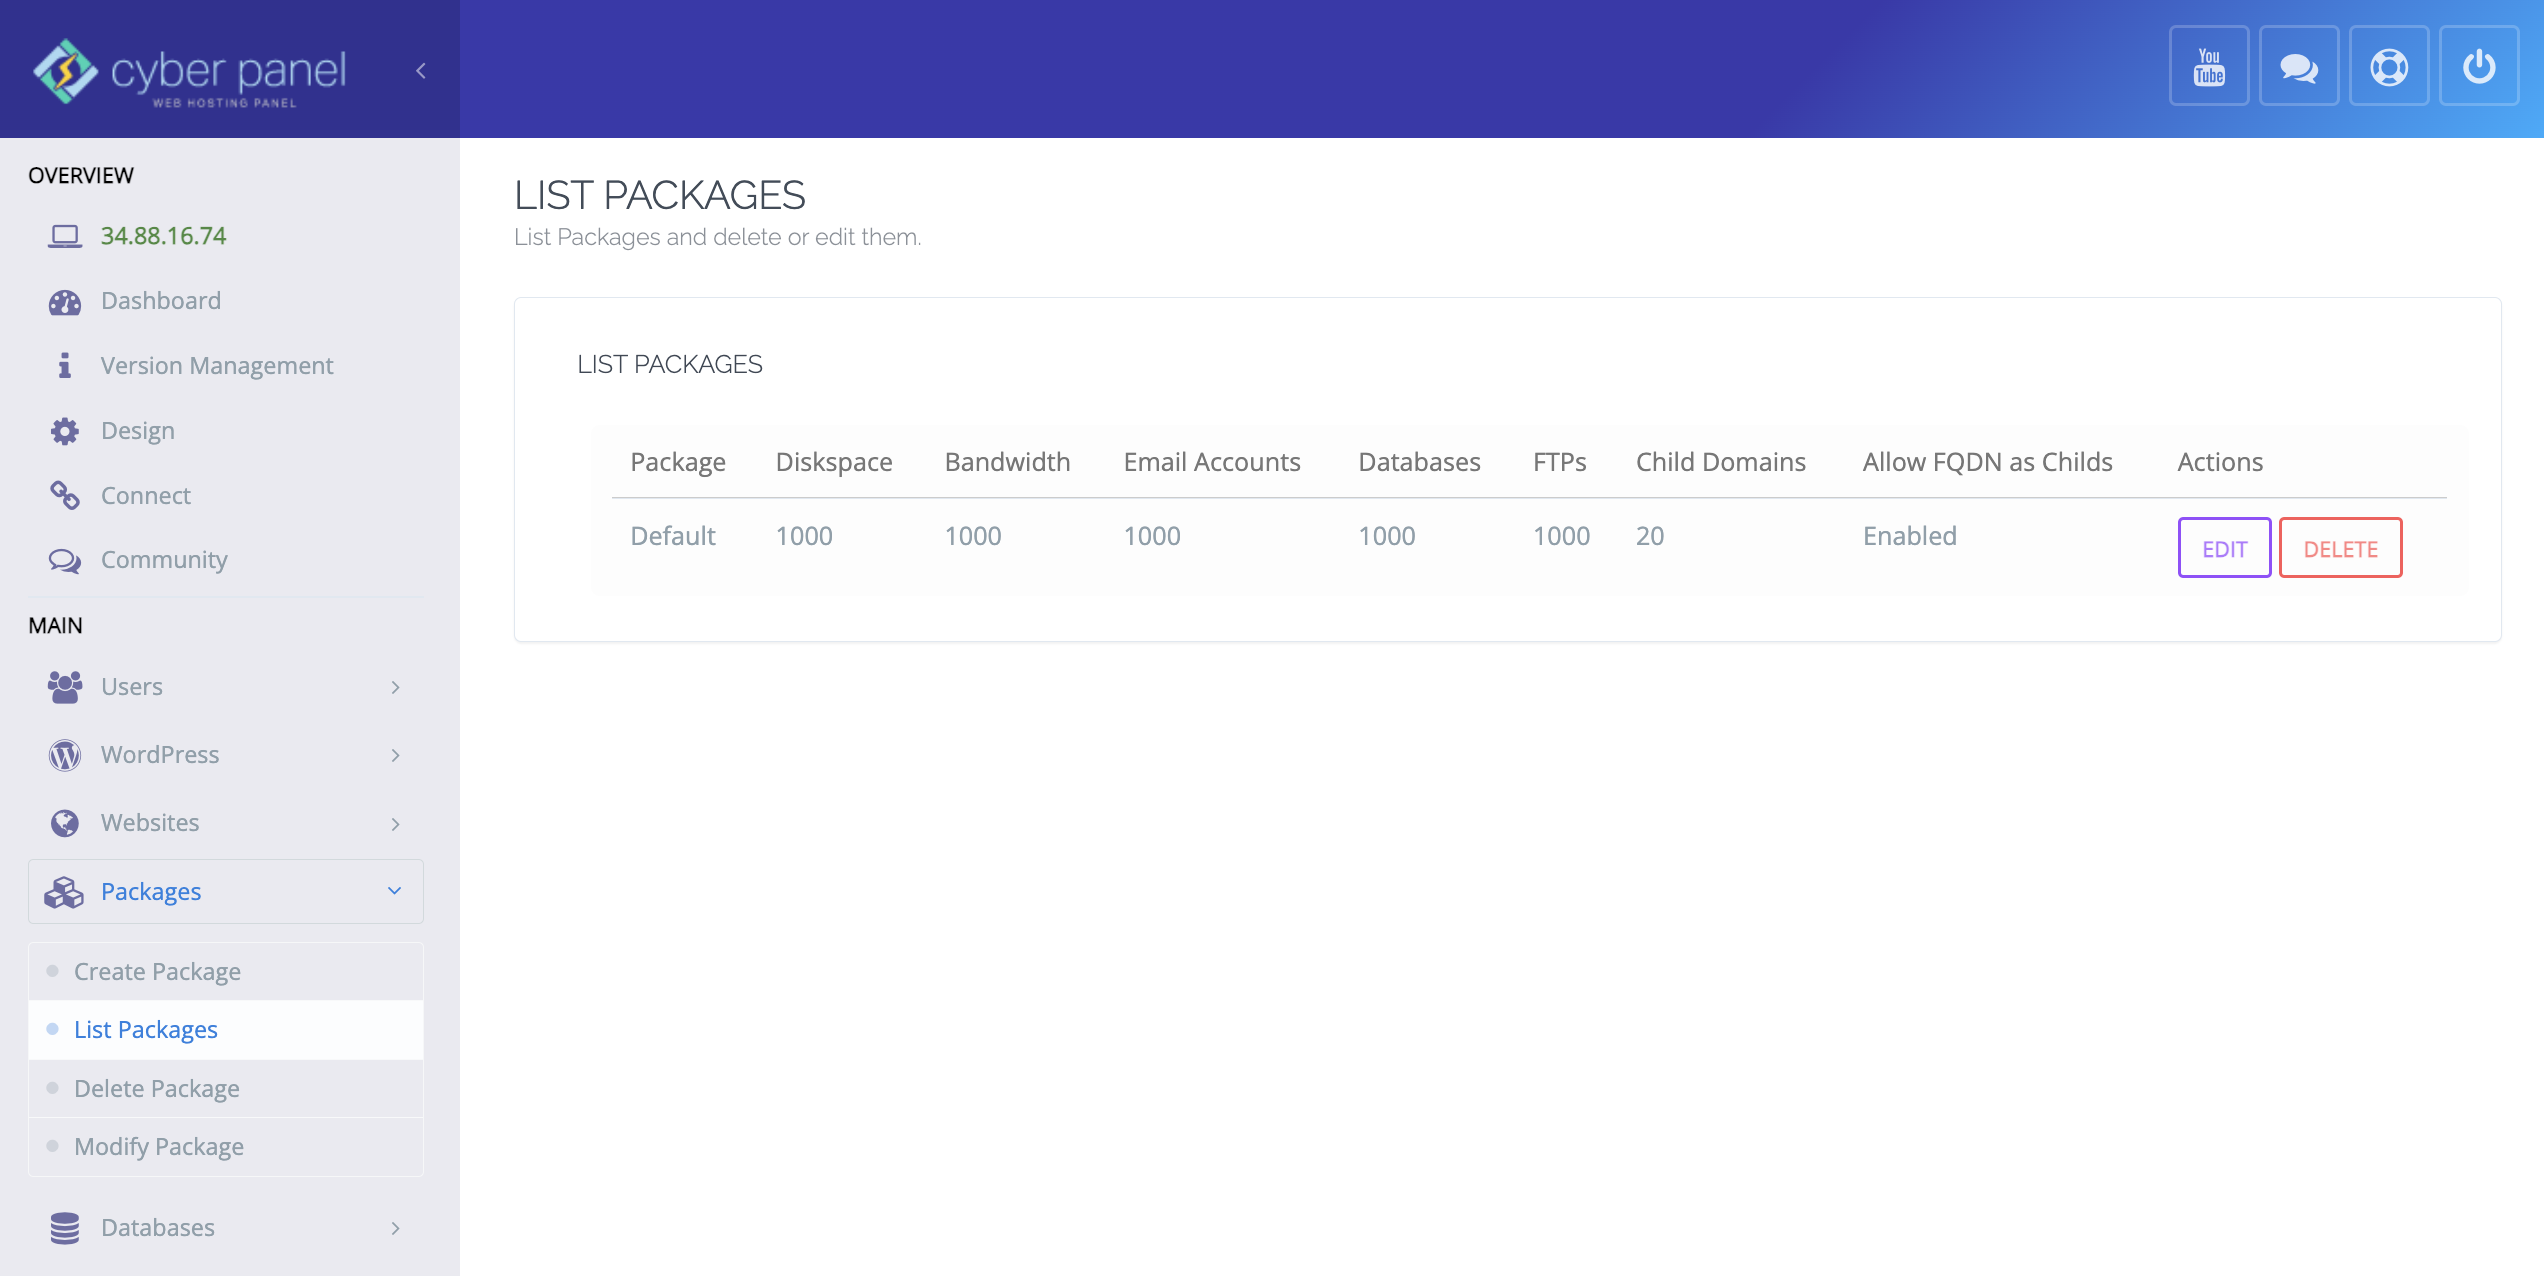
- In this page go to the Actions column and click the Edit button. You will be prompted with a new window through which you'll modify different values. We recommend you set the value for Domains, Disk Space and Bandwidth to 0 for unlimited usage. Set FTP Accounts and Emails to 0 each and Databases to 1. Changing the value to 0 for FTP Accounts and Emails will block you from creating email inboxes and connections to your storage through old technologies, and because this server should only be used for your websites it is highly recommend to do so. Email services make your server IP address public and expose you to different attacks. It is imperative to protect this server in the best possible way, as you'll store database entries on it. Cloudflare services can mask your server IP address only for websites.
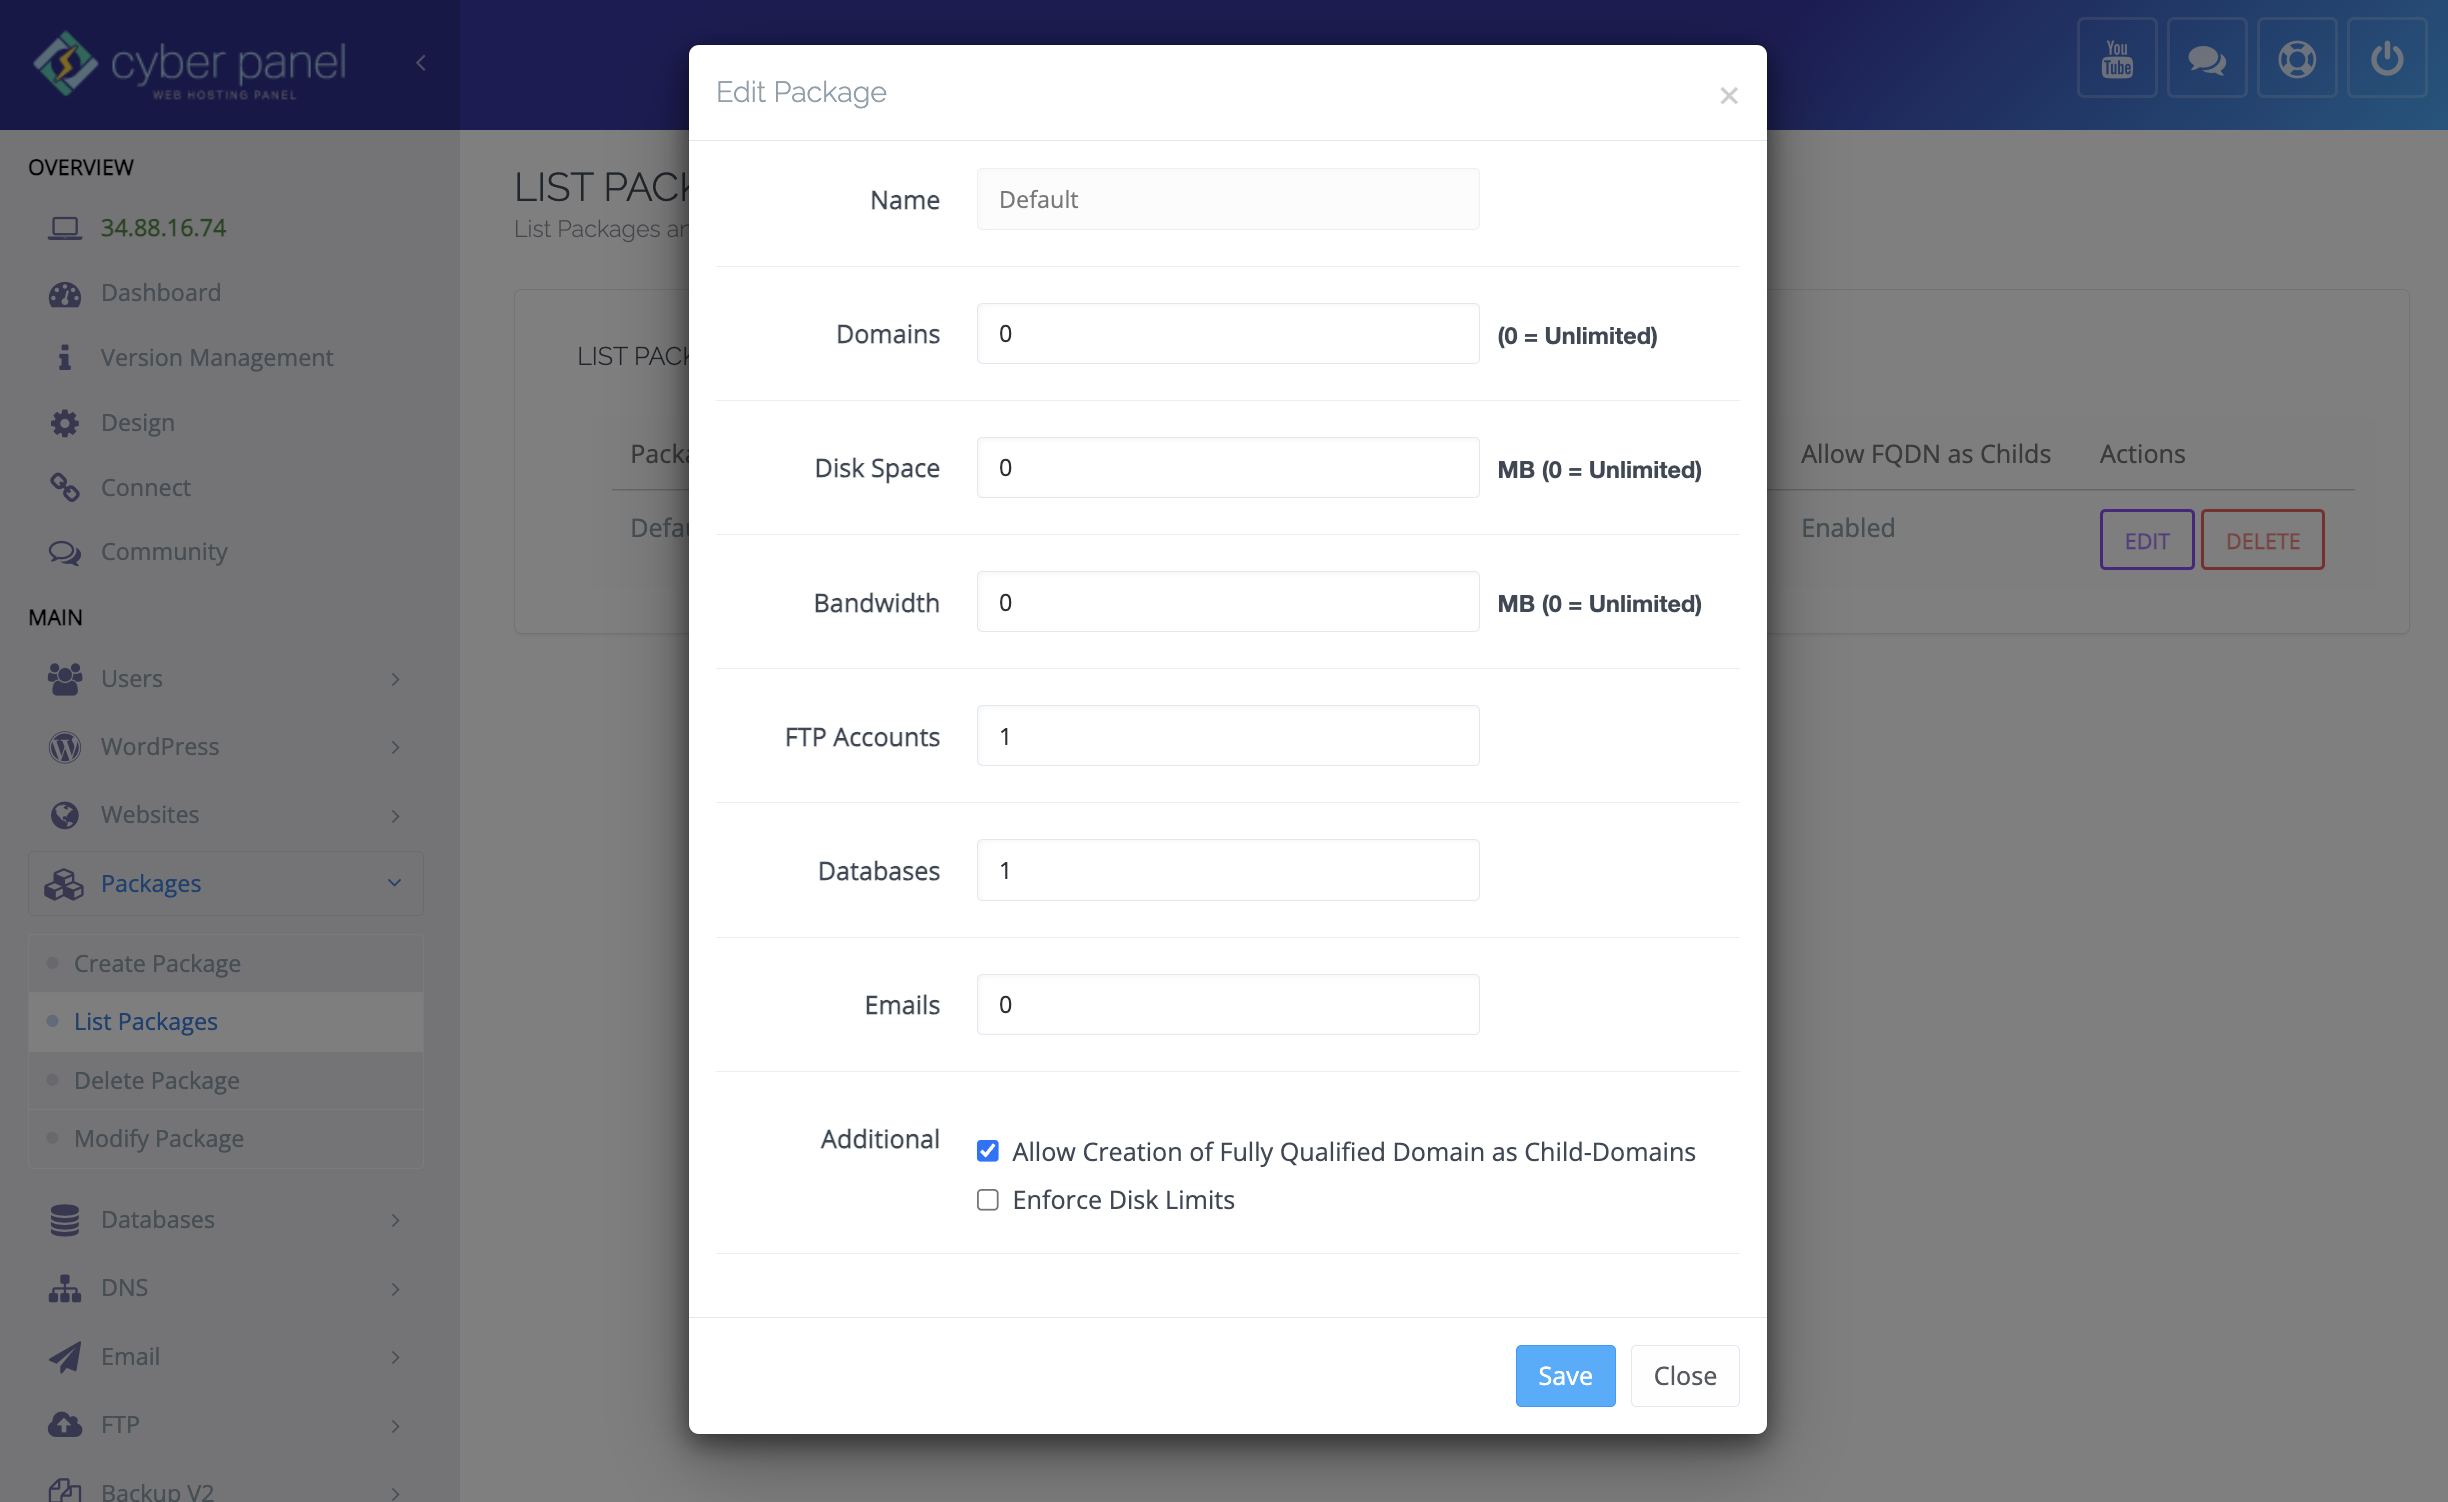
- Click the Save button to submit changes.
Cyberpanel PHP Configuration
PHP is a widely-used open-source scripting language particularly well-suited for web development. It can be embedded within HTML code, allowing for seamless integration with existing web pages. PHP is executed on the server side, meaning that the code is processed on the server before being sent to the client's browser. This server-side execution enables PHP to generate dynamic web page content, manage databases, create session management systems, and perform various other tasks that static HTML cannot achieve. PHP’s ease of use, efficiency, and vast compatibility with databases like MySQL, as well as its extensive library of pre-built functions, make it a favorite choice for developers looking to build robust, interactive websites.
- To run WordPress websites you need to install and activate different recommended technologies.
- Using the side menu, Navigate to PHP > Install Extensions. Using the dropdown, Select PHP 8.1 (latest version). Head over to the Search Extensions input and type imagick. The system will display five results.
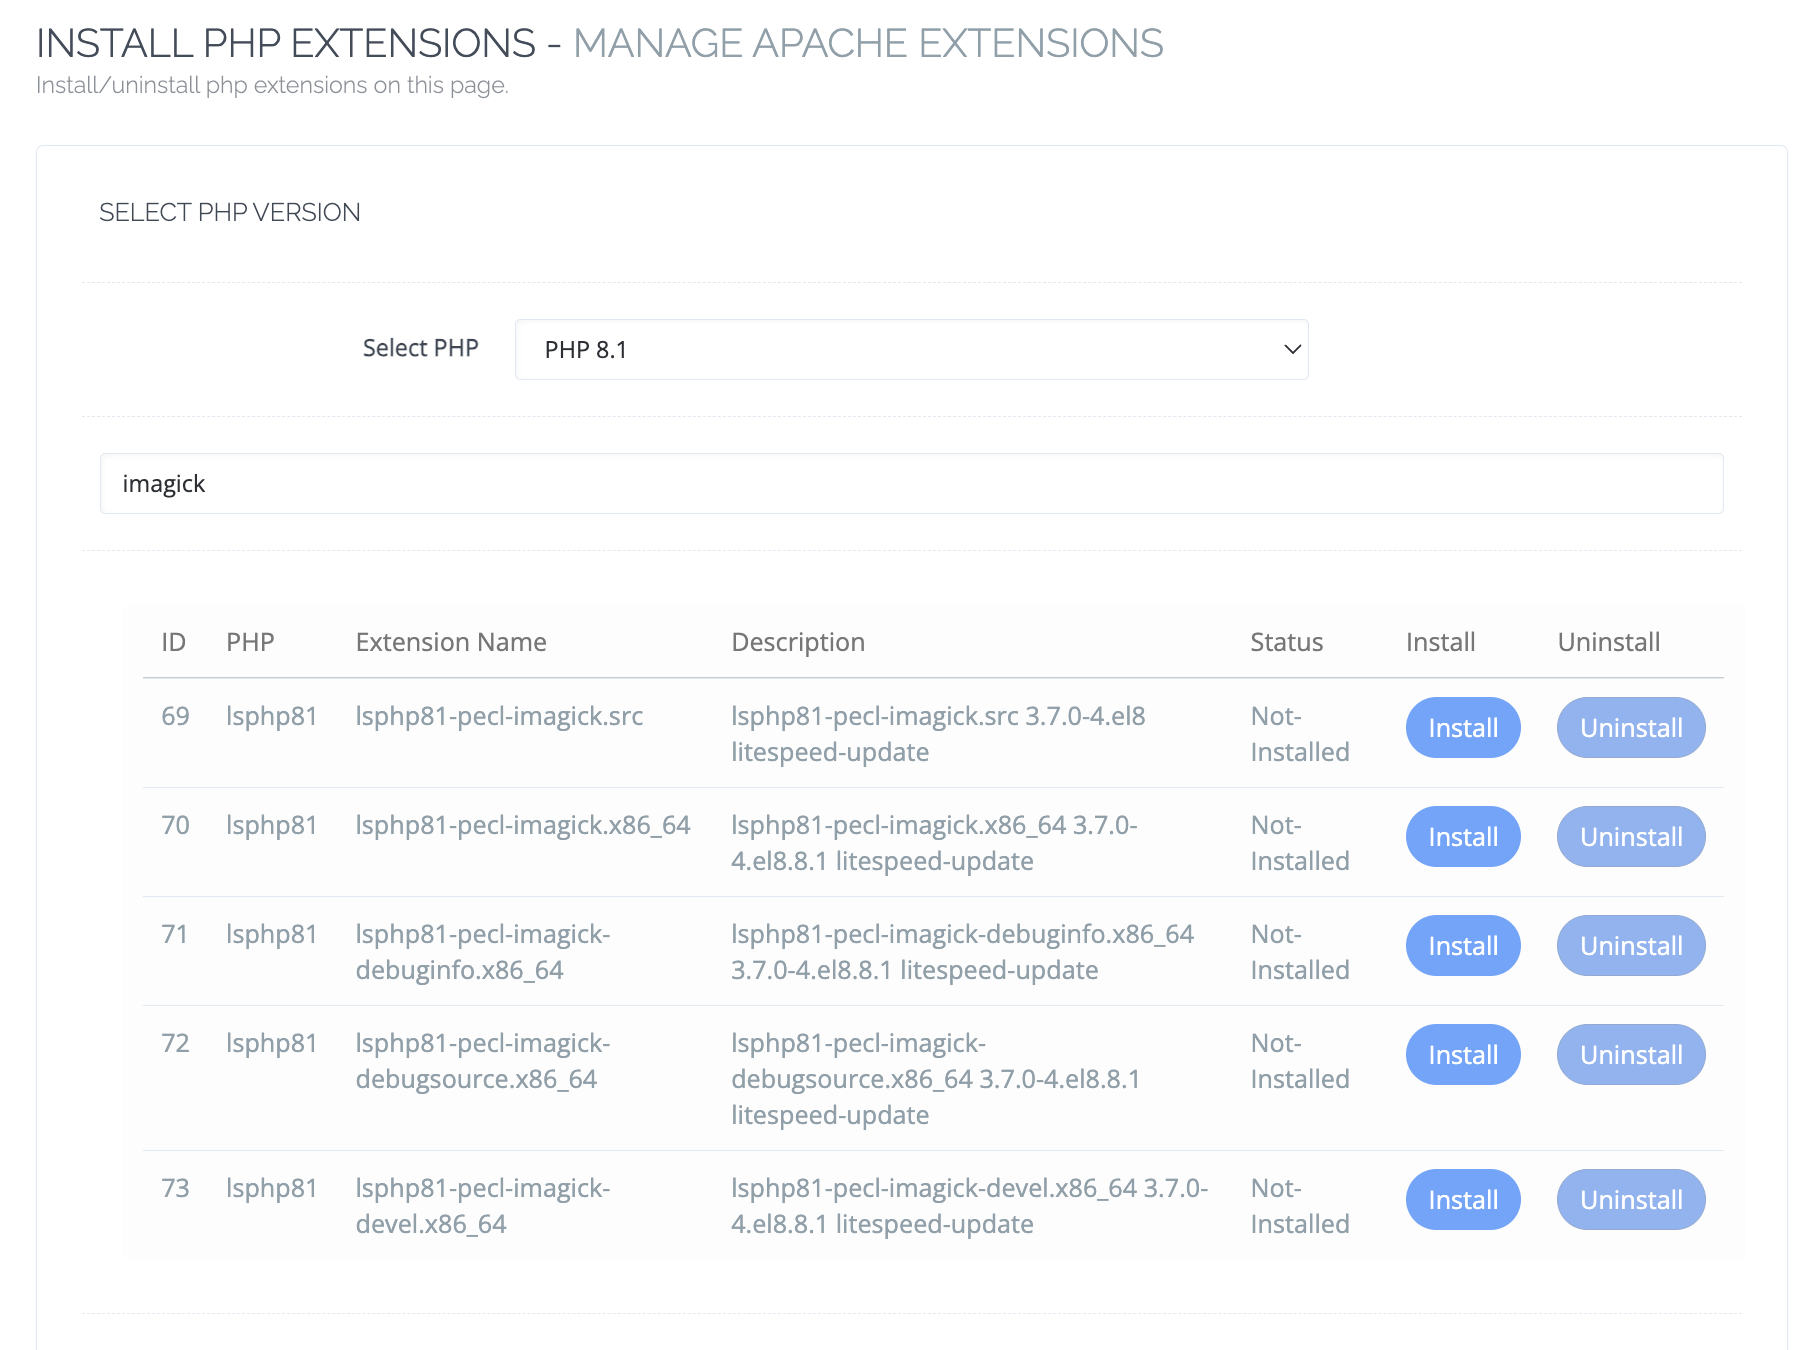
- Click the Install button.
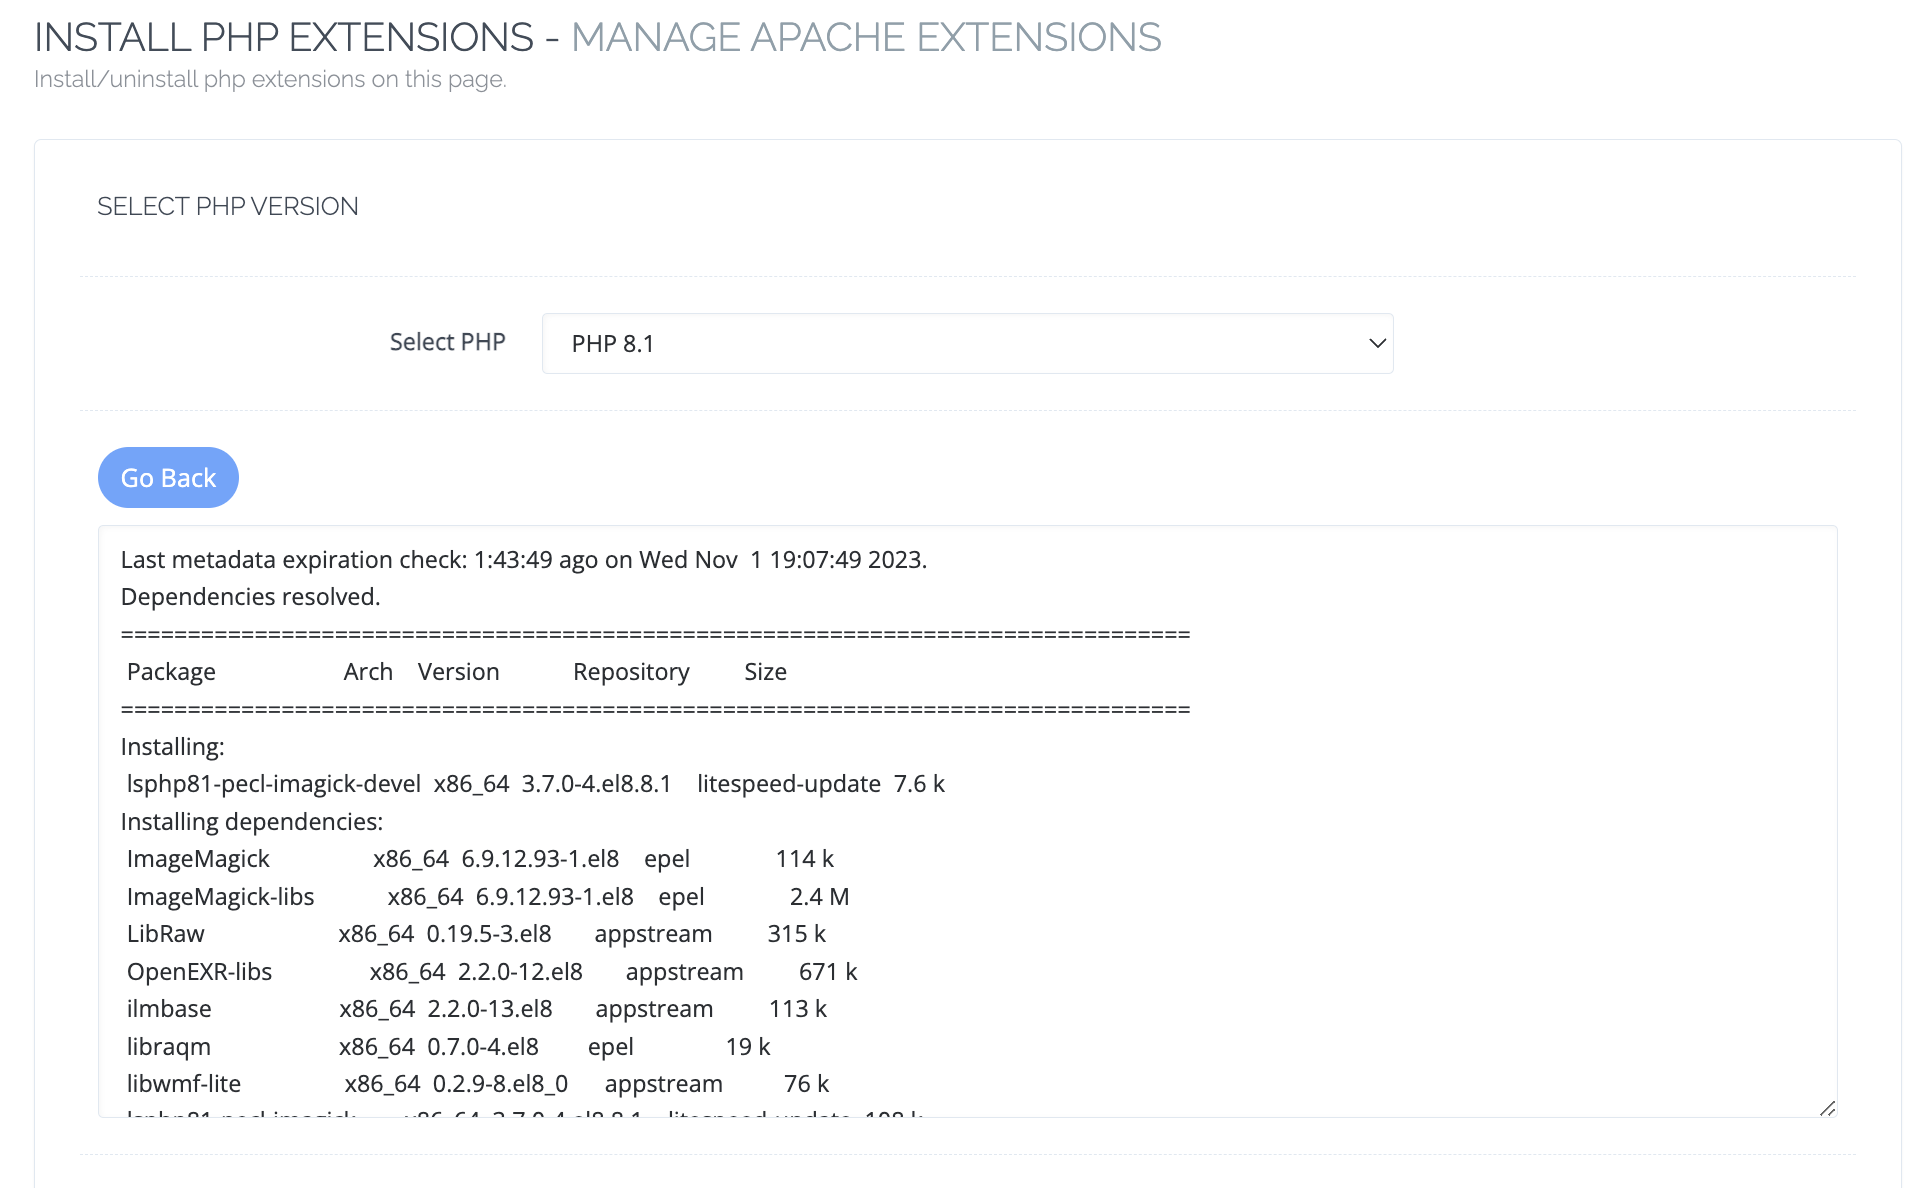
- Wait for the page to finish loading to confirm a successful install and then click the Go Back button.
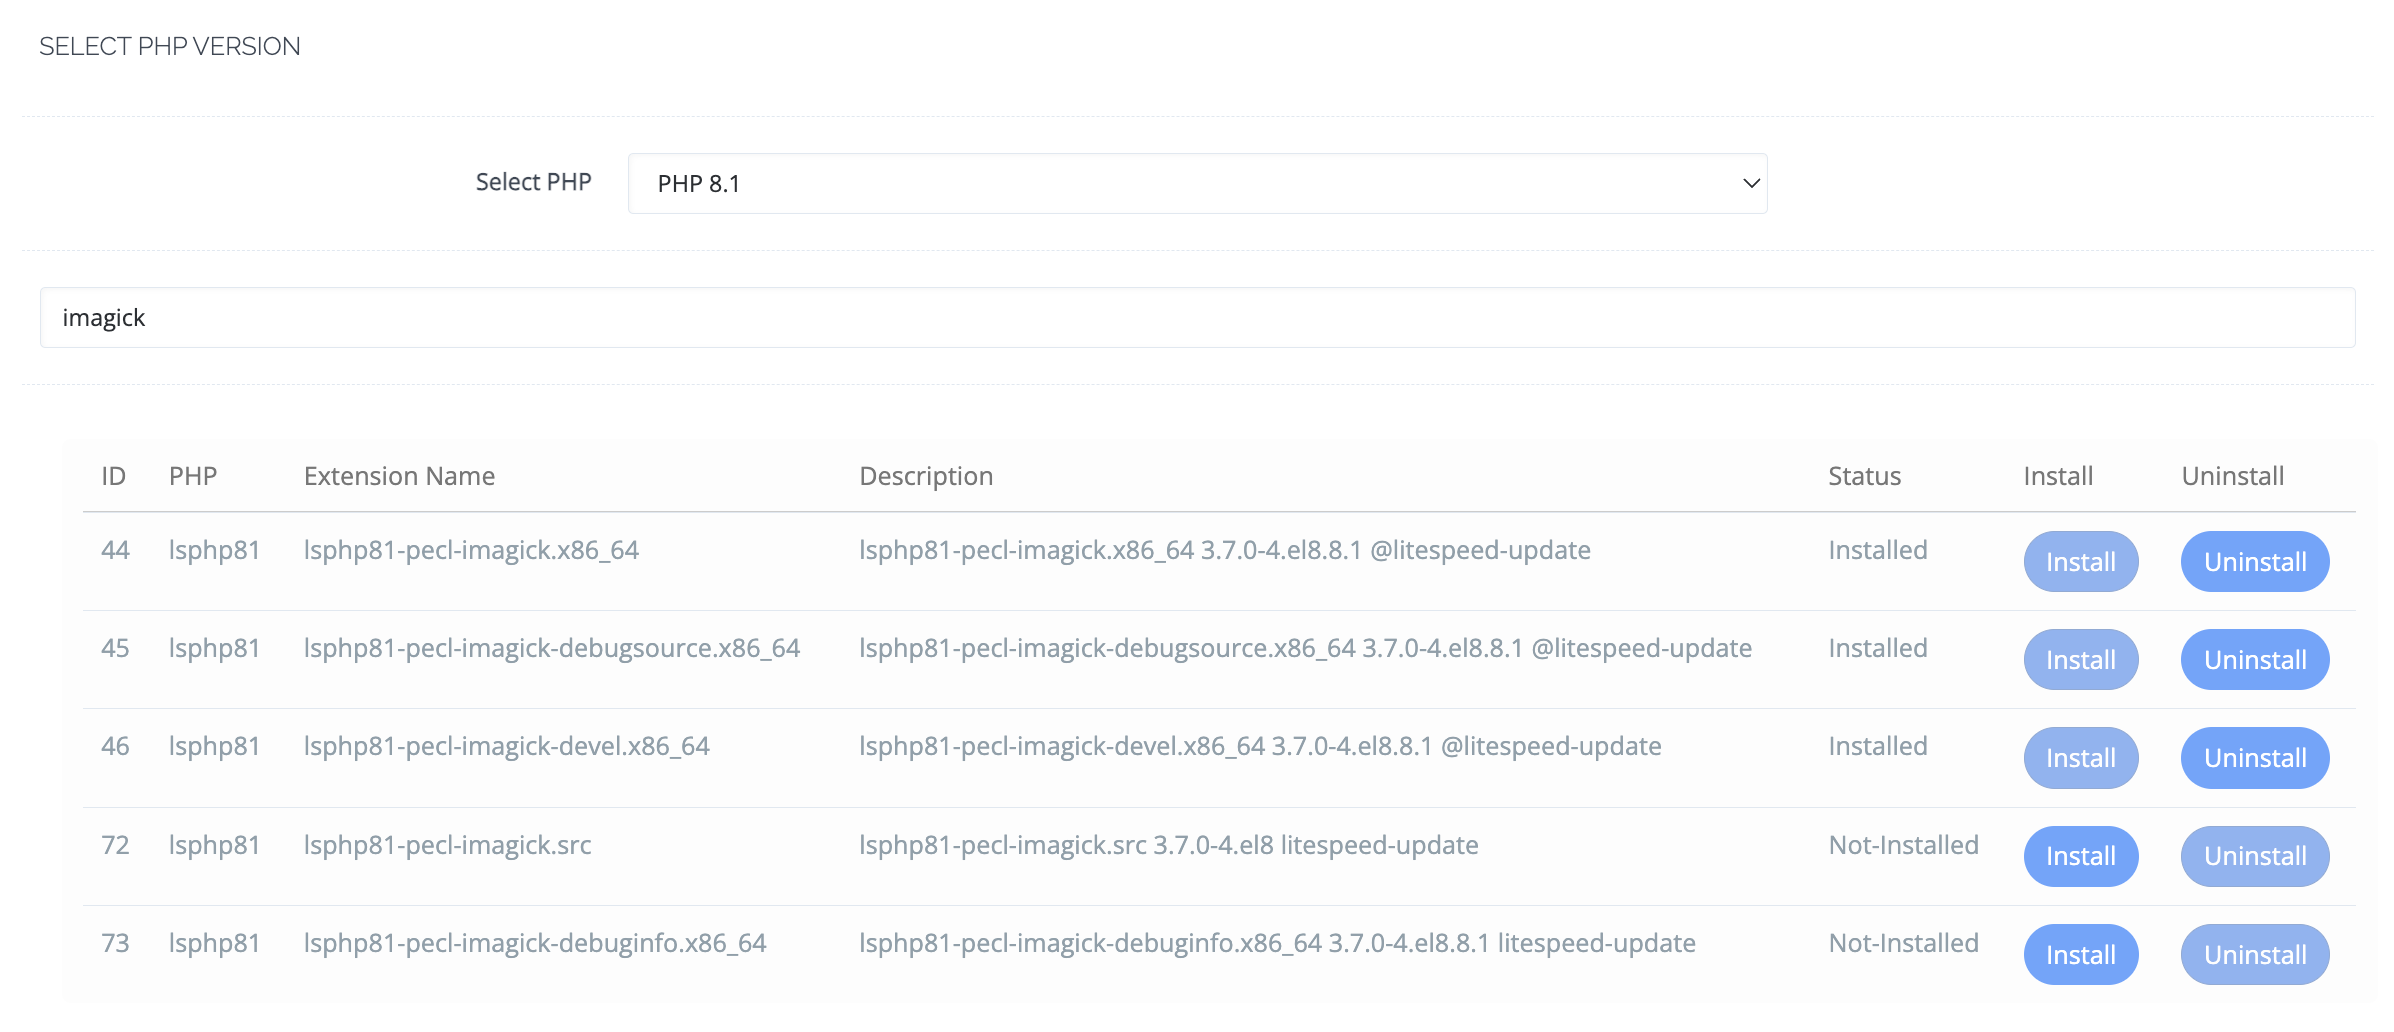
- Check the Status column. Each time you finish installing an extension, you'll notice a different status.
- Repeat the process until all extensions have the Installed status.
- Now go to PHP > Edit PHP Configs and Select PHP 8.1. Change the input values as in the bellow screenshot.
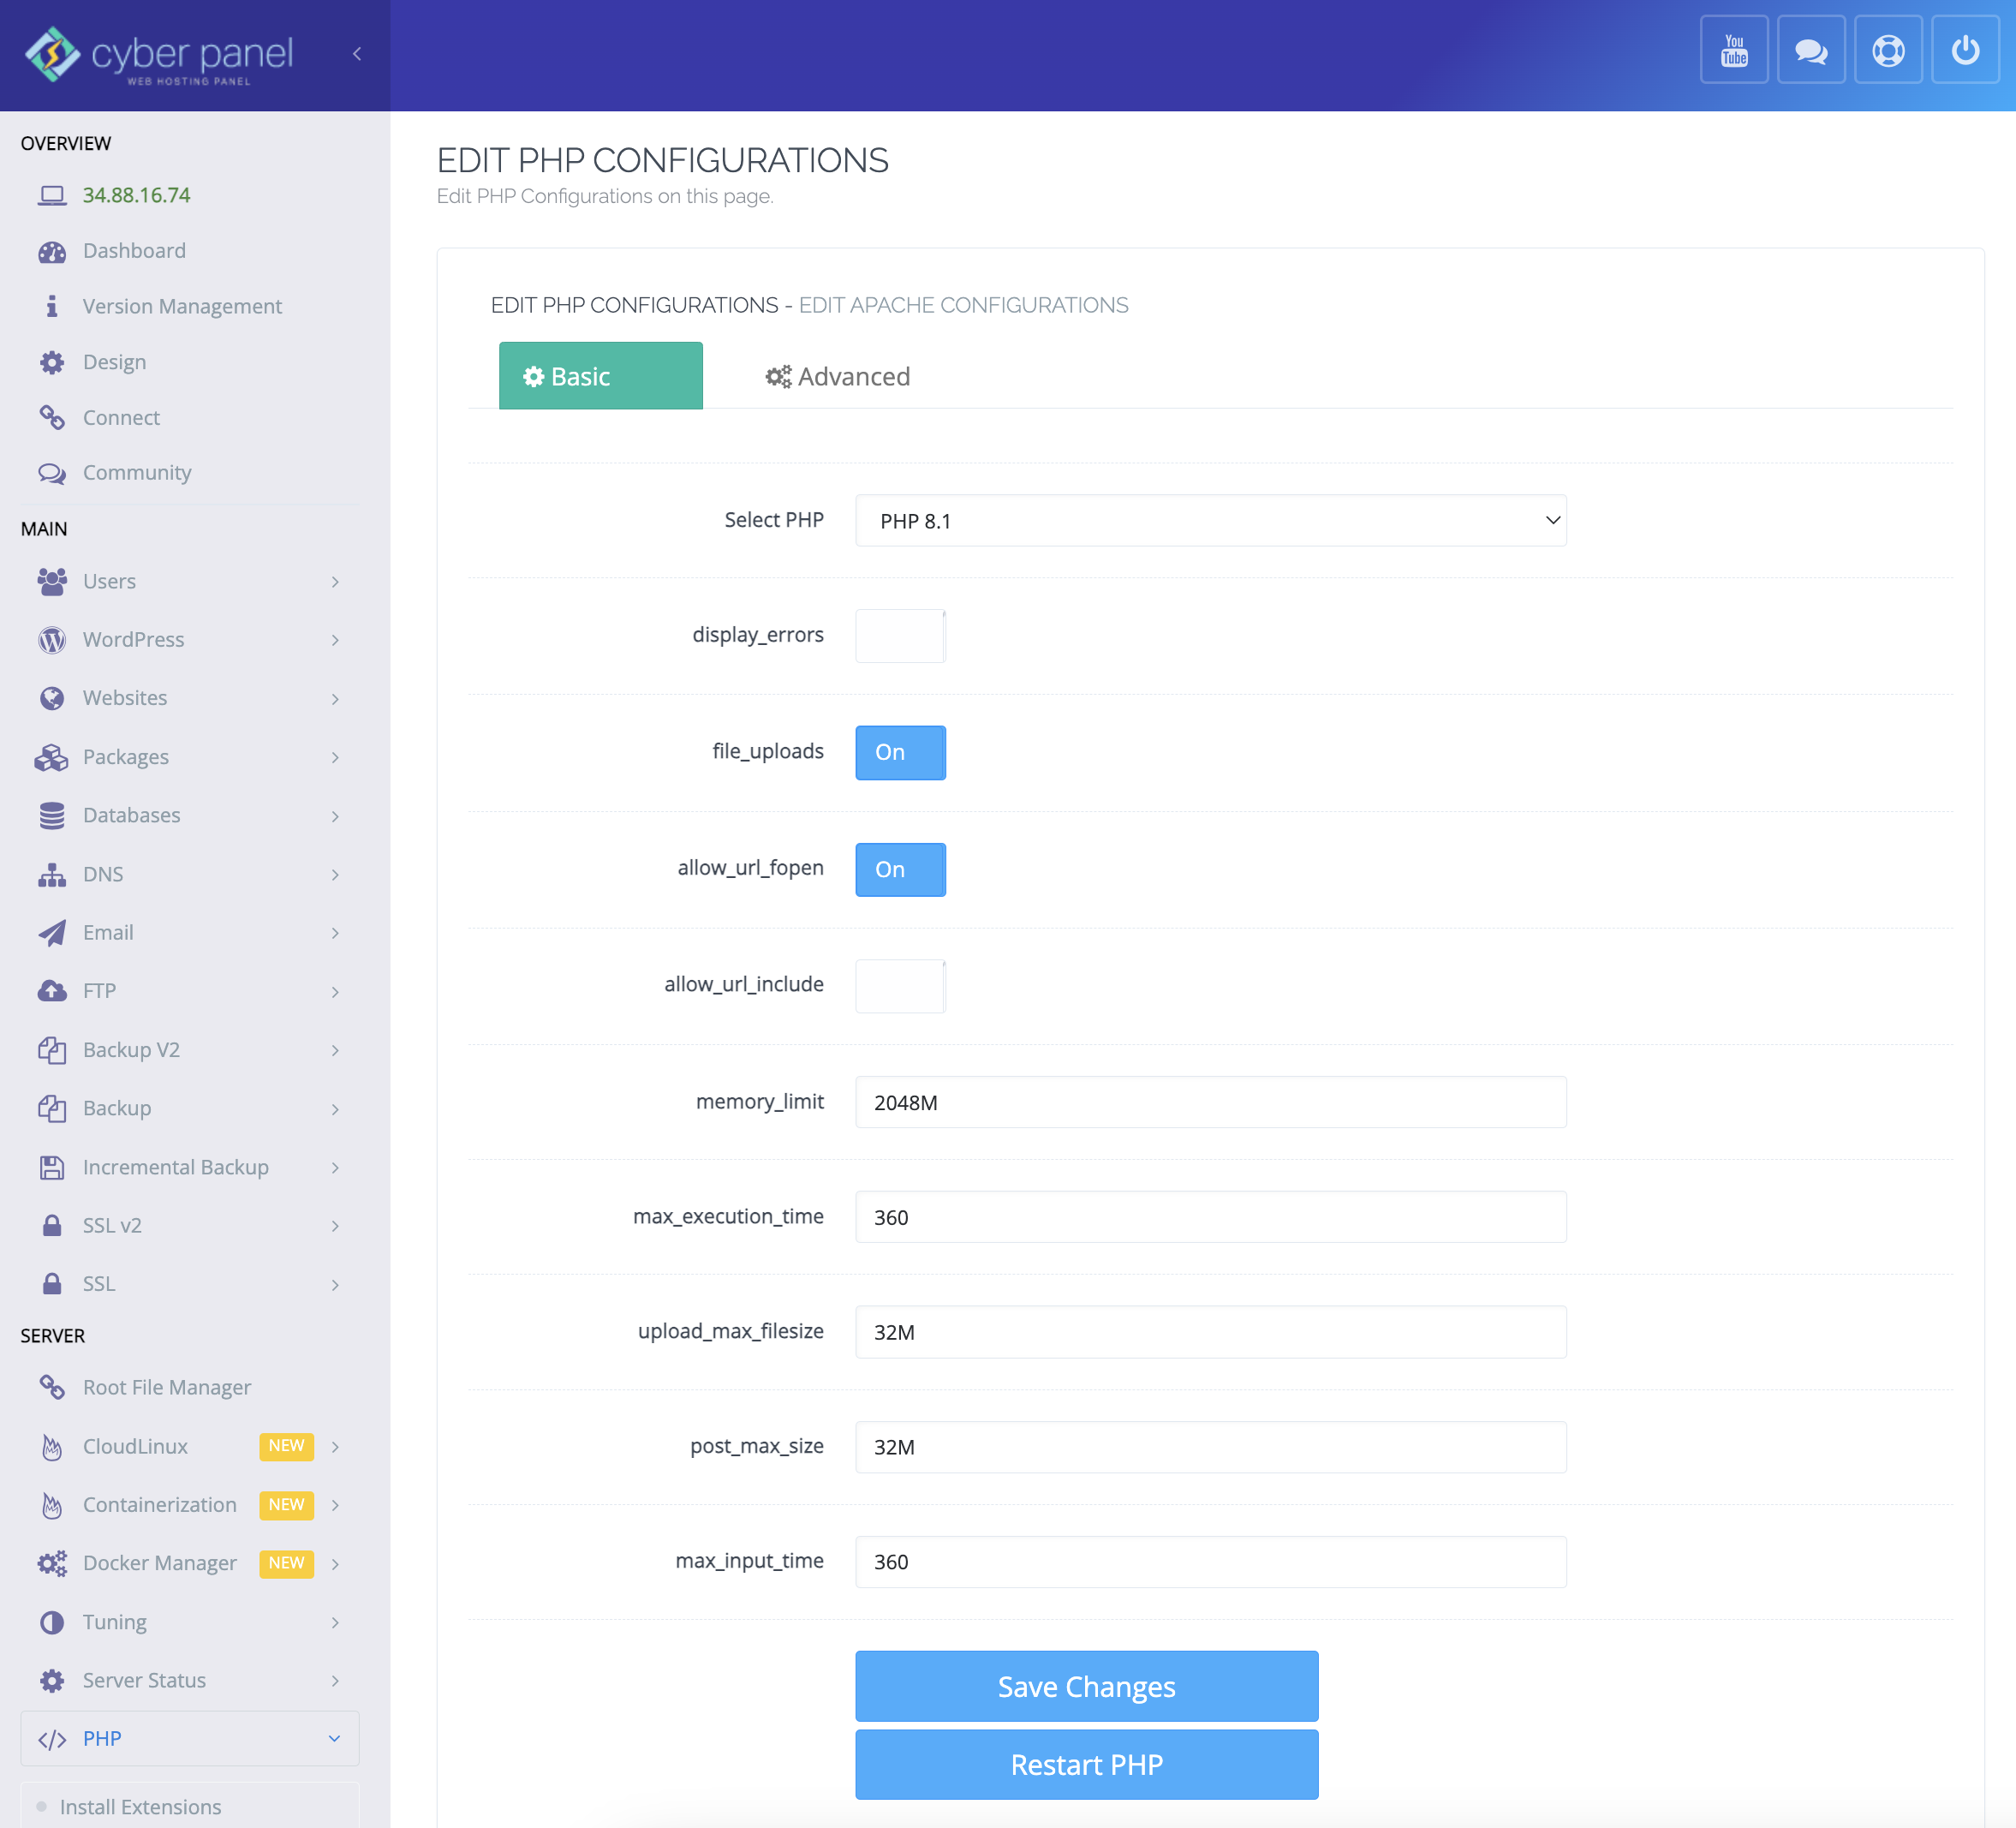
- Click Save Changes to submit and then Restart PHP in order to allow your server to use the new configuration.
- Switch to the Advanced tab and scroll down to ;max_input_vars = 1000.
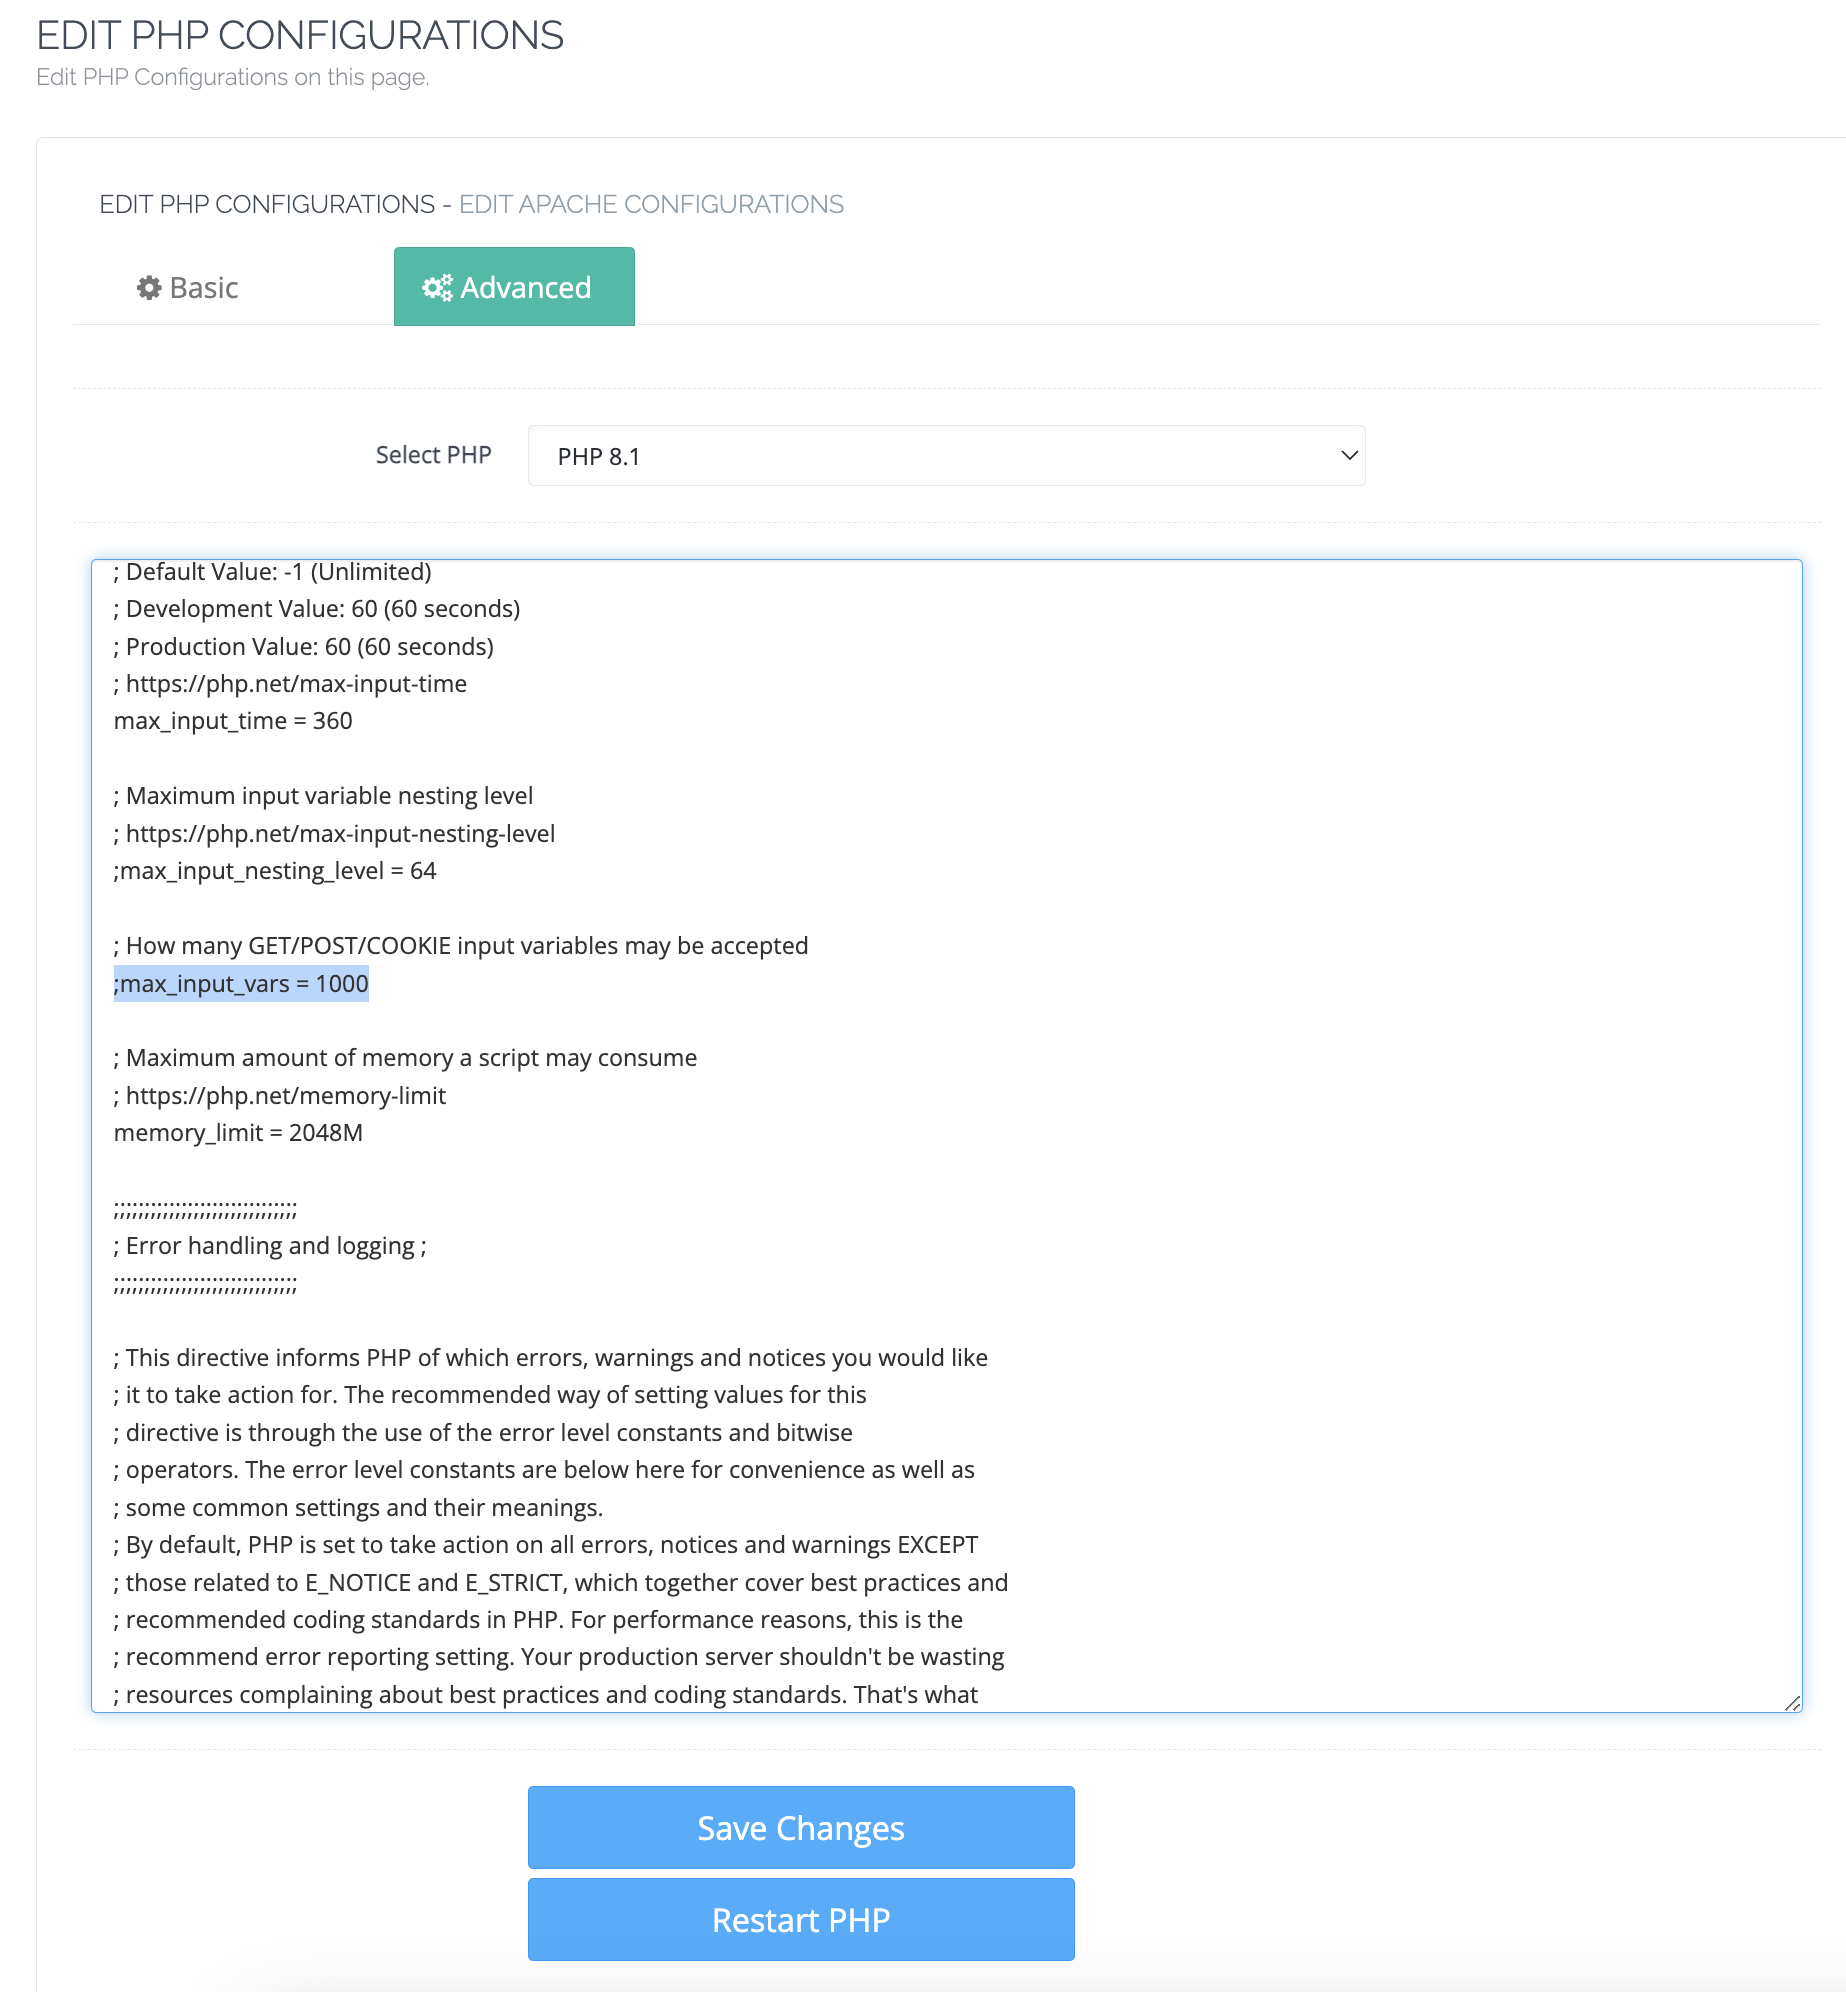
- Remove the semicolon and add one more zero (max_input_vars = 10000). Certain WordPress themes and plugins may require a higher max_input_vars value due to their complexity and the number of settings they offer, this is why we need to increase the number.
- Save Changes then Restart PHP.
Disable certain Cyberpanel systems for services you won't be using
- Using the left side menu, navigate to Manage Services > Manage PowerDNS.
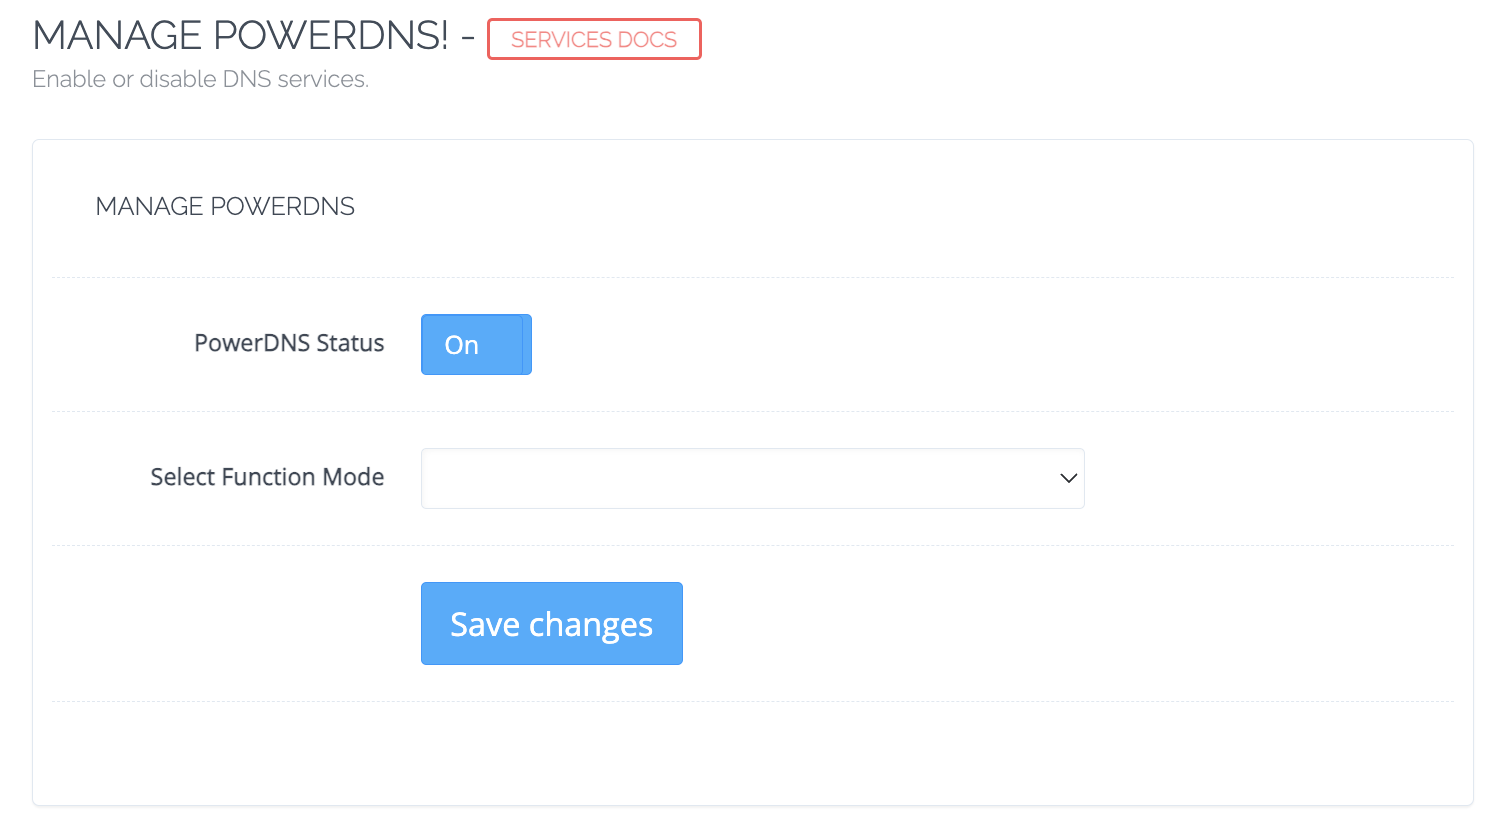
- Now you need to switch off PowerDNS. Use the PowerDNS Status toggle to achieve this, then click the Save changes button.
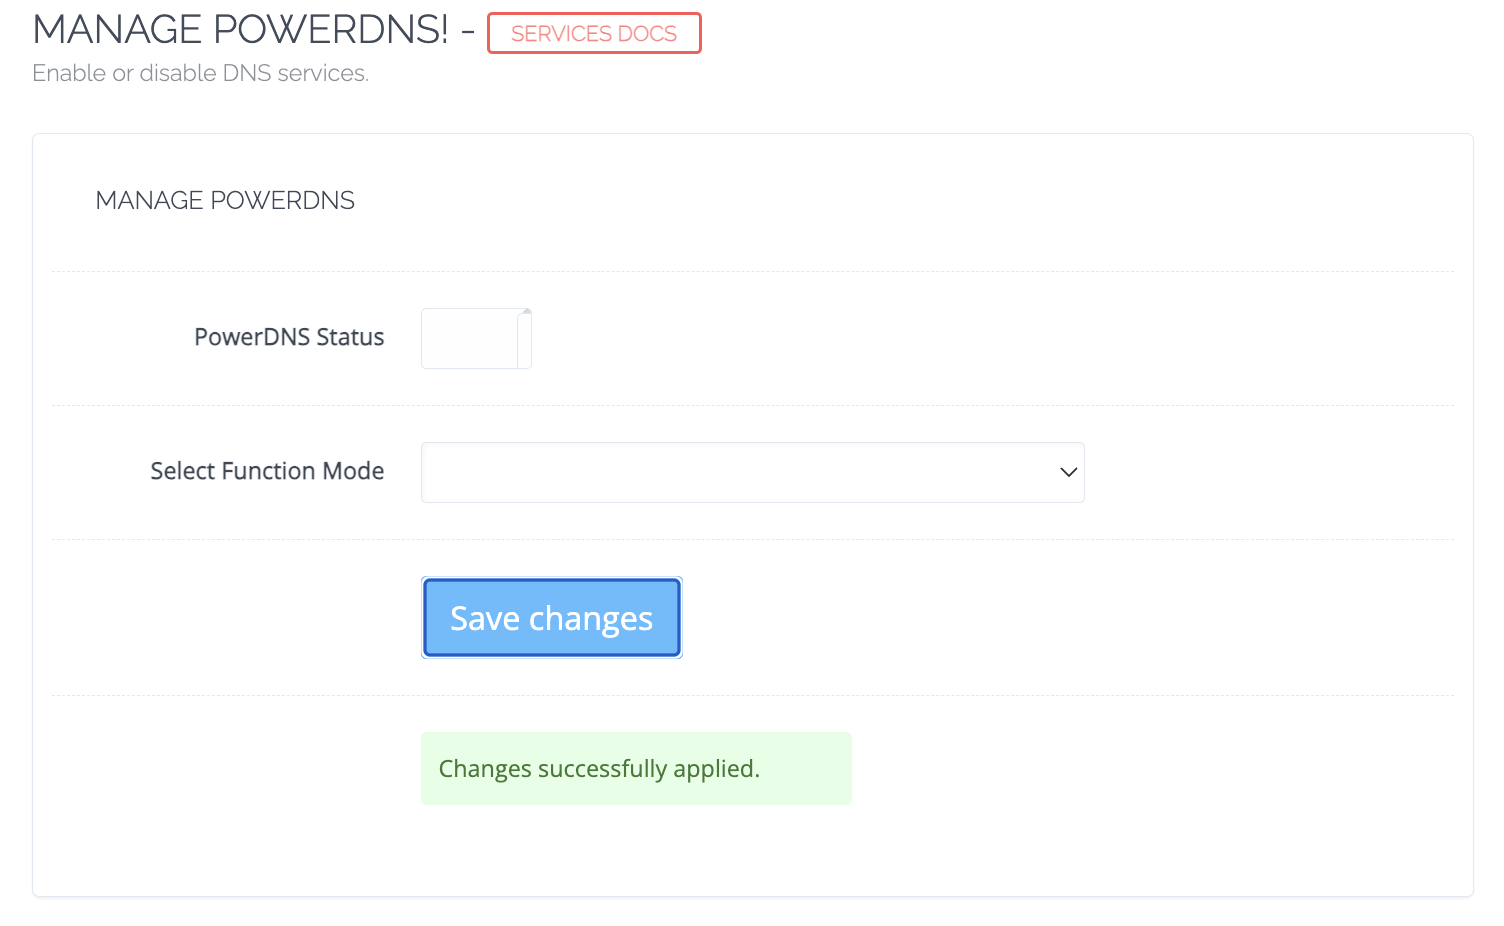
- Navigate to Manage Postfix and Manage FTP and apply the same instructions.
Cloudflare is a global content delivery network (CDN) and web infrastructure provider that offers a suite of services designed to optimize website performance, enhance security, and ensure uptime. With features like DDoS protection, intelligent caching, and a distributed network of data centers, Cloudflare accelerates and protects millions of websites, ensuring faster page load times and safeguarding them from web threats. Additionally, Cloudflare provides SSL/TLS encryption, domain name system (DNS) services, and traffic analytics, making it an essential tool for webmasters and businesses aiming for a secure and high-performing online presence.
Cloudflare SSL/TLS
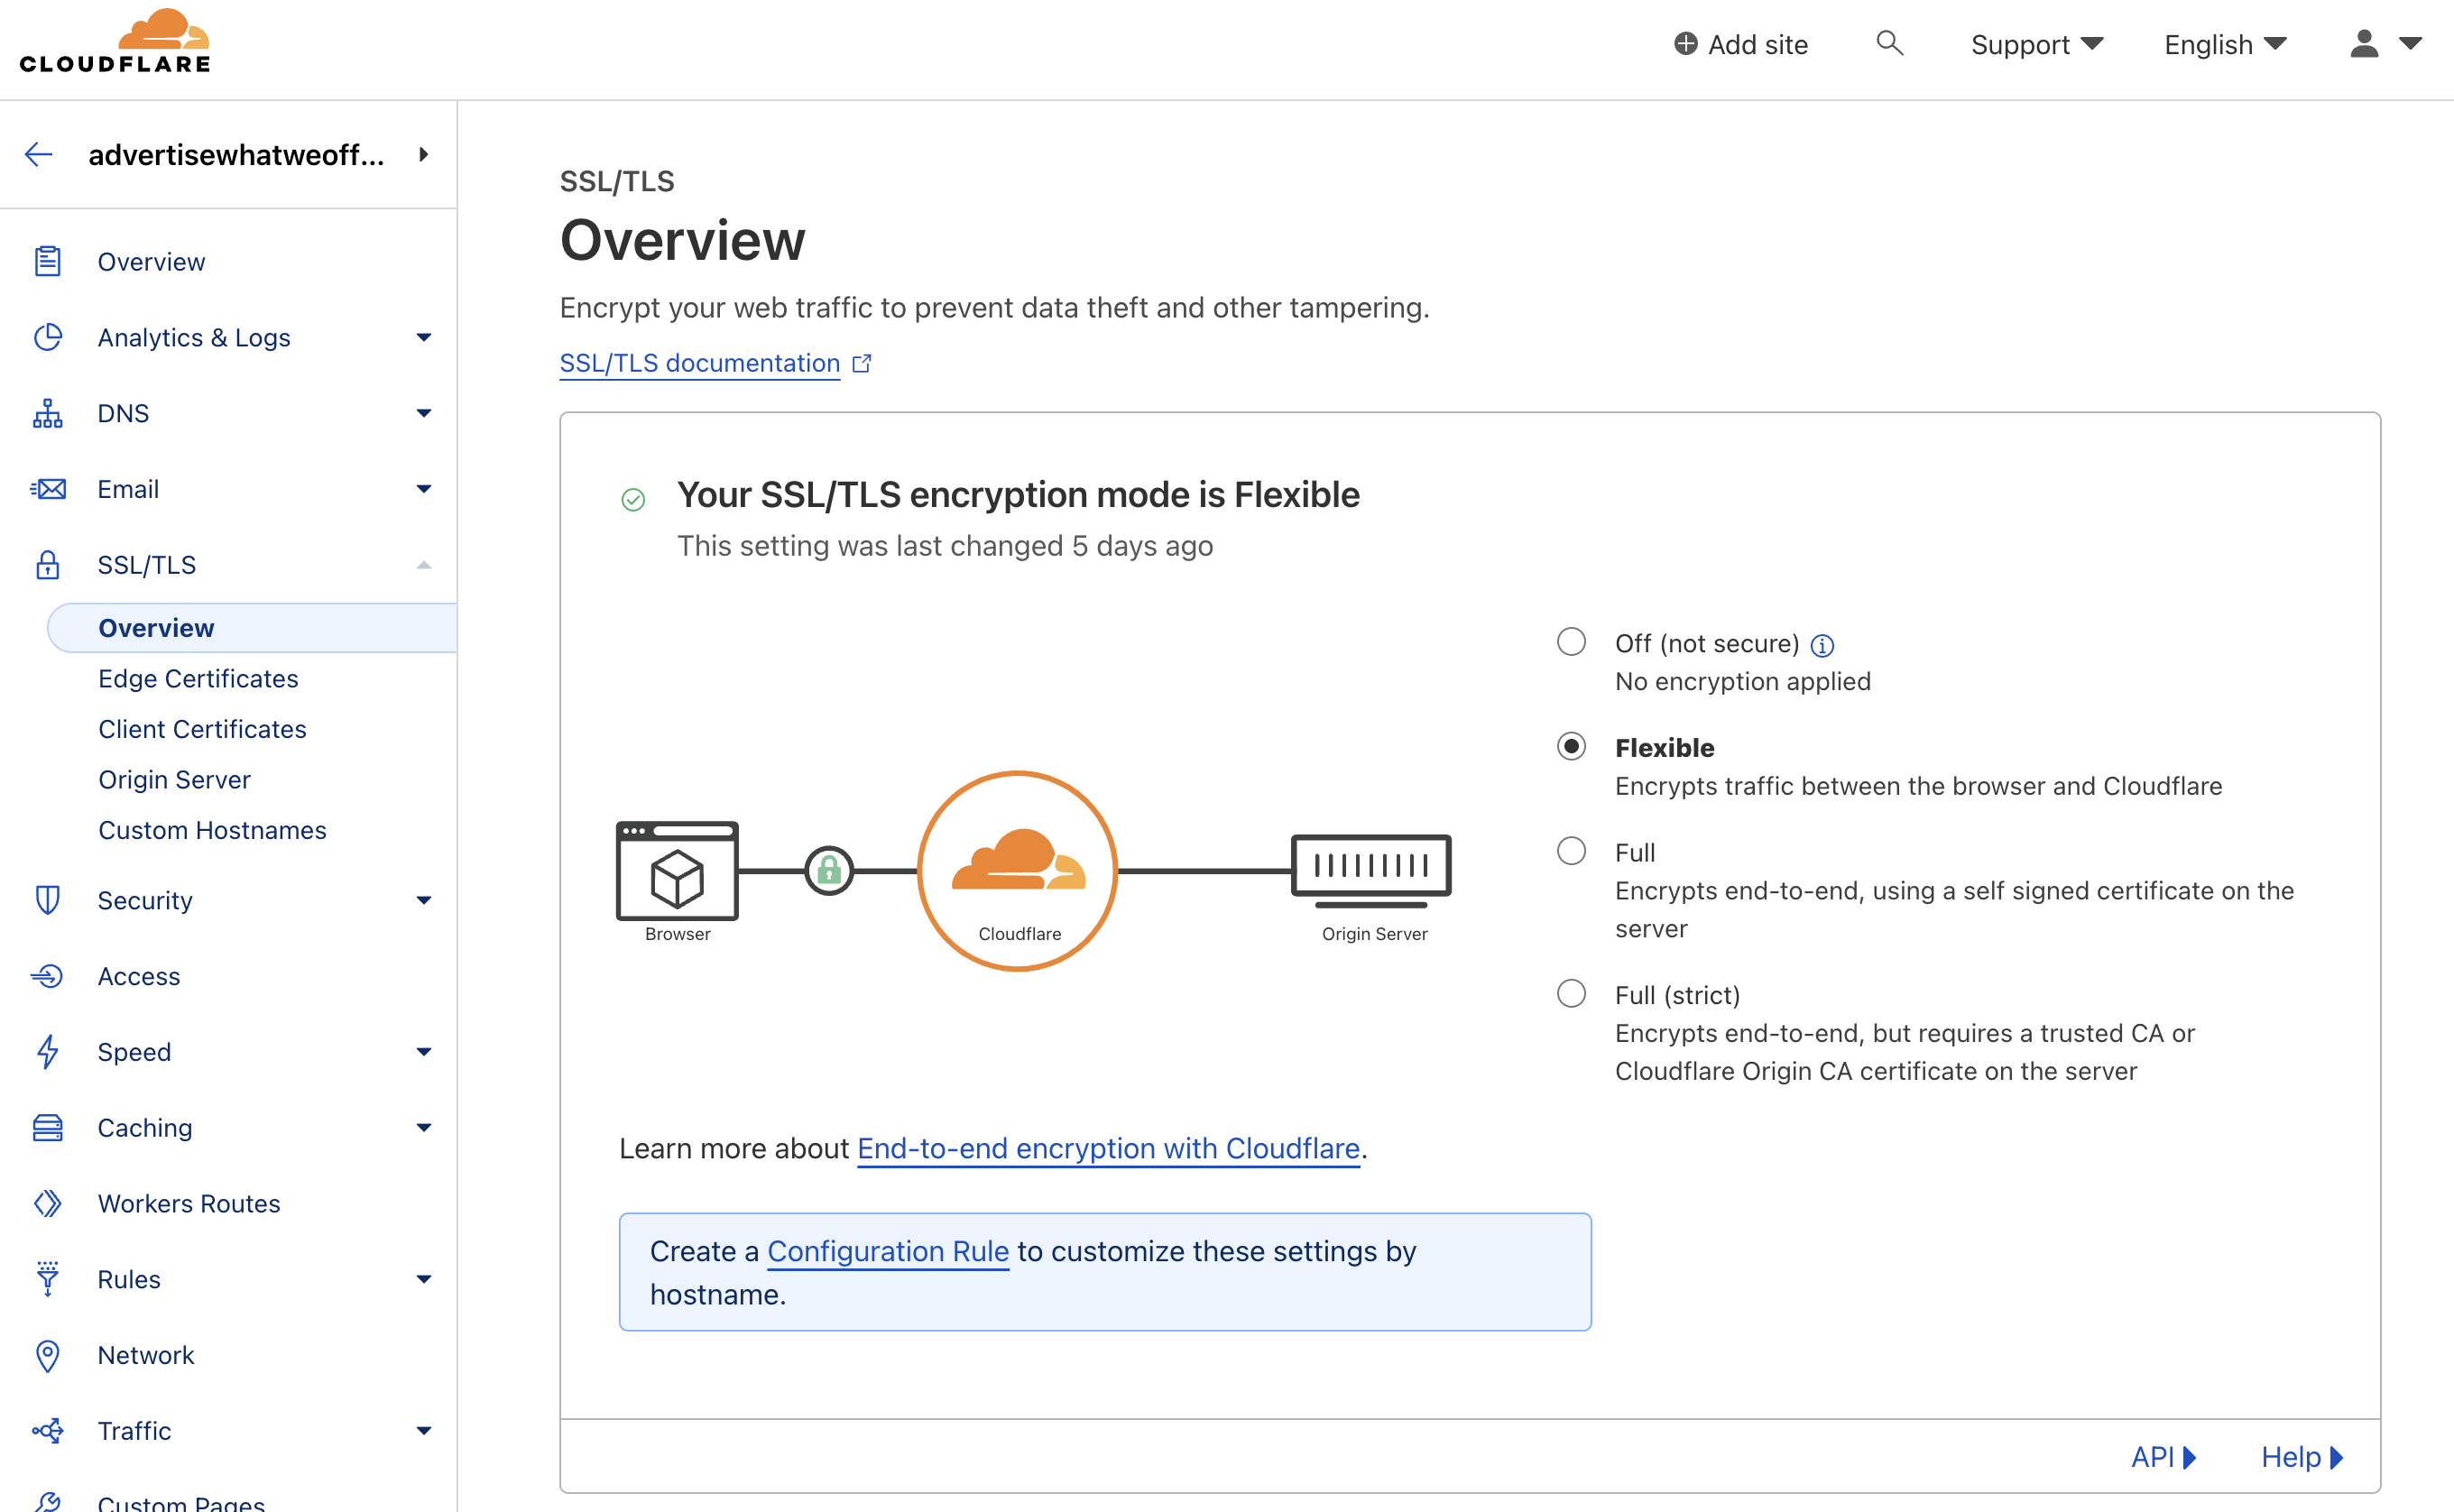
- Go to your Cloudflare Dashboard and navigate to SSL/TLS > Overview. Switch the encryption mode from Flexible to Full (strict). From this moment forward all connections to your server will only work if your SSL Certificate is issued by a trusted Certificate Authority (CA). In our case, Cyberpanel issues all certificates through Let's Encrypt. They are a nonprofit Certificate Authority providing TLS certificates to 300 million websites, sponsored and endorsed by all major league, global companies, like Google, Amazon, Cisco, etc.
- Using the left side menu, switch to the Edge Certificates page. Scroll down to the Always Use HTTPS box and activate.

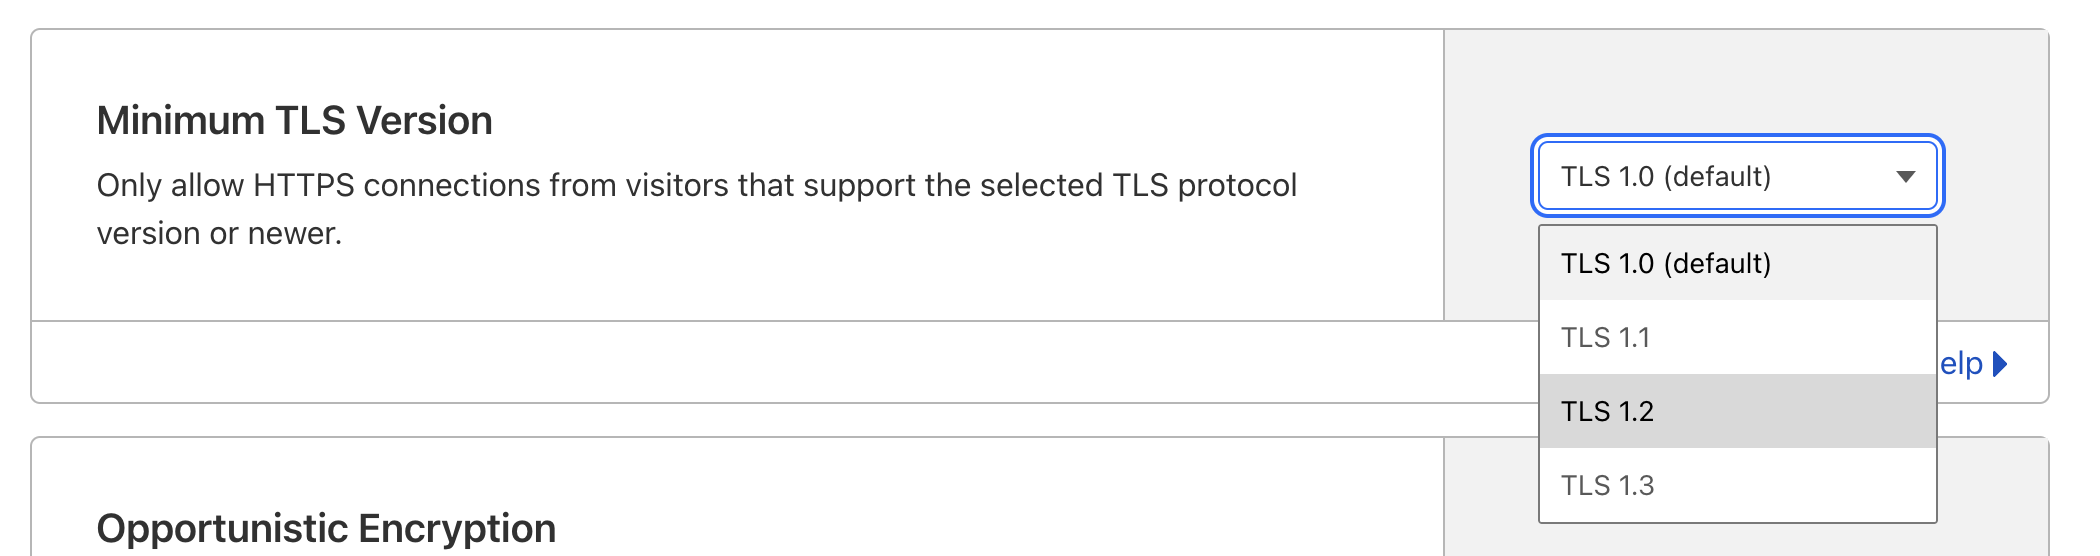
- Inside the Minimum TLS Version use the dropdown and select TLS 1.2 to force all connections to a higher encryption level. You can also use TLS 1.3, but older computers will not be able to access your websites at all, as they do not support the latest version of the technology.
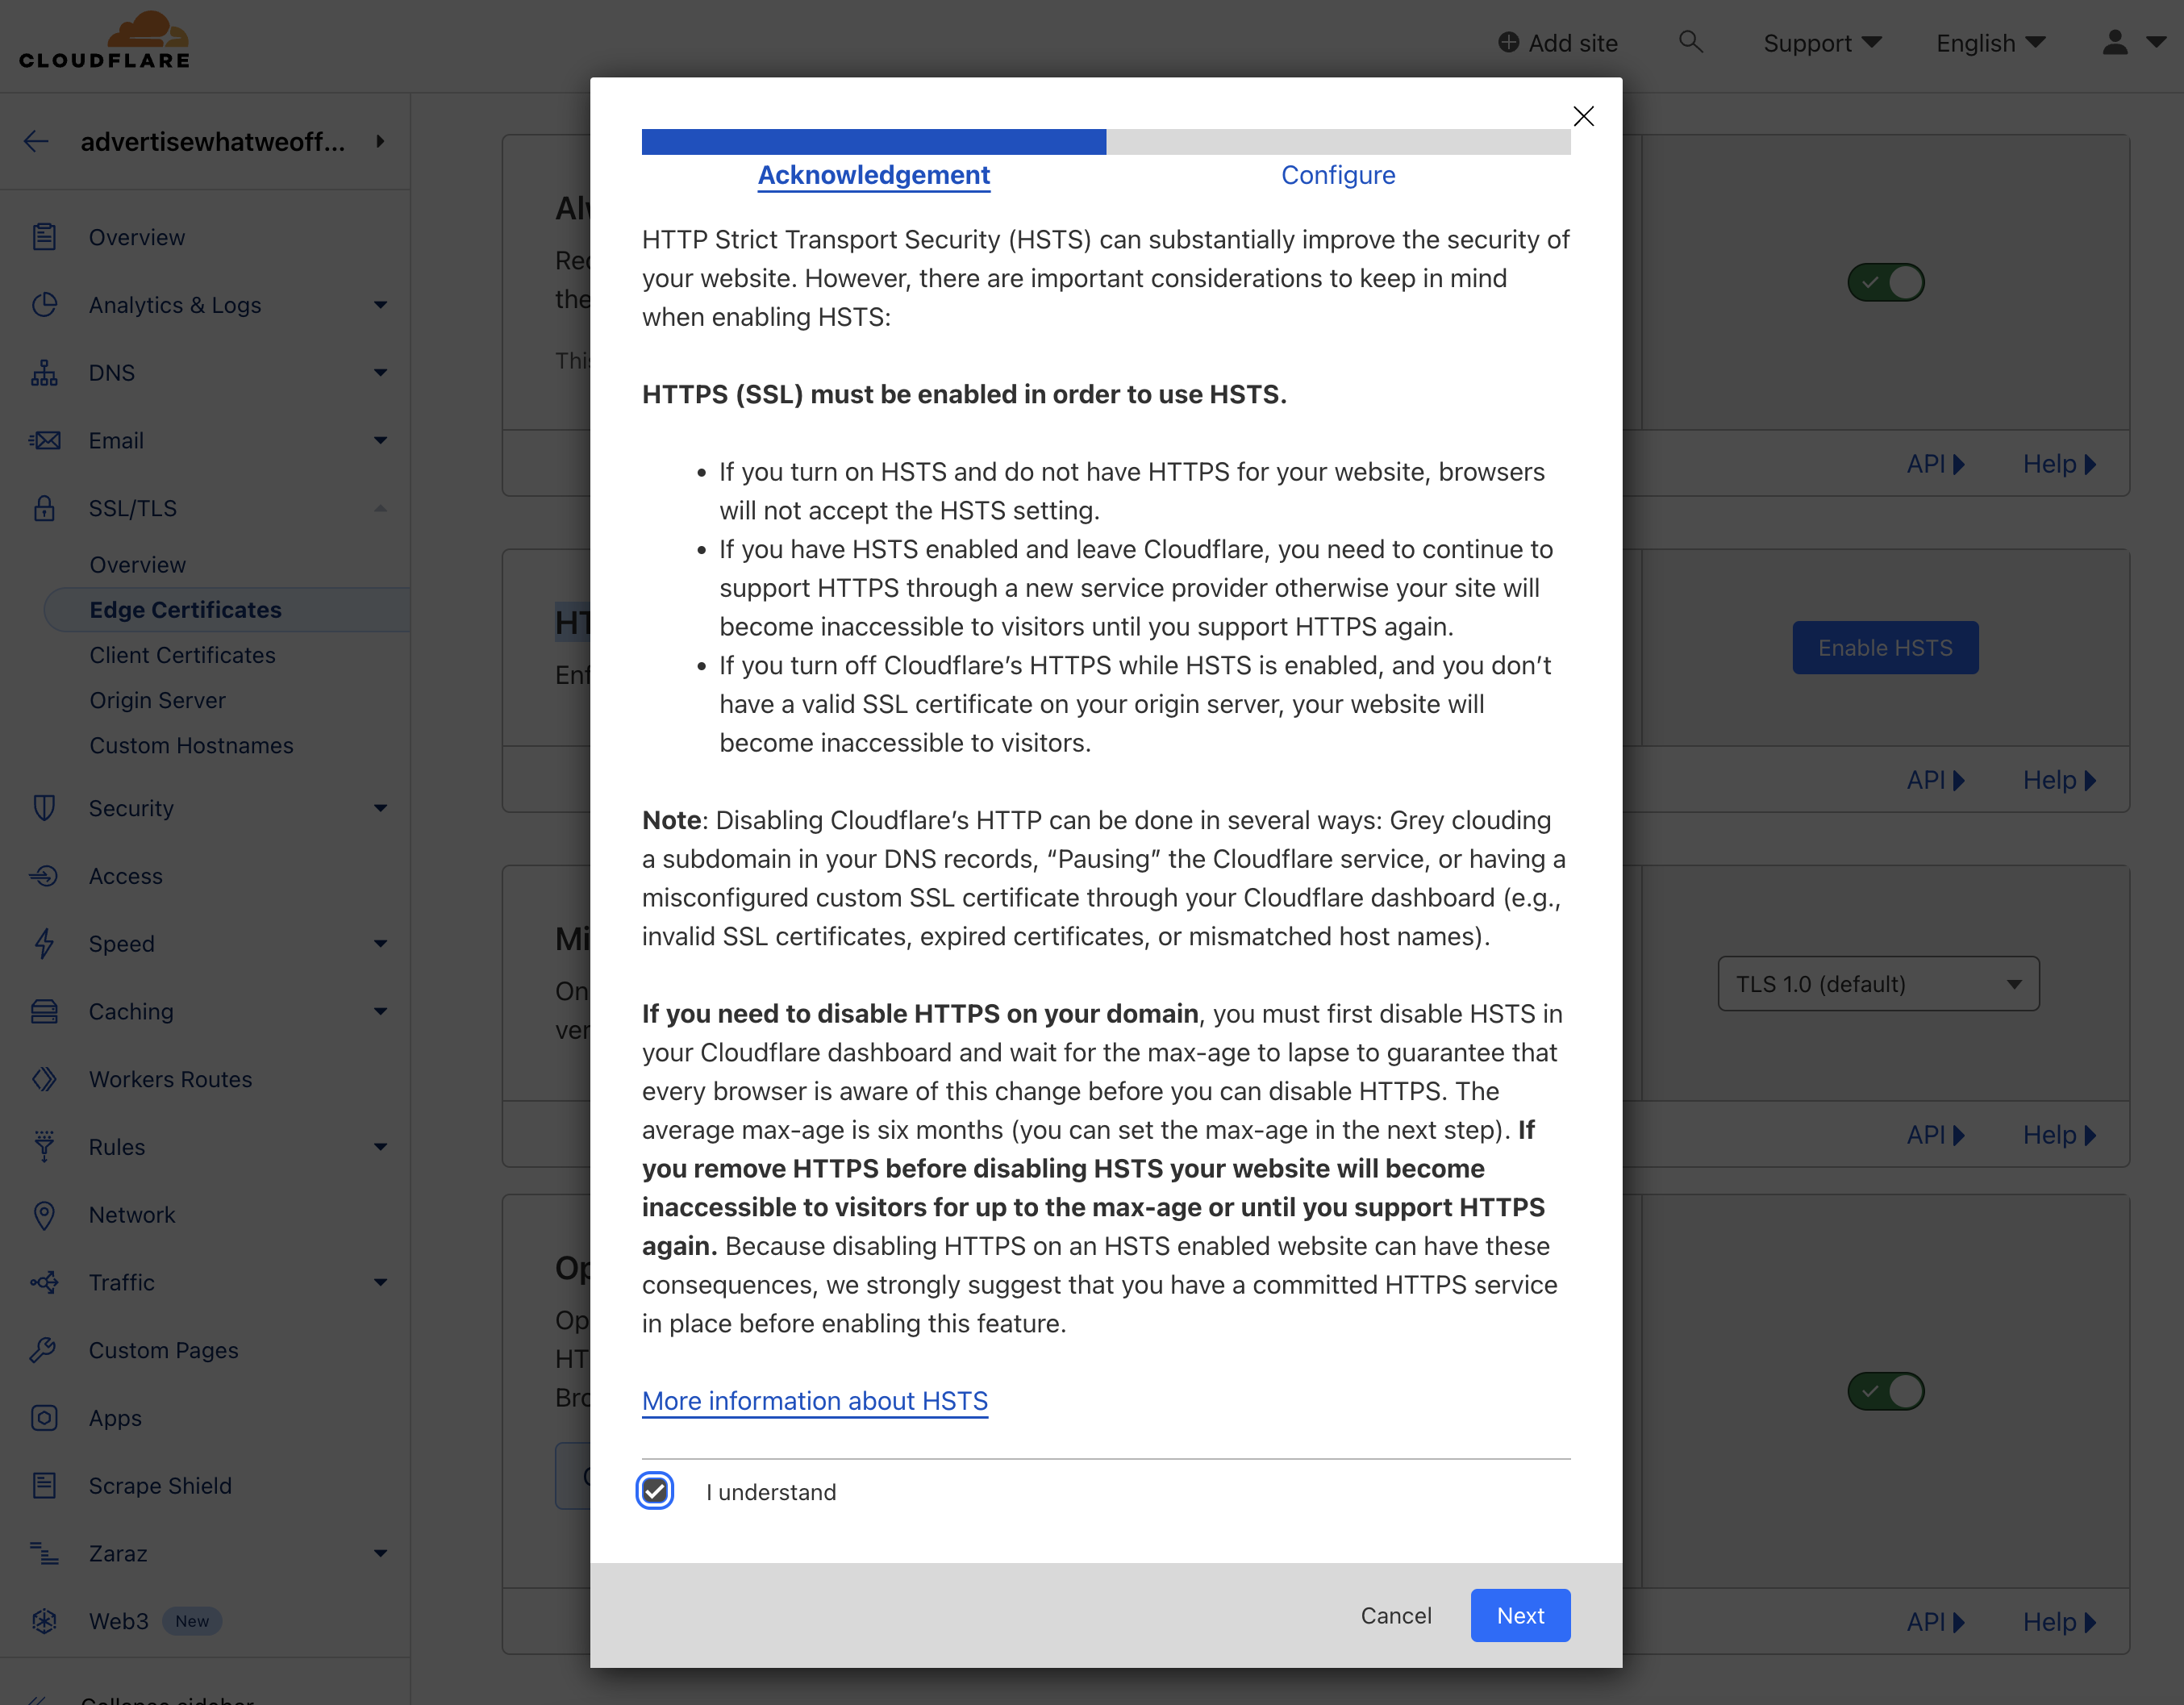
- Now switch to the HTTP Strict Transport Security (HSTS) and hit the Enable HSTS button.

- Cloudflare will display the Acknowledgement window. Go to the bottom of this window and activate the checkbox for I understand, then click the Next button.
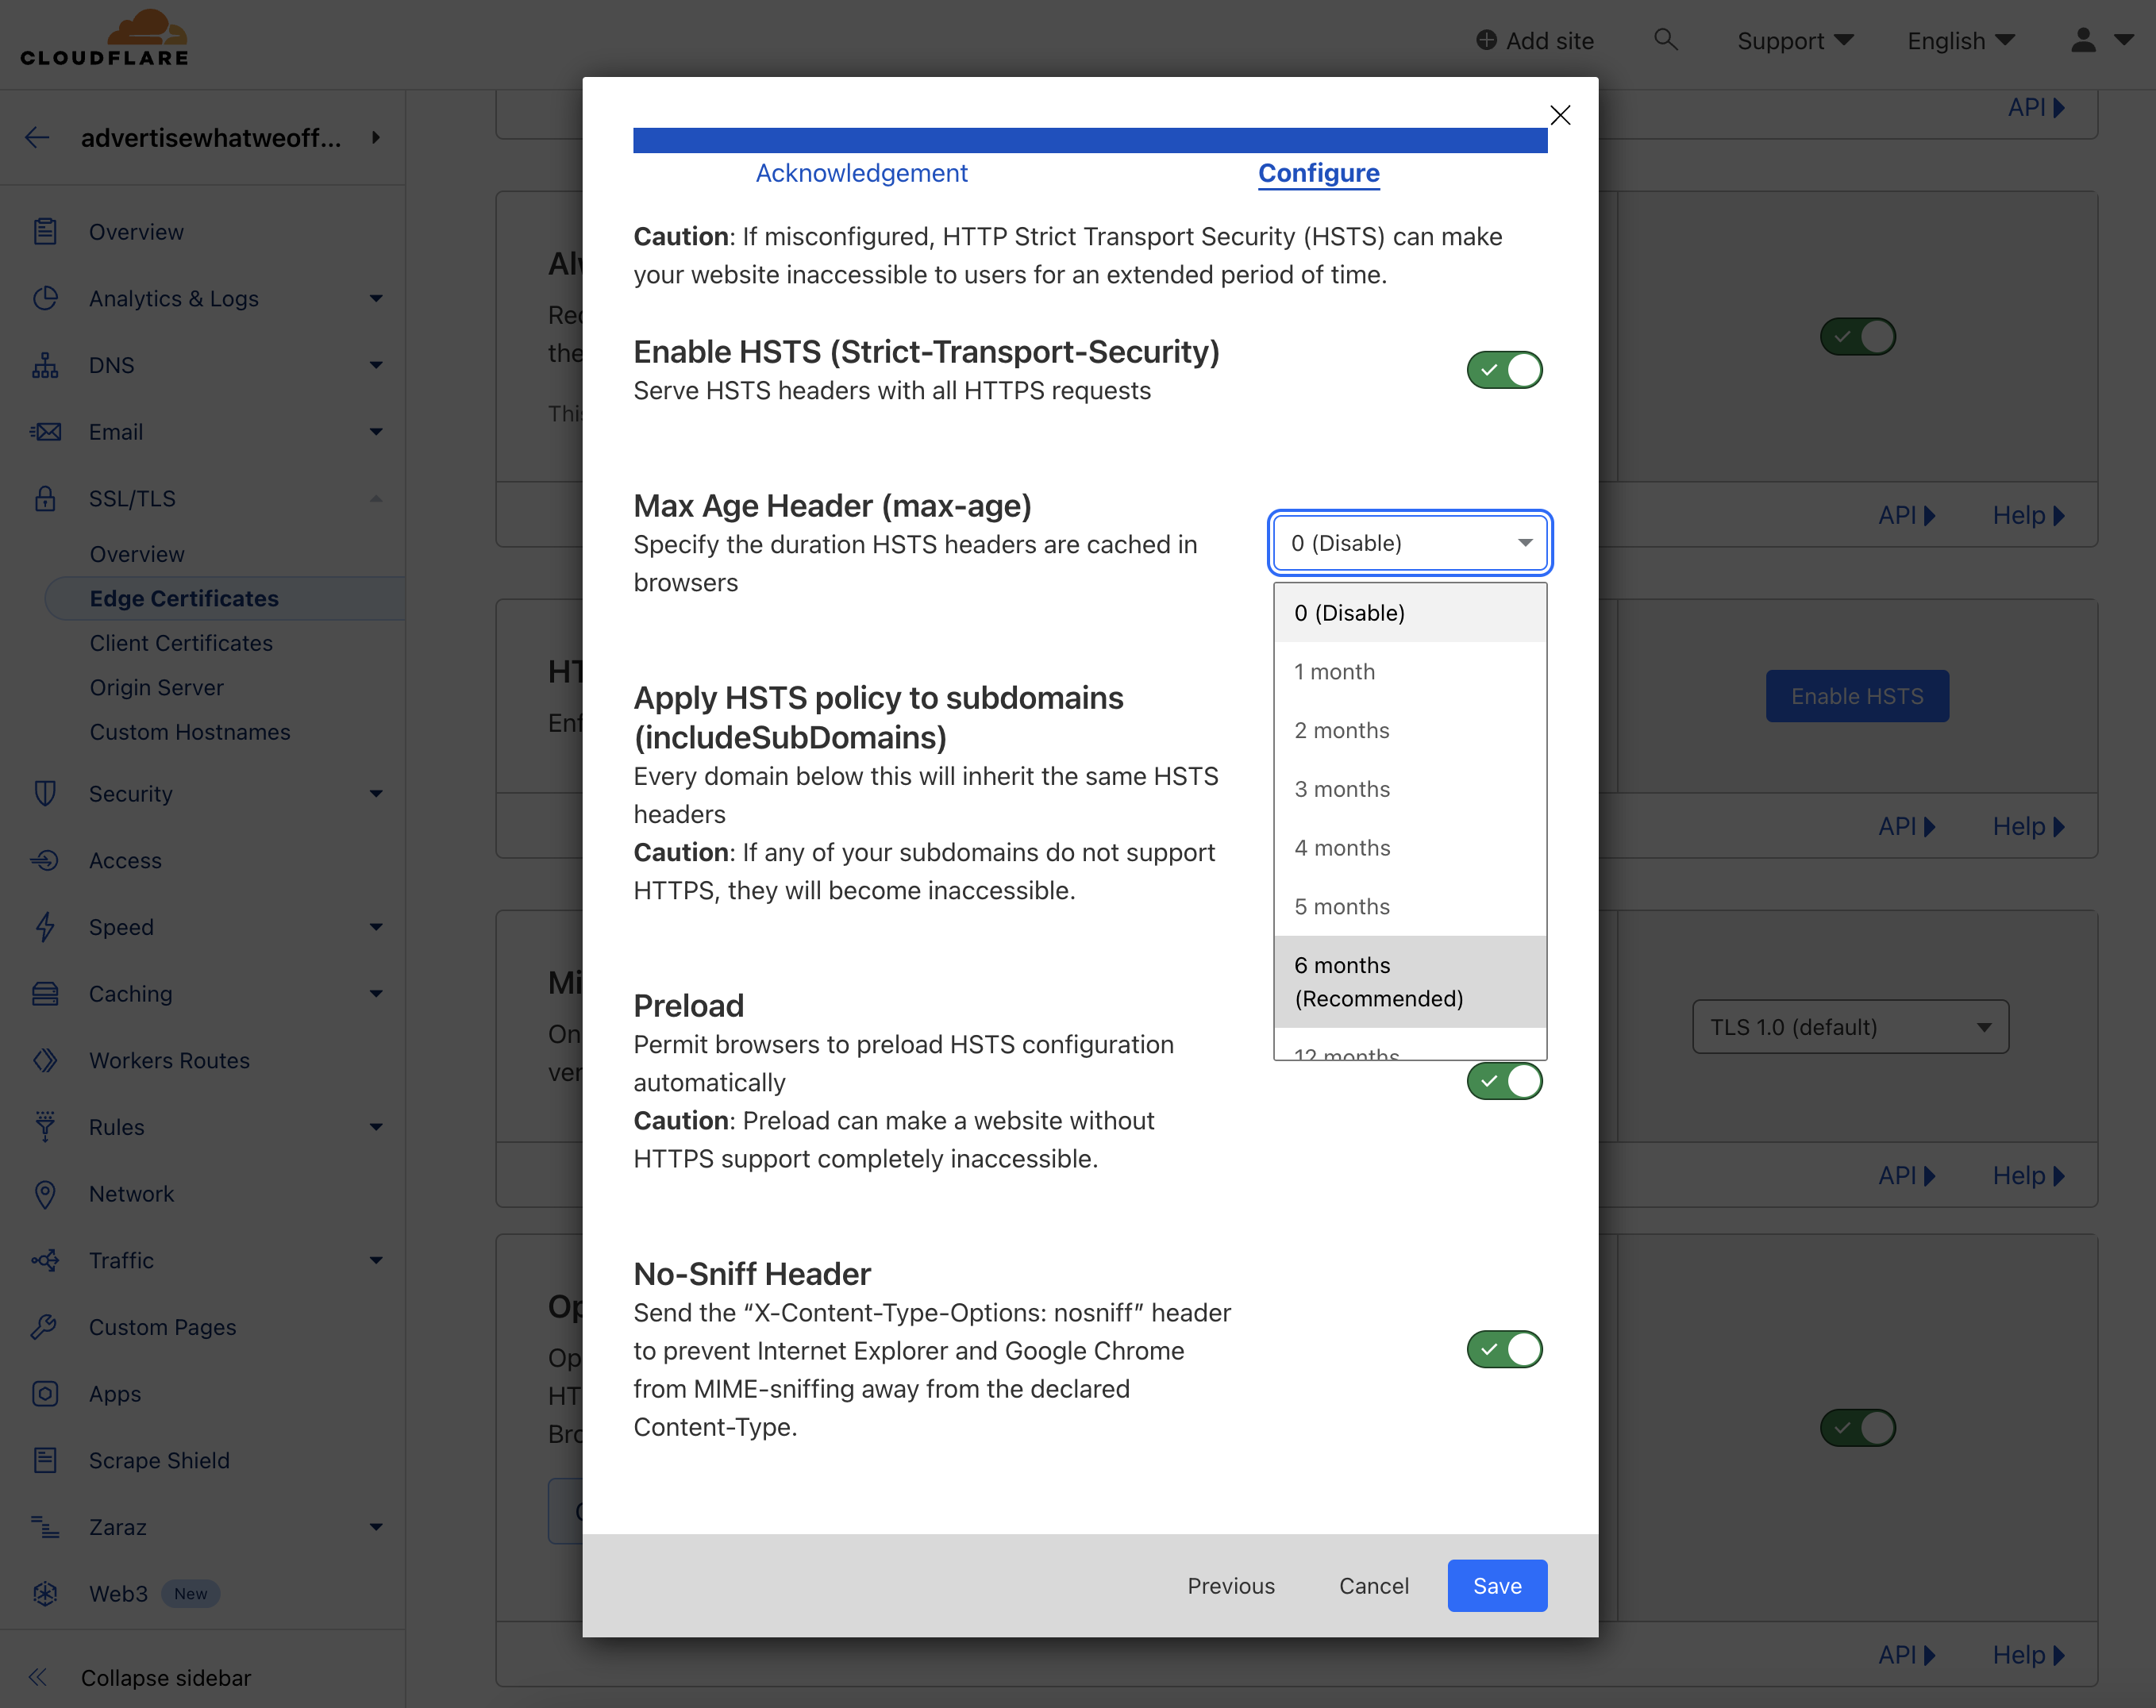
- Inside the Configure window switch on all options and set Max Age Header to 6 months. Don't forget to hit the Save button in the end.
Cloudflare Security
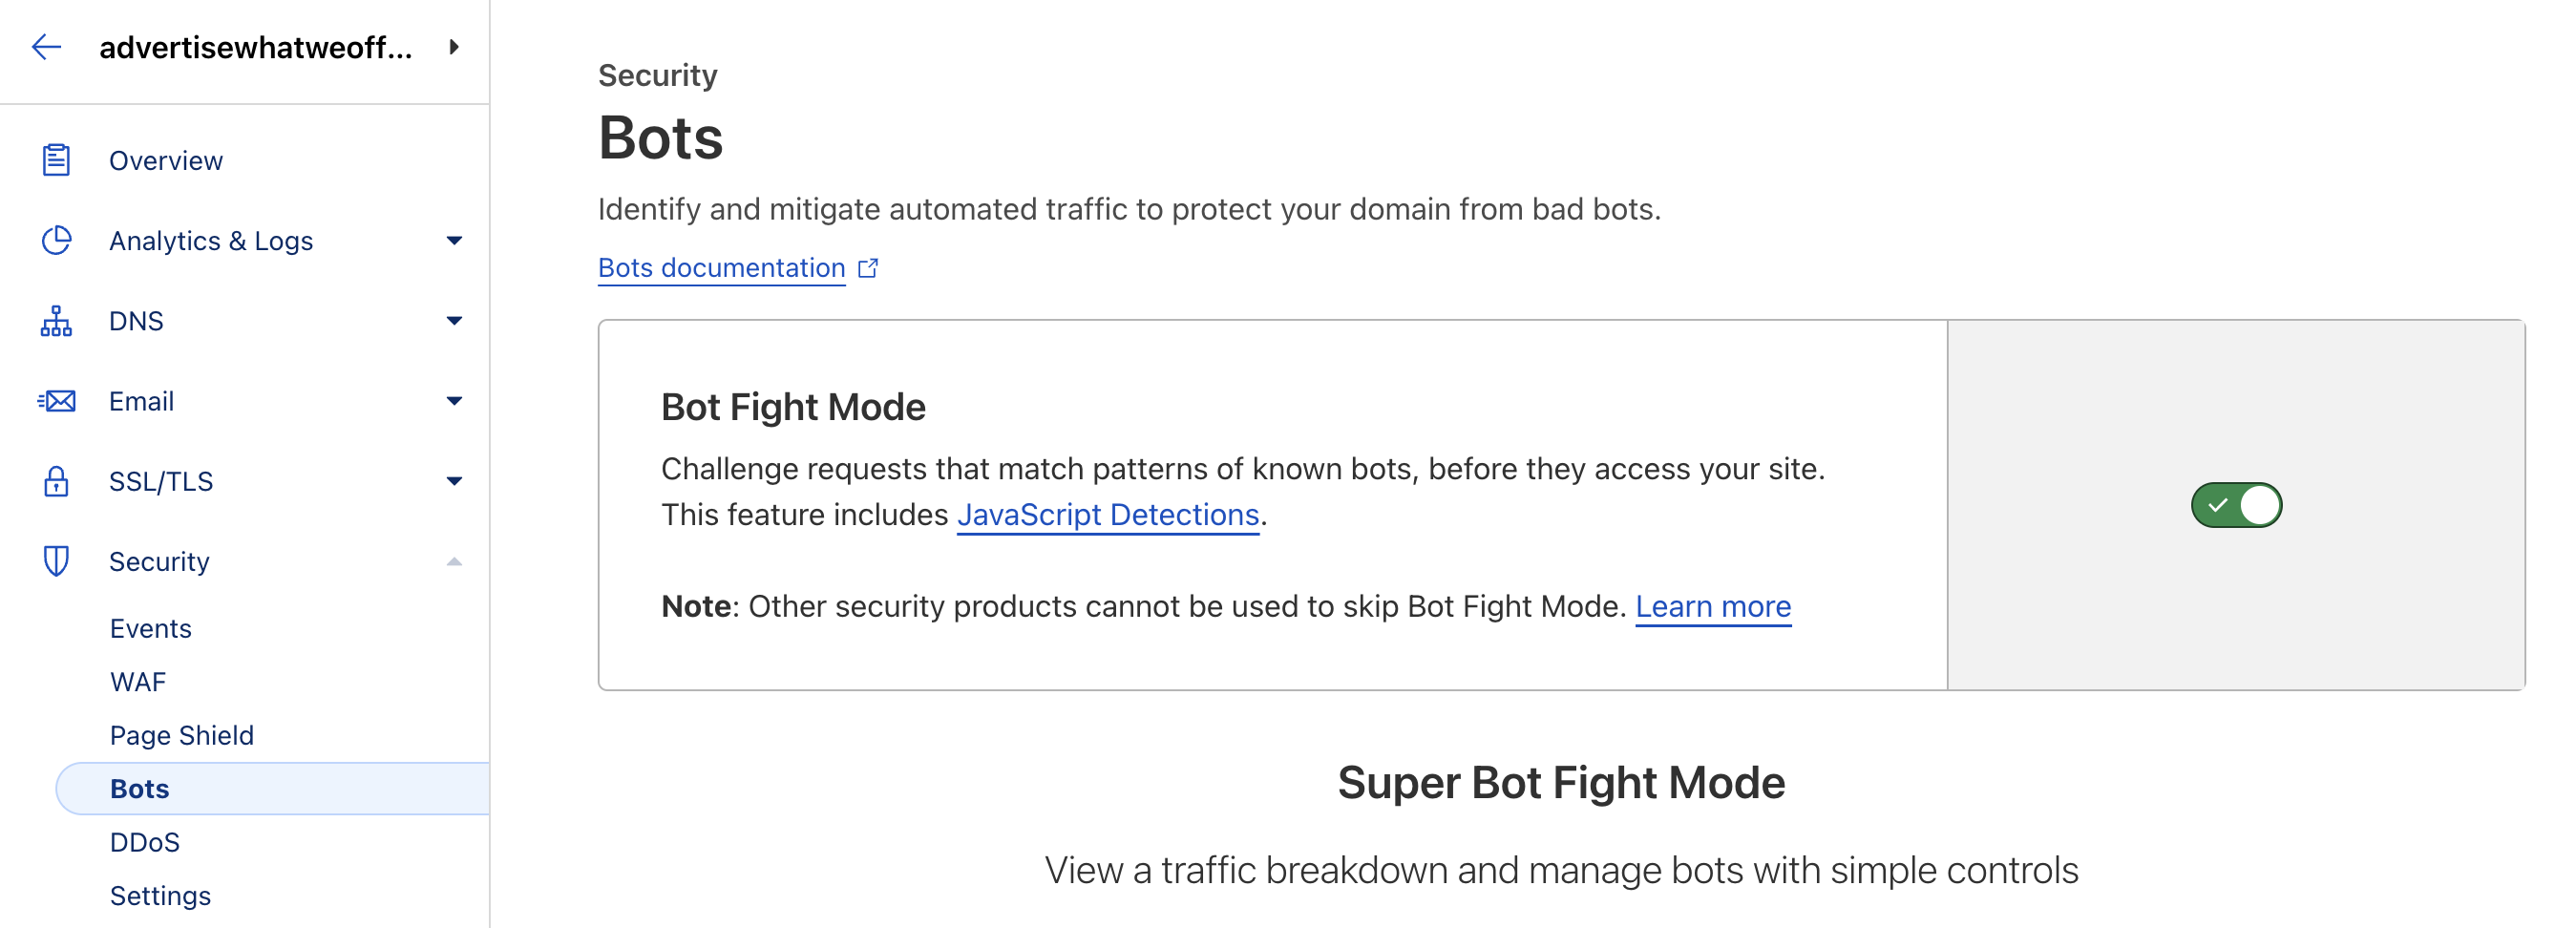
- Back to the navigation menu, go to Security > Bots and turn on the Bot Fight Mode. This mechanism will challenge requests that match patterns of known bots, before they access your site.
Cloudflare Caching
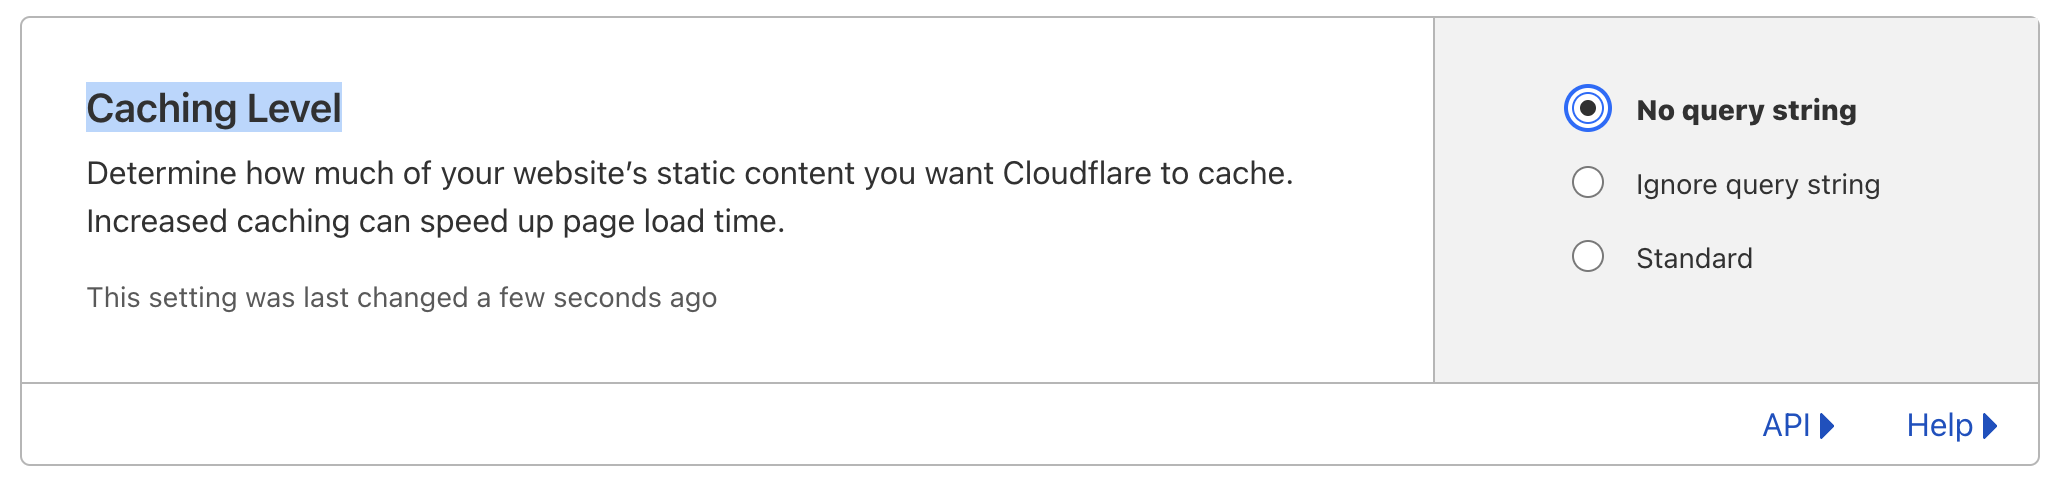
- Navigate to Caching > Configuration. Inside the Caching Level box switch from Standard to No query string. This feature will allow your server to deliver most updated content for your website, so that each time you make a design or content update it will be instantly made available for the public.
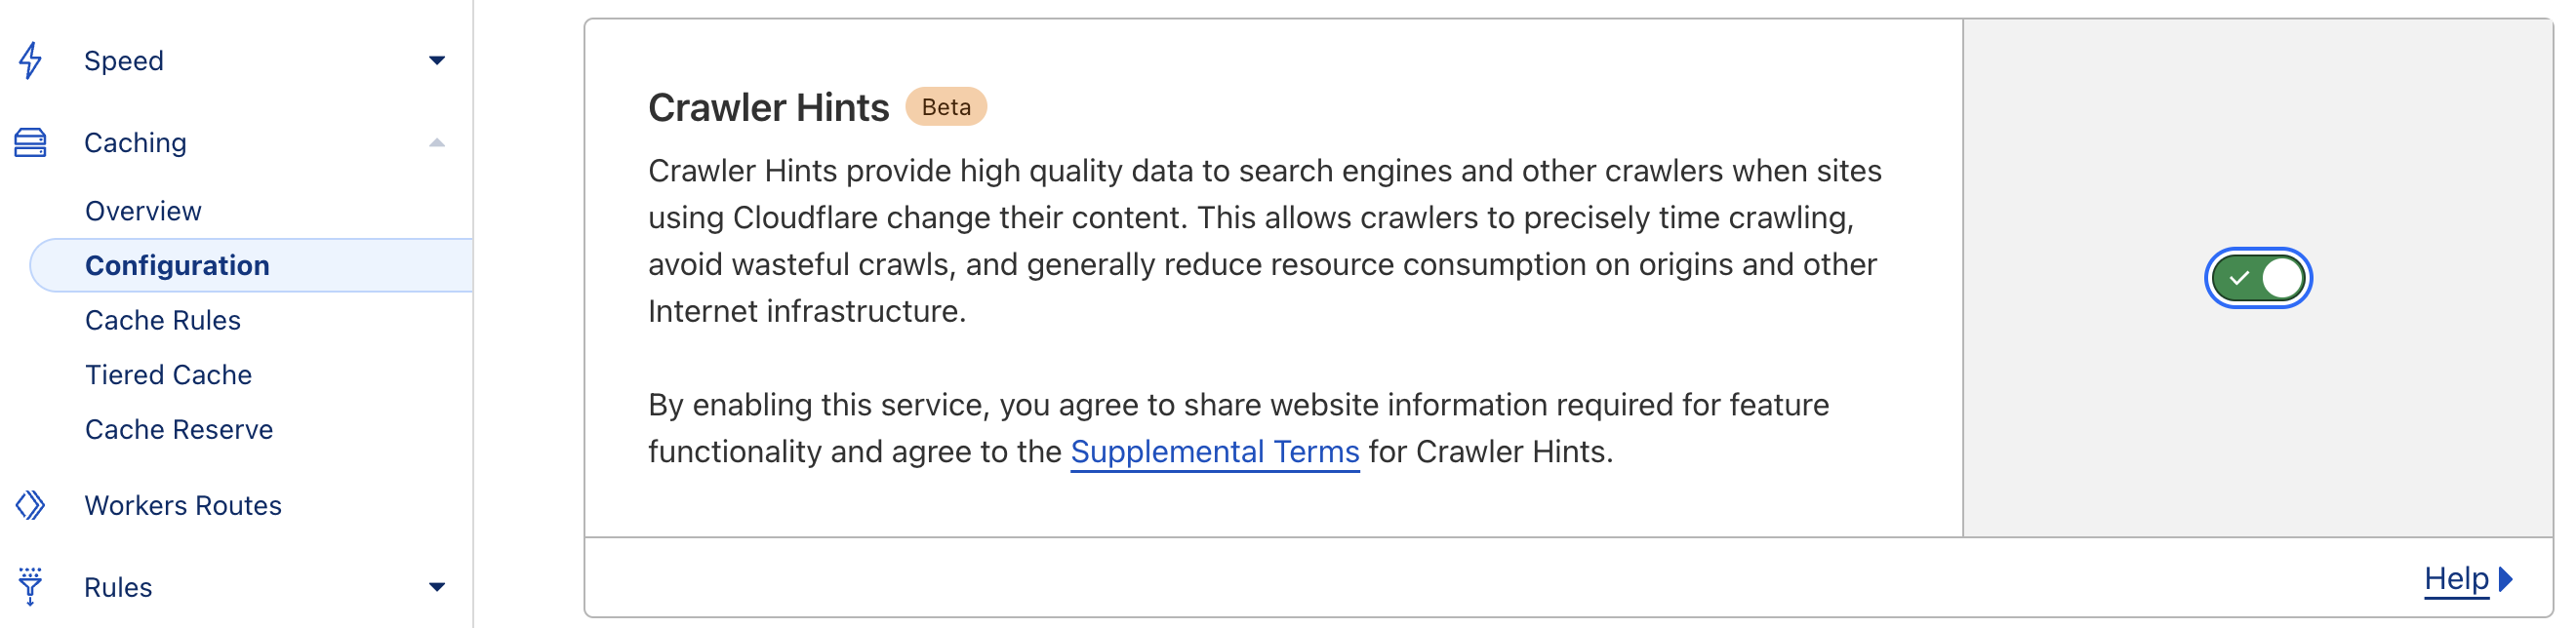
- Scroll down to the Crawler Hints box and switch on. Crawler Hints provide high quality data to search engines and other crawlers when sites using Cloudflare change their content. This allows crawlers to precisely time crawling, avoid wasteful crawls, and generally reduce resource consumption on origins and other Internet infrastructure.
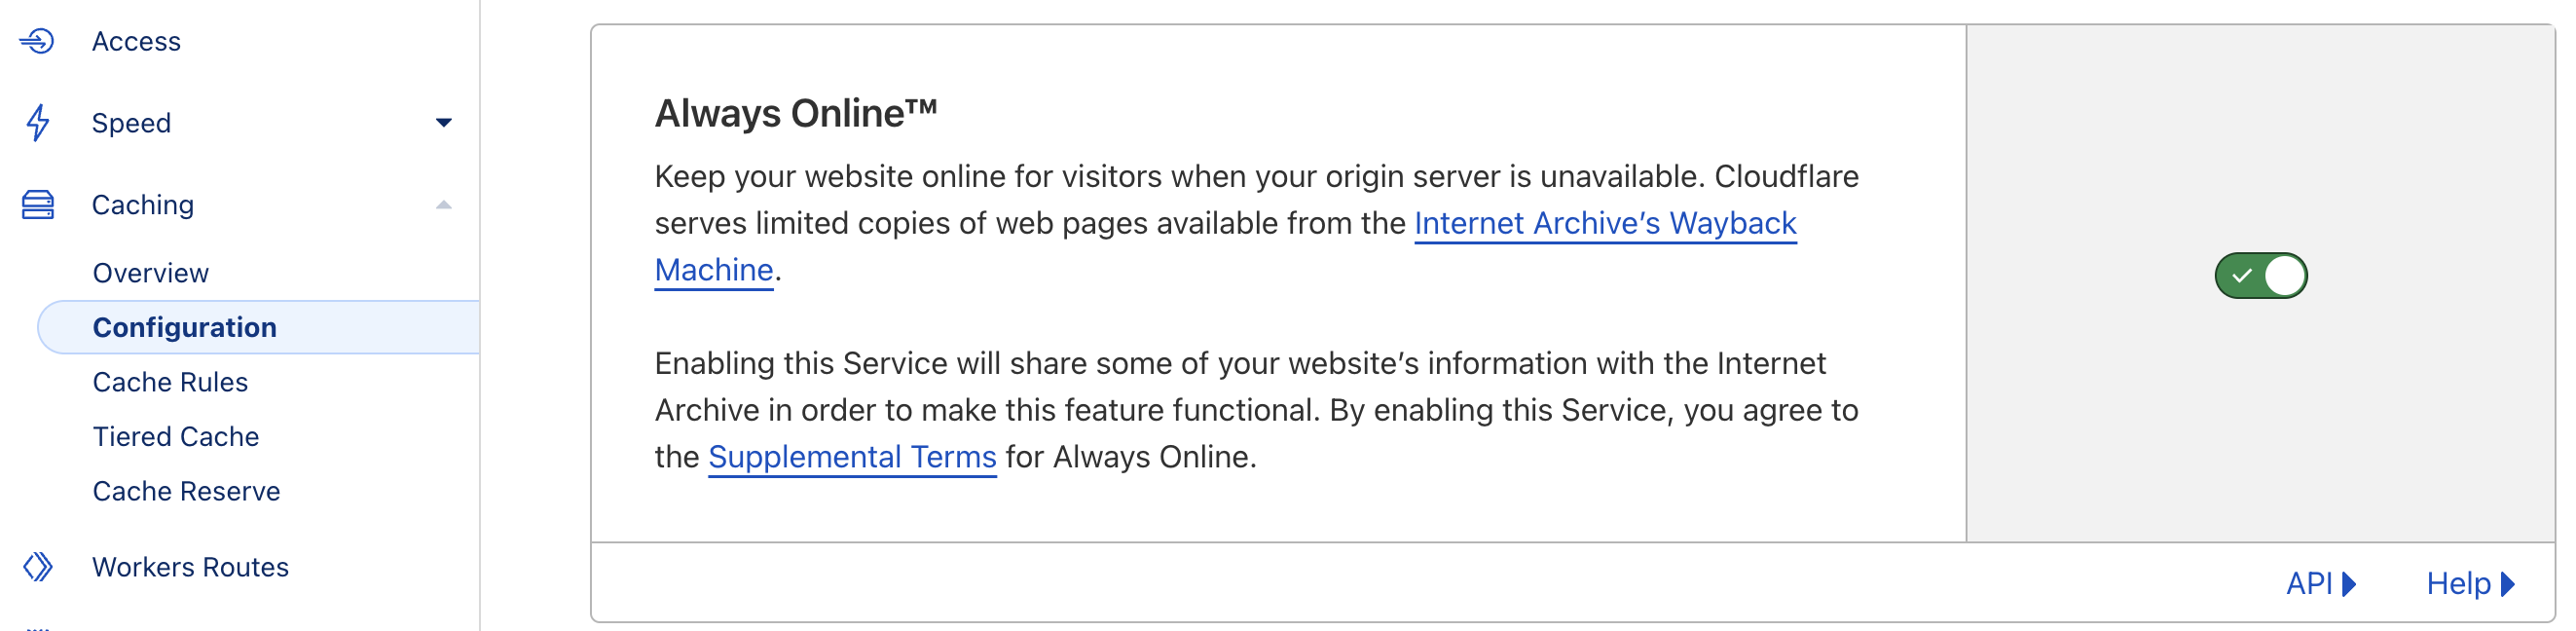
- Go to the Always Online™ box and switch it on as well. This features will keep your website online for visitors when your origin server is unavailable. Cloudflare serves limited copies of web pages available from the Internet Archive’s Wayback Machine.
Cloudflare DNS Settings
- Last thing to do, using the navigation menu go to DNS > Settings. Inside the DNSSEC box click the Enable DNSSEC button.
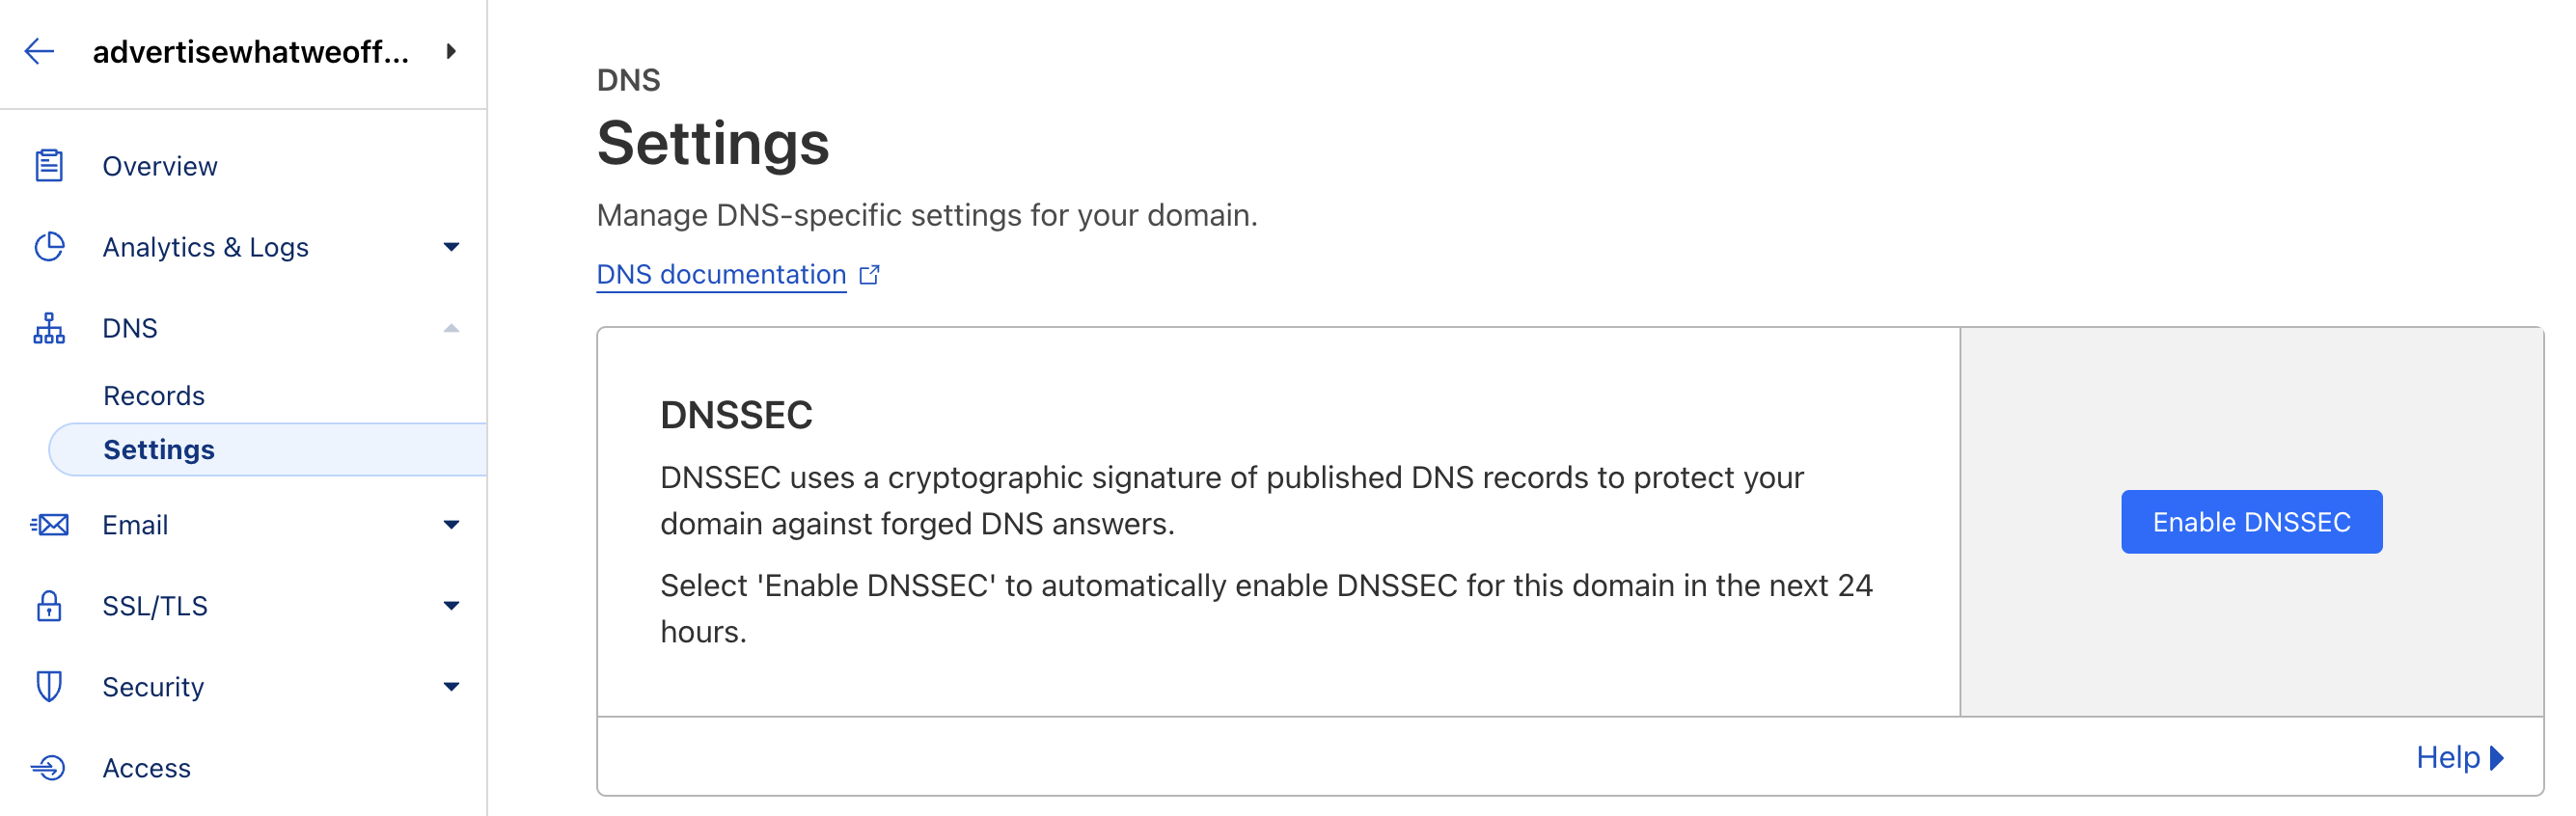
- DNSSEC uses a cryptographic signature of published DNS records to protect your domain against forged DNS answers. Wait for at least half an hour for the Cloudflare system to complete the process. At the current moment the system will display inside the box the following message: DNSSEC is pending while we automatically add the DS record on your domain.
- Once the process is finished you'll see an updated status for this service with the following message: Success! advertisewhatweoffer.com is protected with DNSSEC. Notice that in your case the message will contain your domain name.

Finishing all settings in this Chapter will guarantee the best Cyberpanel and Cloudflare Free Tier security and performance tweaks. Now you can safely proceed to the next Chapter for more things to learn about.